Pfiffner Traverse Trip Report
Background + Quick Stats
Trip Dates: 8/17-8/20, 8/23 2019
RMNP Campsite(s): North Inlet Junction
Gear List: LighterPack
About Me: I have been hiking in the Front Range since I was a kid, but really got serious in 2016. I have no real long distance hiking experience, but I do have some minimal experience in off-trail travel and route finding. I formerly worked for a conservation corps, building and maintaining trails in northern Colorado, so I am quite familiar with the weather patterns of the area and the gear required to have an enjoyable trip. On a really good day when I am alone and hiking on well-established trails, I can hike about 30 miles. If I am alone, feeling amazing, and at least 50% of my day is off-trail, I think I top out closer to 20 miles. I'm not as good at estimating my vertical gain/loss limit, I suspect that I can do a few consecutive days with 5k-6k vertical gain. In planning this trip, I set out to complete the route in 5 days, which ended up being dead on despite a brief detour due to weather concerns.
A Note About Mileage & Vertical Gain/Loss Estimations: The mileage and vertical gain/loss reports are estimations based on my SPOT tracking data, exported to Caltopo and split into daily mileage. I think that the vertical gain/loss is fairly accurate, but given the intermittant nature of my SPOT track, the mileages may be a bit off. If anything, I think that the mileages may be an underestimation, but maybe that's because they were really hard miles. I did not record a SPOT track on my last day, so both mileage and vertical gain/loss for this day were estimated using Caltopo. Please forgive me for not having 100% accurate measurements, I did the best I could.
Estimated Total Mileage: 73-83 miles
Estimated Total Vertical Gain: 25,596 ft
Estimated Total Vertical Loss: 26,970 ft
Special Thanks:
- Andrew Skurka - for creating the guide and mapset, both were very helpful
- My Parents - for dropping me off at Milner Pass at 5am on the first day and for picking me up when I needed to bail on day four
- Travis Briles - for writing excellent, very detailed trip reports on the PT and giving me feedback on my gear selections
Day 1 - Milner Pass to North Inlet Junction
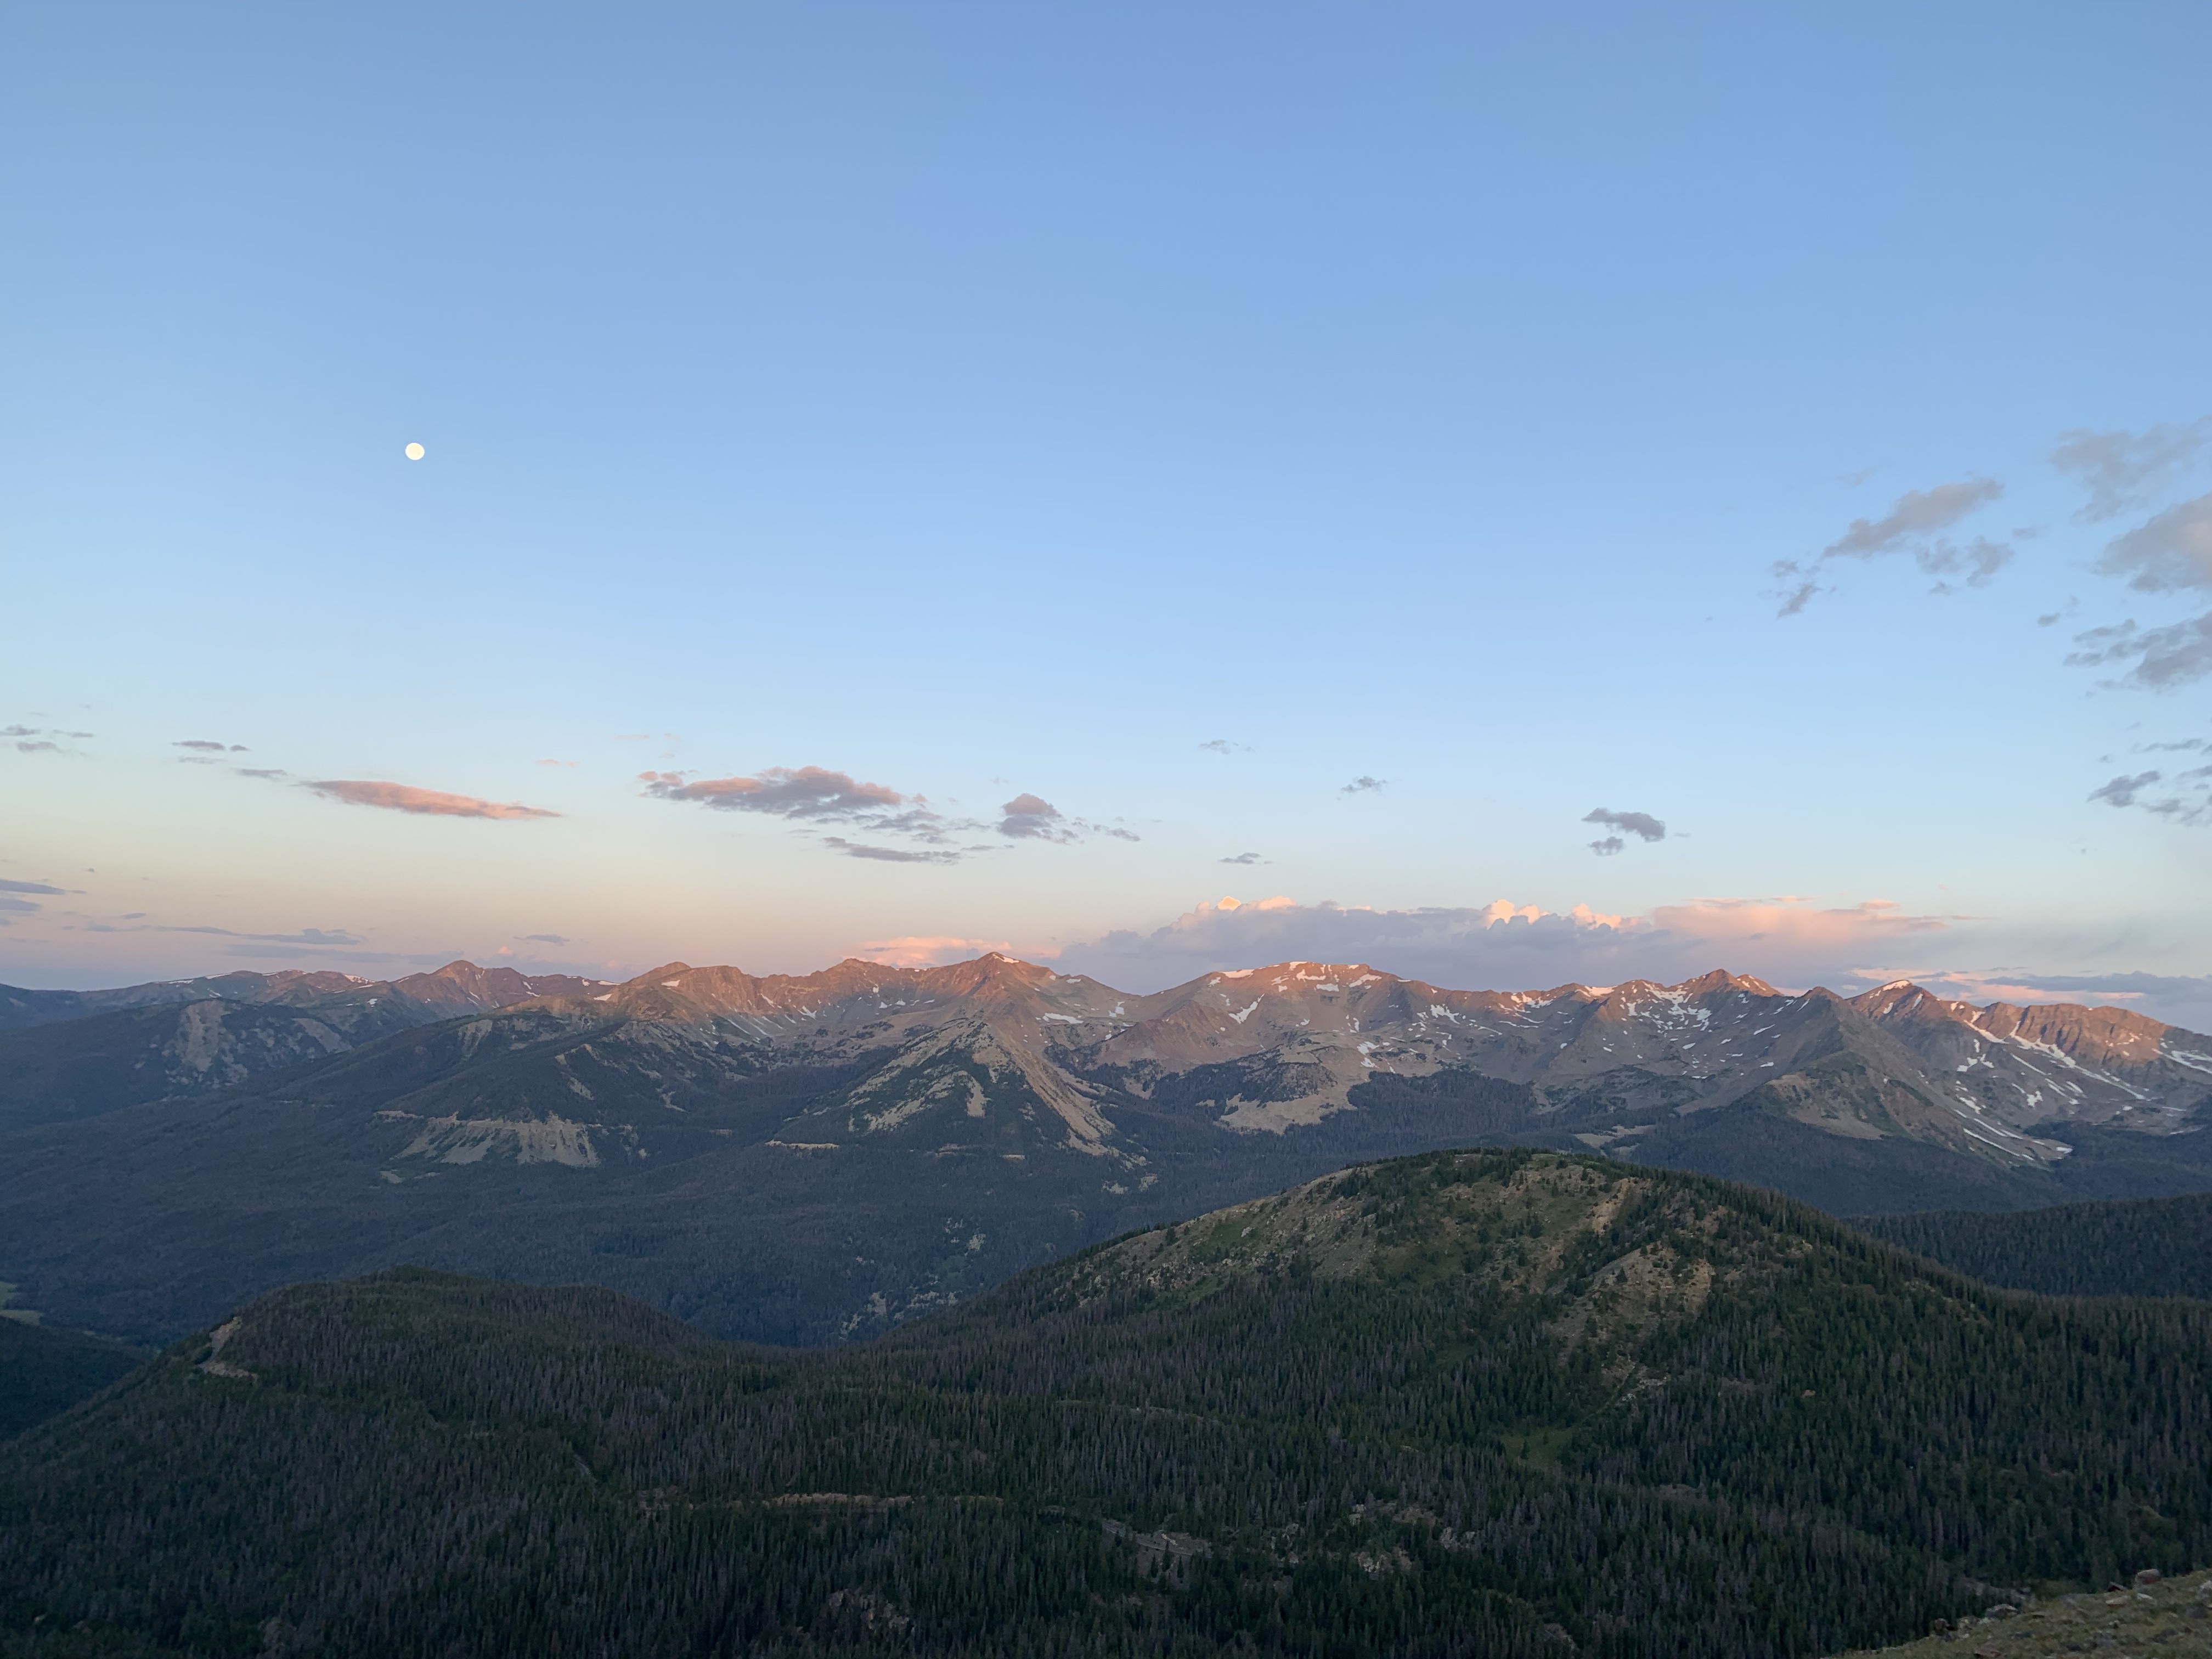
Sunrise to the north of the Mount Ida Trail
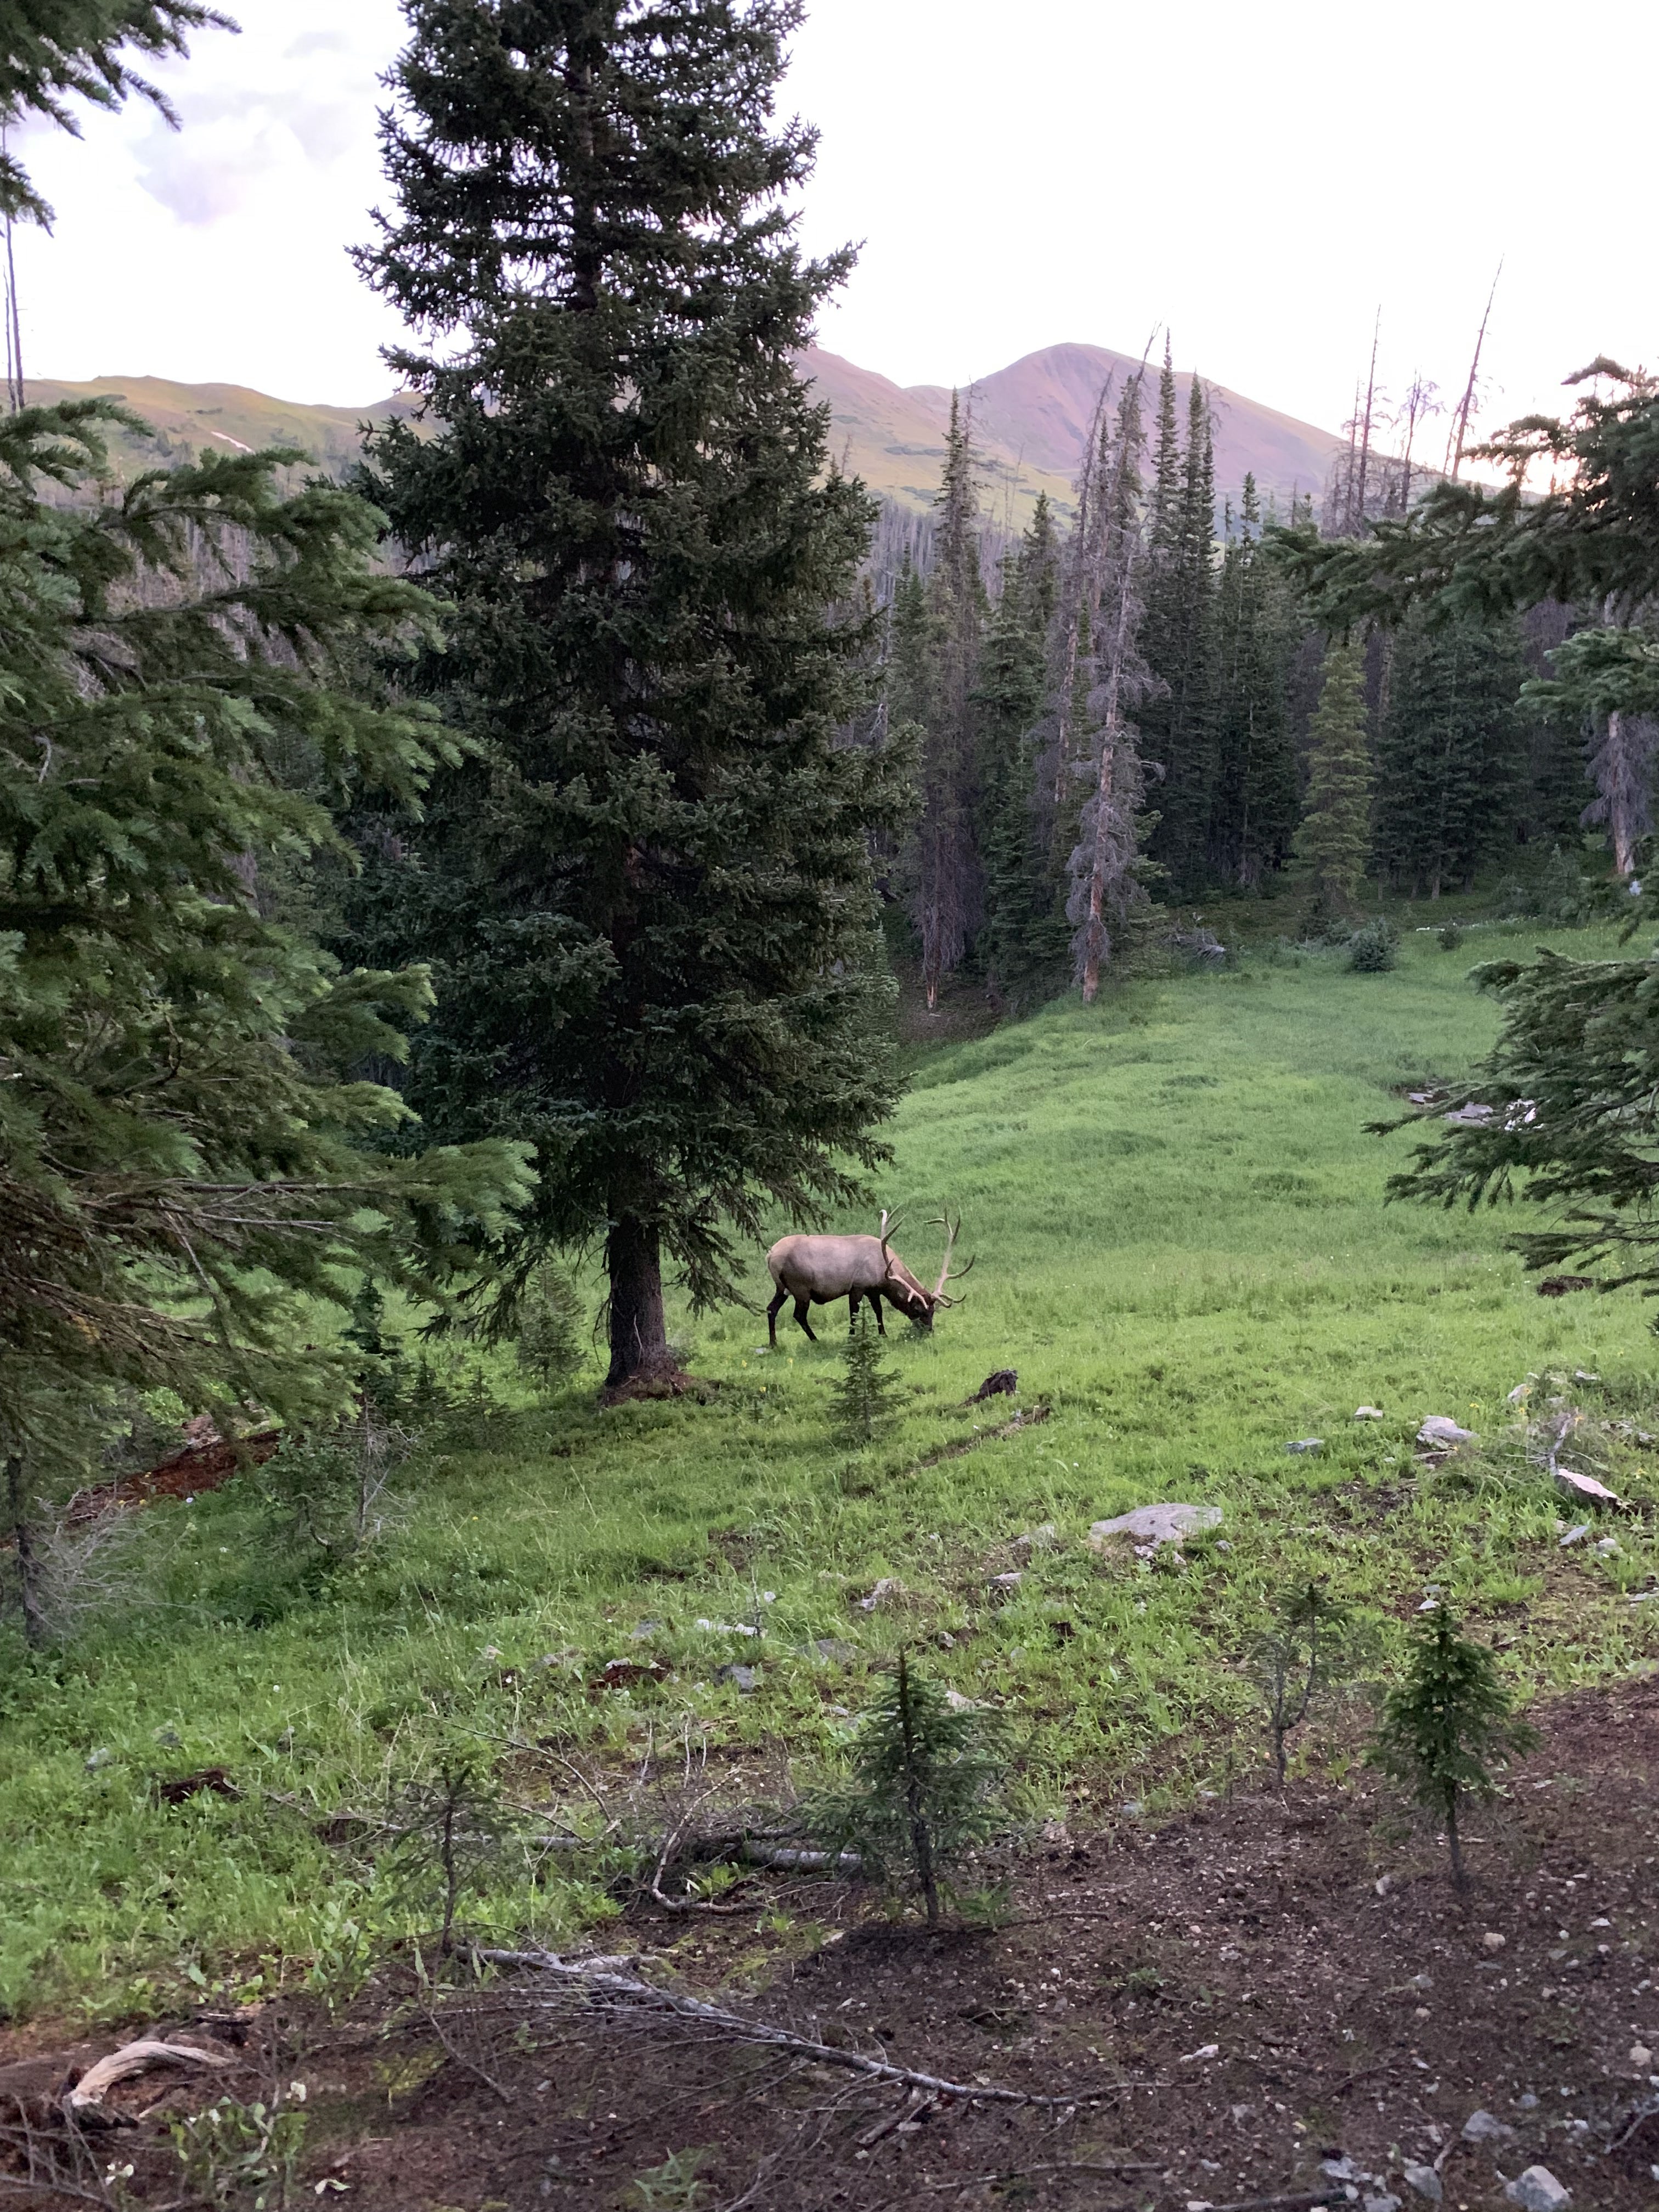
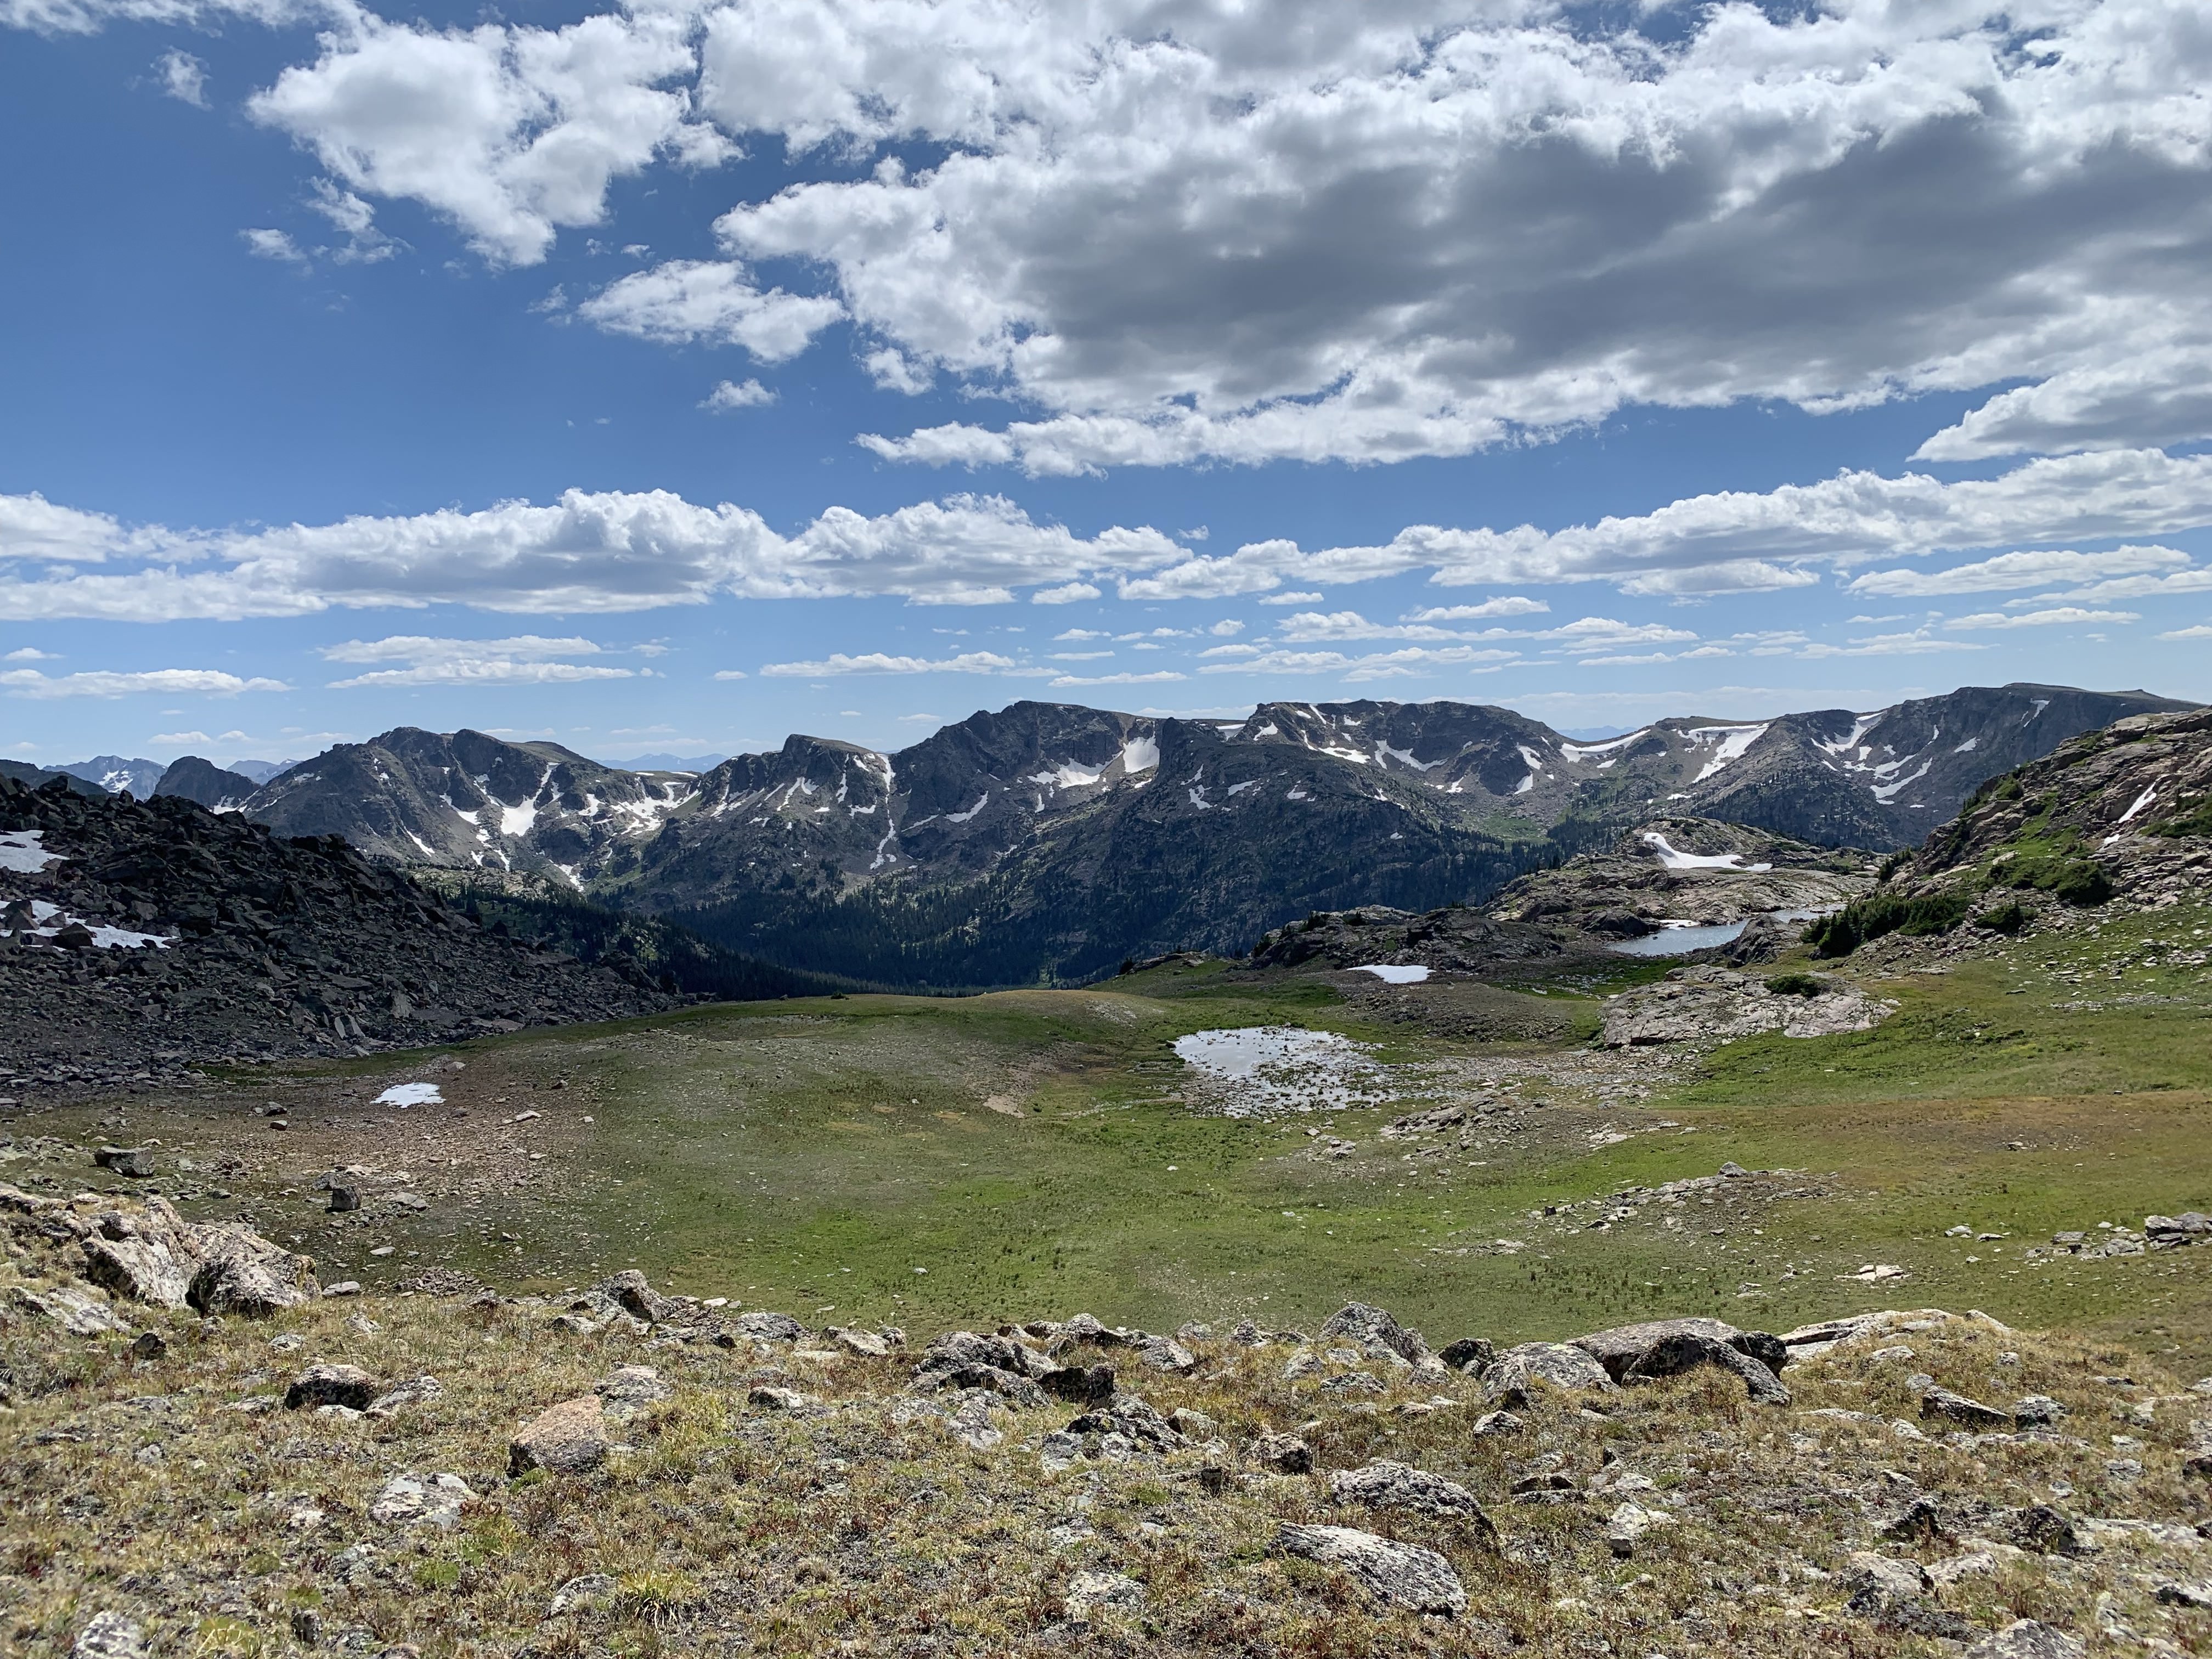
I started the Pfiffner Traverse (PT) at Milner Pass on 8/17/2019. I knew it would be a huge adventure when less than 10 minutes into the hike I encountered a large bull elk directly on the trail, with a second bull 15-20 feet away. It was the closest I’ve ever been to a creature that powerful. I stood on the trail quietly watching the Elk graze for 10-15 minutes before deciding to skirt up and around them in an upper meadow. Epic start. I had a fairly large amount of mileage to cover on this first day, so I had started quite early in order to avoid any afternoon thunderstorms. The section from Mt. Ida’s summit to Haynach Pass was awesome, I loved the challenge and solitude of this introductory section. I had originally planned to take the Sprague Pass alternate and stay high all the way to Bighorn Flats to try and make better time, but looking down towards Haynach Pass I made the snap decision to dip down into the valley. Overall, I’m really happy with this decision: it provided a welcome change of scenery and introduced me to a new favorite region of Rocky.
Heading up the Mount Ida Trail. A dramatic and quick introduction to the alpine.
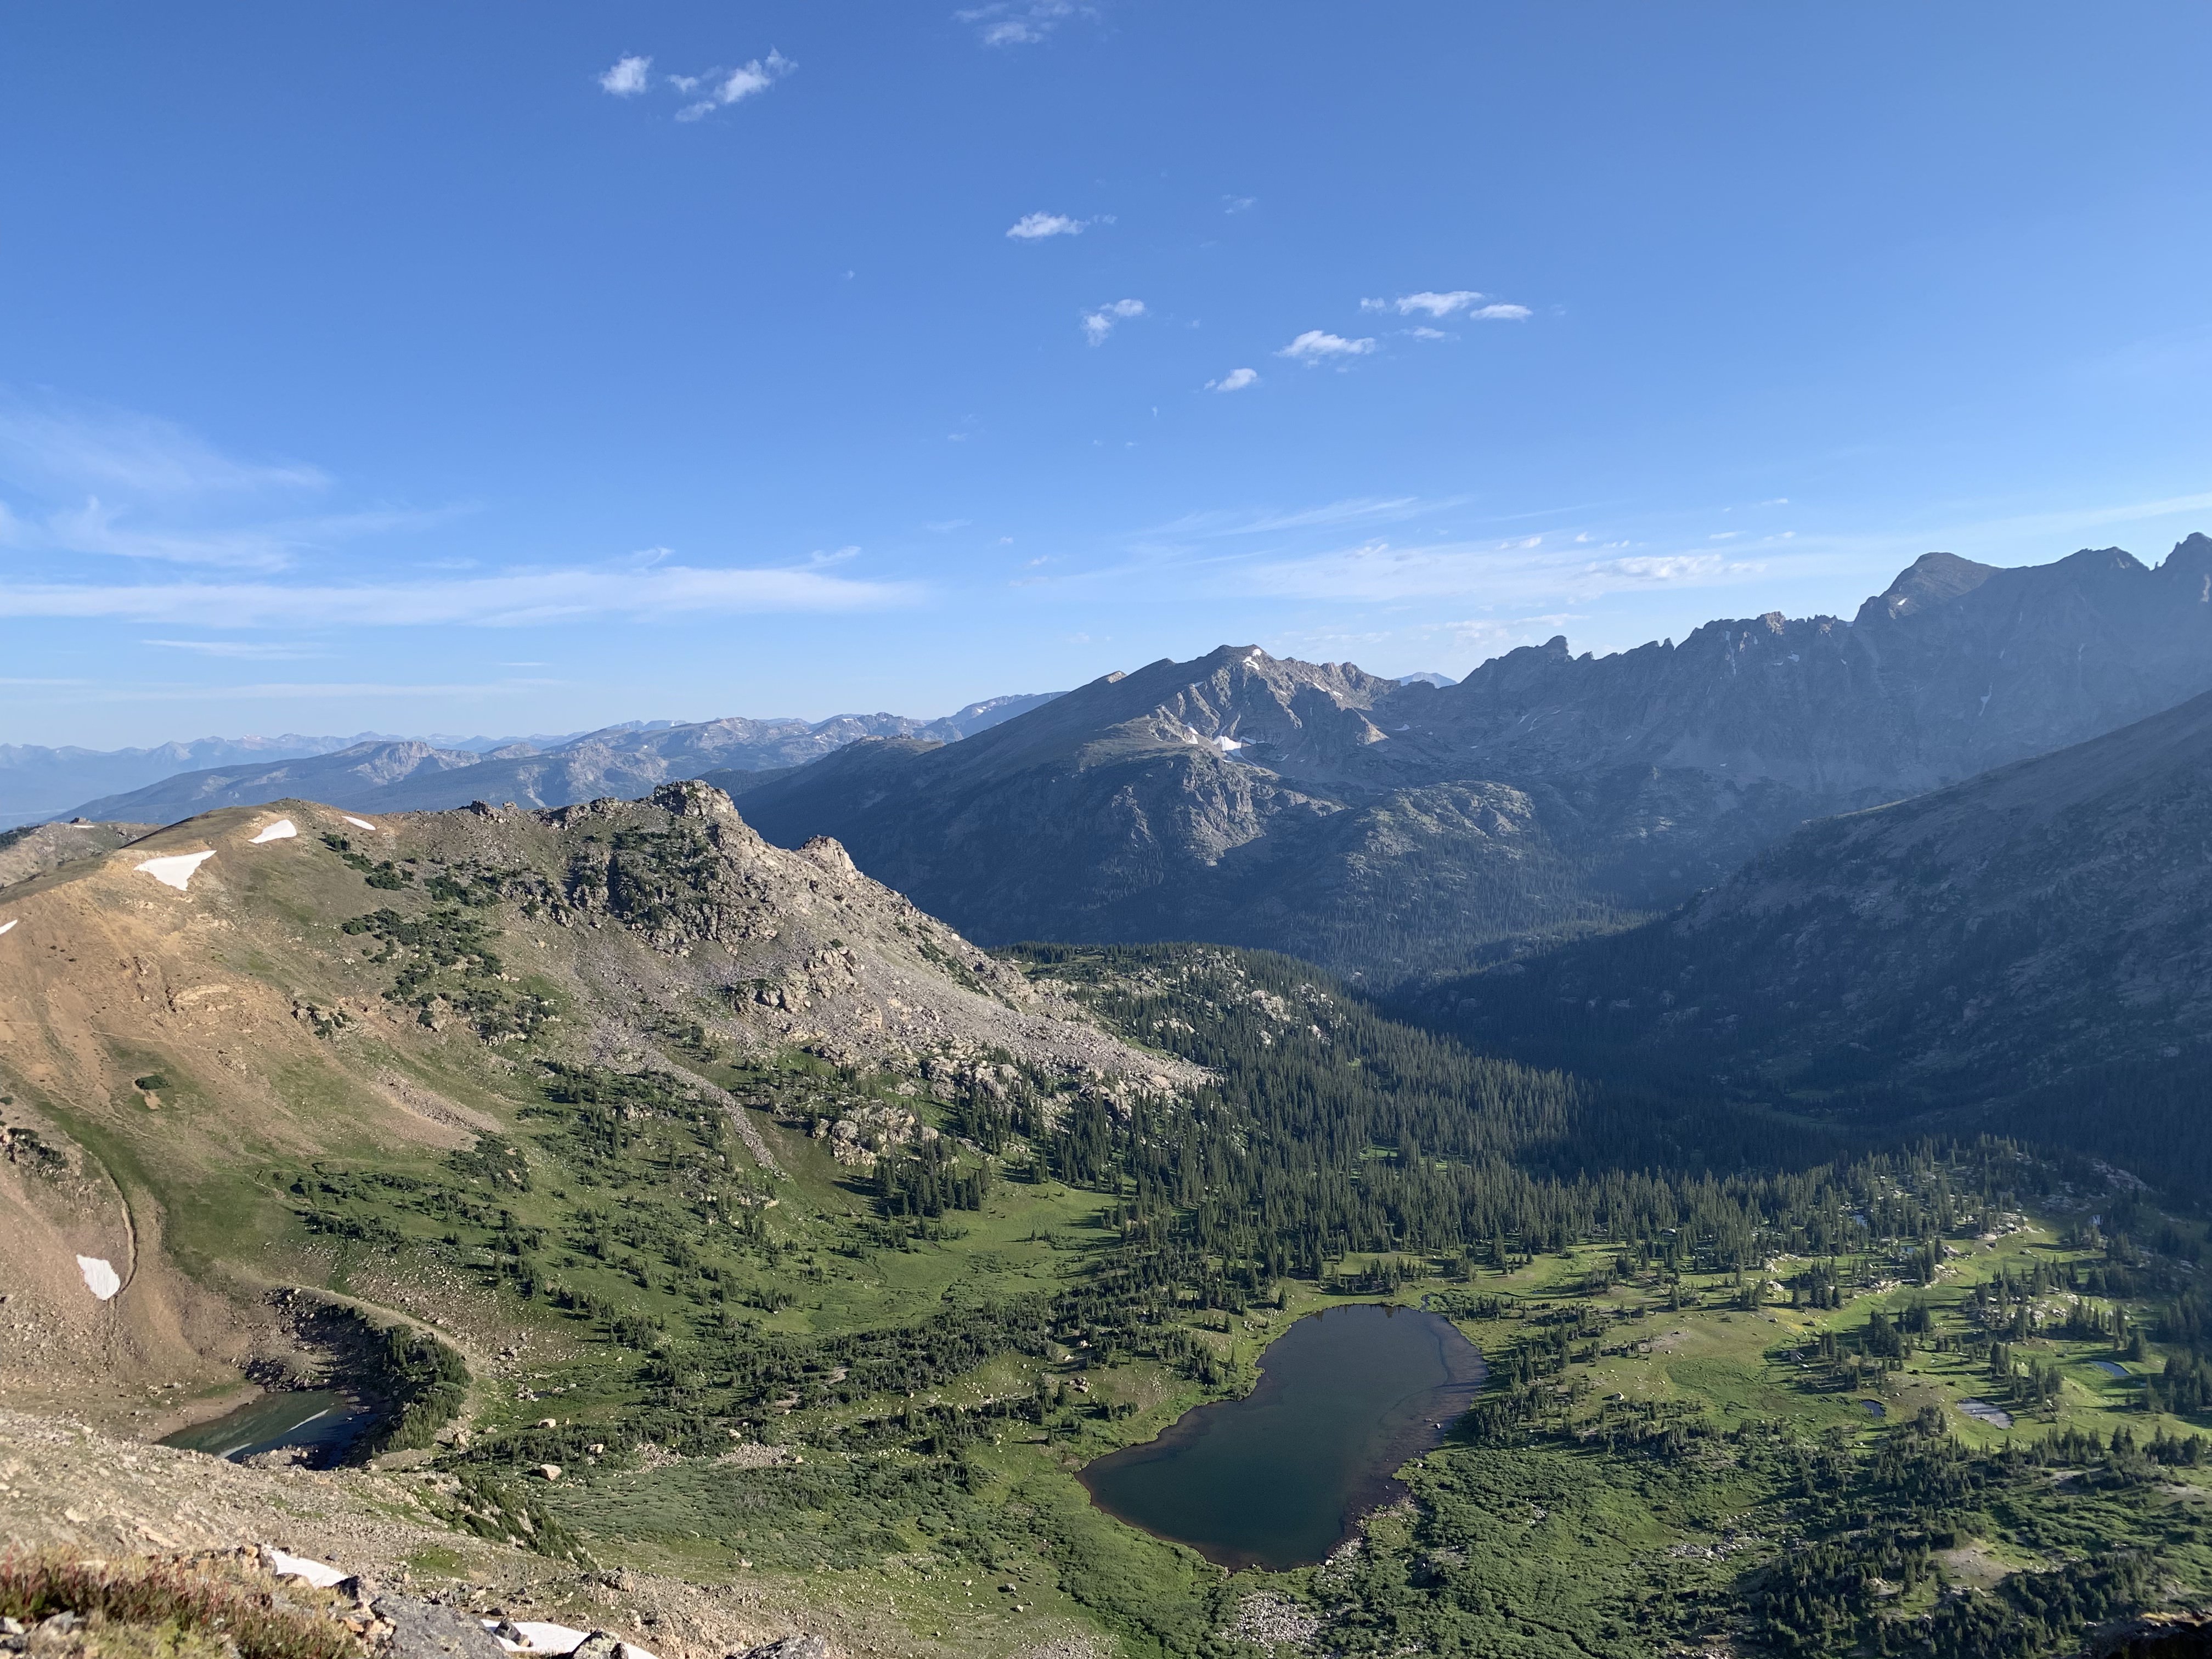
Looking down towards Haynach Pass
From Haynach Pass, looking towards Haynach Lakes. Longs Peak on the left.
I reached the CDT junction early in the morning, maybe around 9 or 10. I wasn’t too concerned about the weather, seeing no real signs of thunderstorms rolling in. Regardless of this, I made haste on this all-trail section and it surely paid off. Going up to Bighorn Flats is a commitment: you will be exposed for an extended period of time with no convienient bailout options. The hiking is quick and simple, and I was fortunate to see two large herds of Elk. Around the approach to Hallett Peak the weather began to deteriorate quickly. Clouds started to roll in, and thunderclaps rung through the air as I began descending into North Inlet. Thunder and lightning increased gradually, creating huge echoing booms through the canyon walls leading down towards North Inlet, and I eventually broke out into an all out sprint down the trail in an effort to get below treeline and to safety. After getting below treeline and enduring hail and rain and loud thunderclaps, I felt a huge sense of relief. This whole process of trying to outrun a thunderstorm was very mentally and emotionally taxing.
On bighorn flats, with the thunderstorm rolling in.
In retrospect, this was a very unsafe situation to be in. The storm rolled in incredibly quickly, and there was no real bailout other than continuing along the intended route as efficiently as possible. If I was doing the PT again, I would take a second night in Rocky and camp near Haynach Lakes the first night. This makes for a short first day, but also provides for a safer morning crossing of Bighorn Flats and potential for amazing sunset views along the divide and down towards Haynach Lakes, my favorite section of day one.
The rest of the day was uneventful: I ran into a few other backpackers doing the CDT loop and eventually got to my campsite at North Inlet junction around 3pm. I quickly pitched my tarp, as the rain started to pick up even more. I ended up just waiting out the storm under my tarp for the rest of the day, which actually proved to be a little detrimental to my mental and emotional wellbeing. In retrospect, I think I could’ve either started the hike later in the morning or selected a campsite further along the primary route: the hours alone in camp going back over the events of the day ended up digging into my confidence, and I think I would’ve been better off if I was able to keep hiking. Obviously, YMMV. I was just happy to have avoided the storm.
At camp waiting for the rain to stop under my small tarp. The small size kept me dry with an effective pitch.
Mileage: 15-17 miles
Vertical Gain: 5,536 ft
Vertical Loss: 6,691 ft
Day 2 - North Inlet Junction to Upper Lake
I didn’t know it at the time, but this day was exactly what I needed after a tough day one. It was easily my favorite day of the whole trip, and likely the most challenging as well.
Camp, pitched my tarp using these trees as cover on one side. This provided adequate rain cover and room.
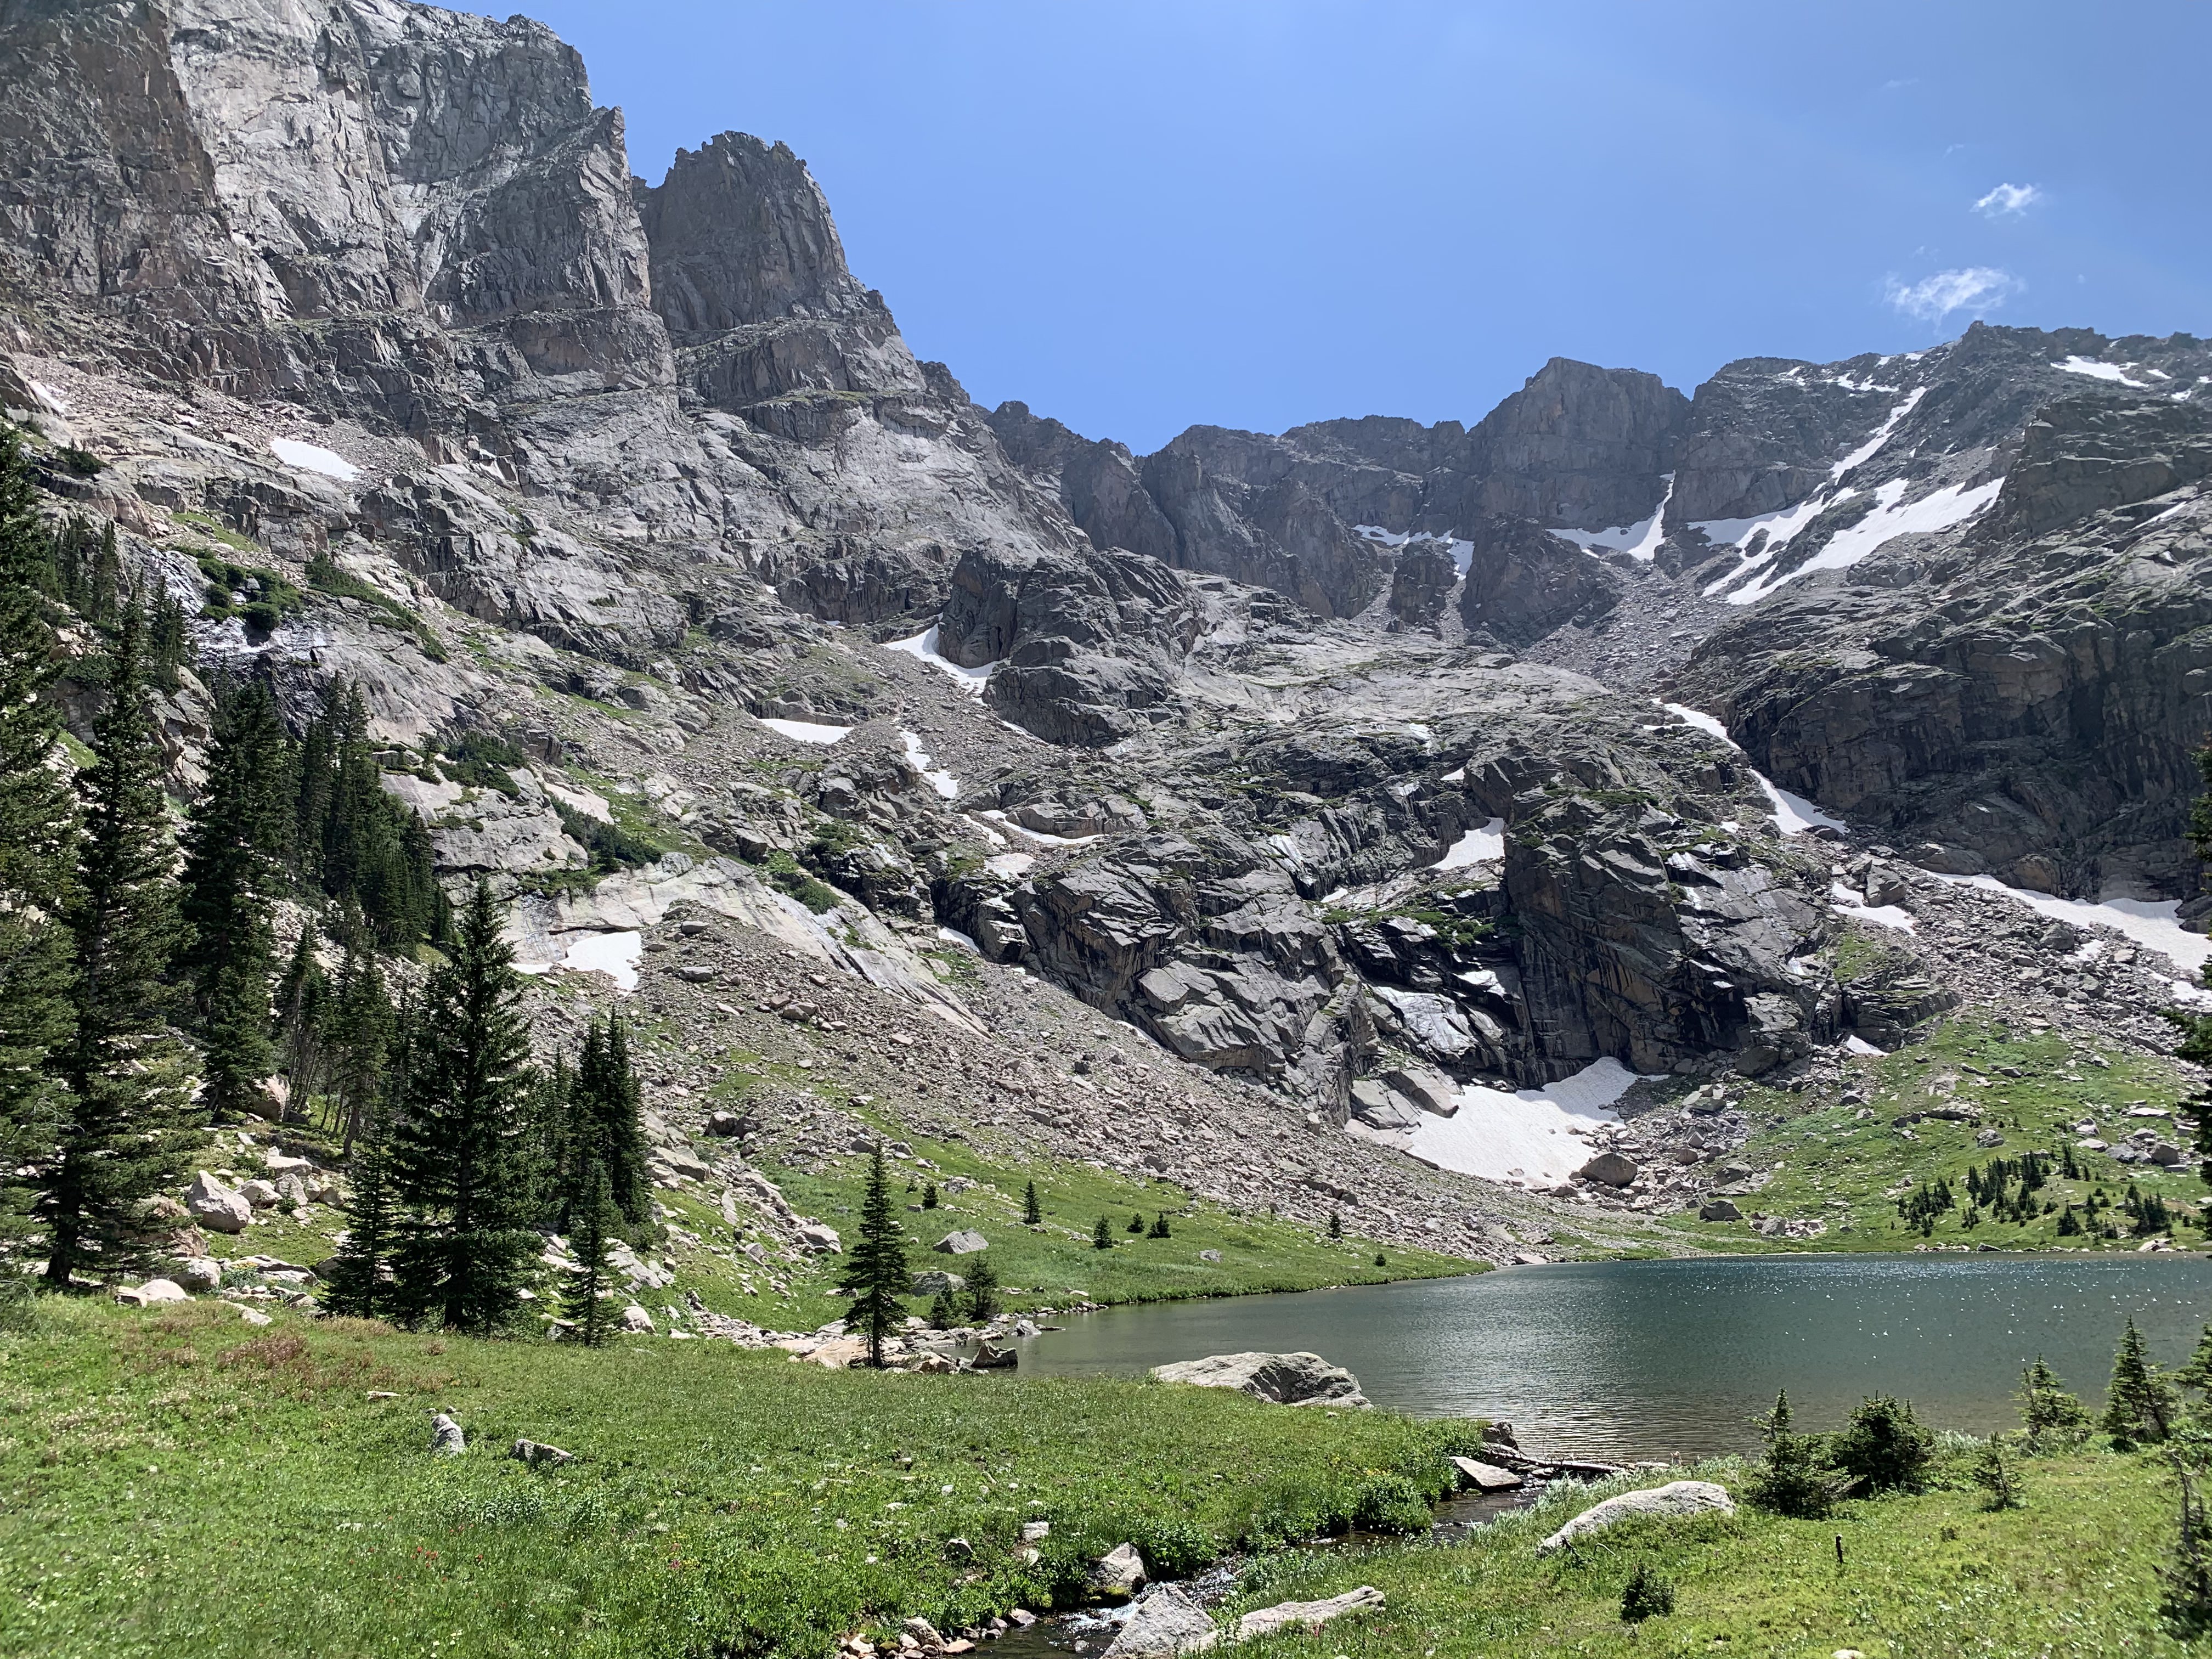
Lake Nokoni. An epic setting, to be sure
Lake Nanita. Excellent place to go fishing.
After a somewhat stormy night, I was greeted by a wonderfully pleasant morning. I started my day and quickly made it up to Lake Nokoni and Lake Nanita, a pair of lakes I had never visited in RMNP. They were both beautiful in their own ways, and I took some time to relax and eat before transitioning into mostly off-trail, navigationally complex travel. If I was to go back, I would like to attempt the higher alternate route to Beak Pass. I headed up to the ‘grassy saddle’ slowly and gradually. One incredible thing about the PT: most everything ‘makes sense’ from a navigational standpoint, which I think is a testament to the ‘route flow’ that Skurka refers to in the guide. Once gaining the saddle, Beak pass and the general route to it is clear. This is incredible terrain: I felt so small and appreciative of the scenery around me. Fortunately, the majority of the PT inspires these feelings, but my experiences on day two were some of the most inspiring I’ve had in the backcountry. I saw zero other human beings between lake Nanita and Upper lake, and the sense of solitude was truly incredible, even in such a heavily visited National Park.
High Tarn just below Beak Pass
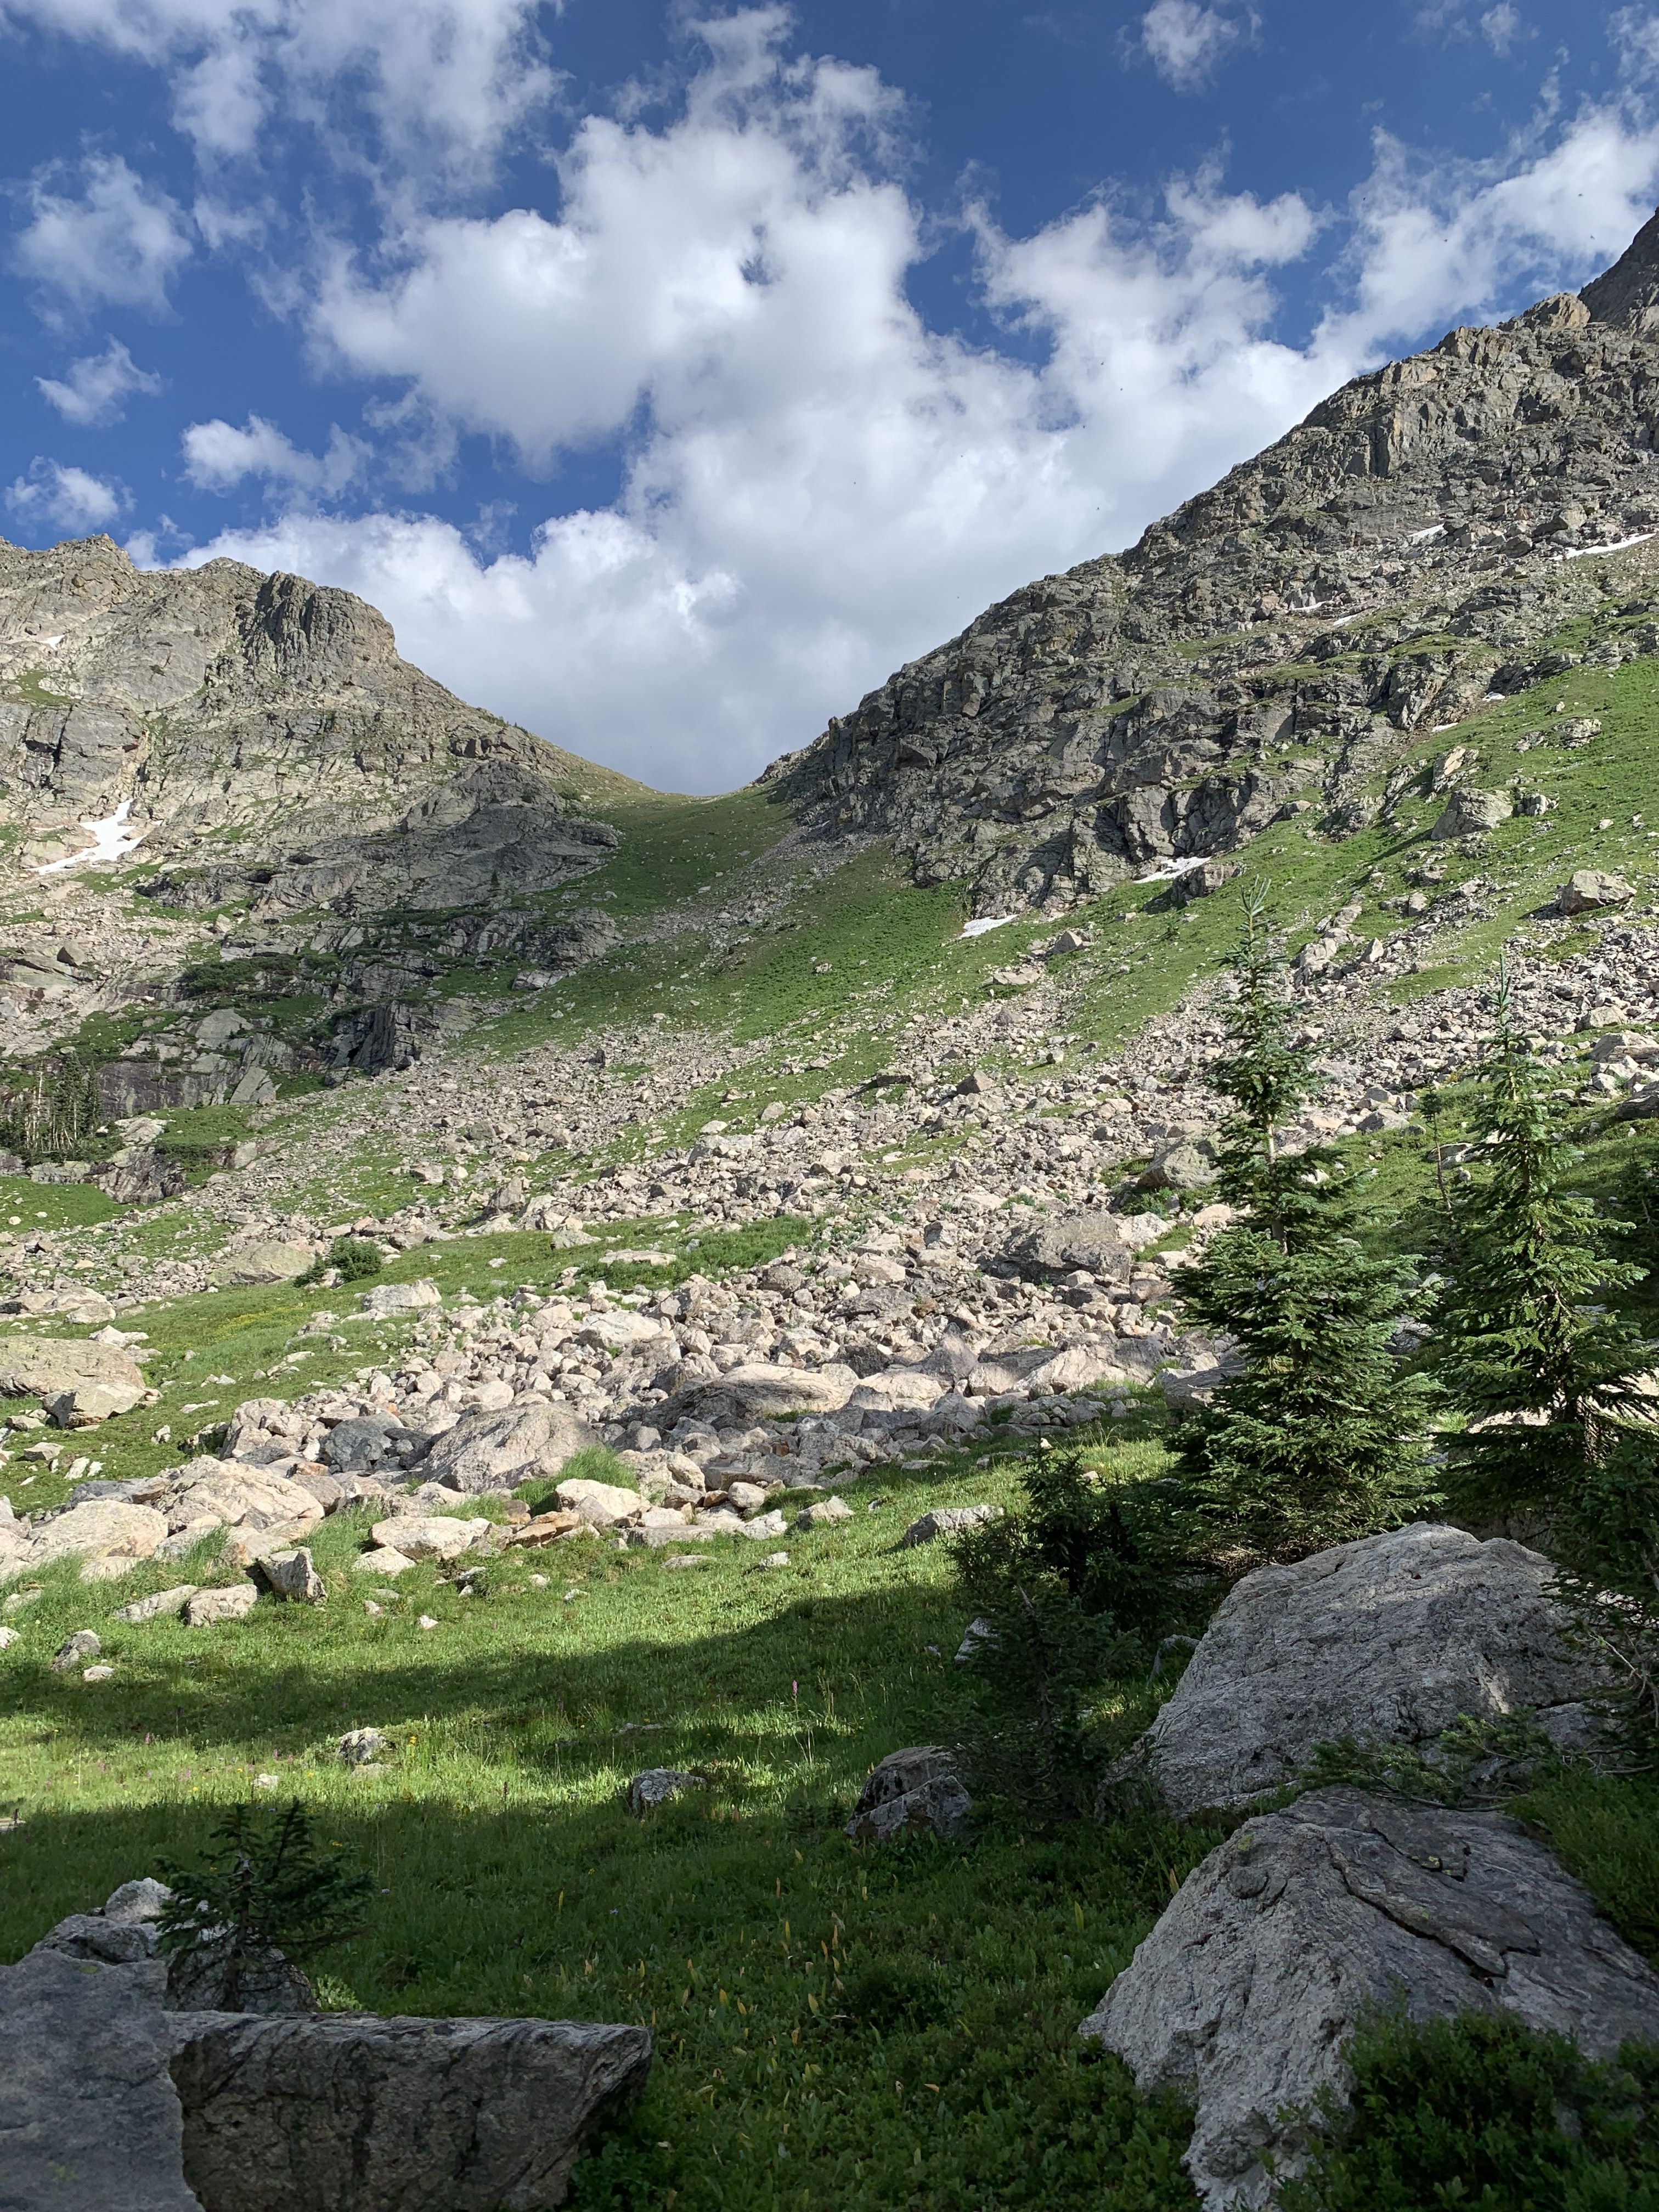
Looking up towards Beak Pass
Ptarmagin's beak from Beak Pass
The descent into East Inlet was the portion of the trip that I was most concerned about on the entire route. Bushwhacking of any kind is not my strong suit, so this section was not one I was looking forward to. In reality, the descent was long and somewhat tedious, but never once did I feel unsafe. I did rip my tights on a blowdown, so I would suggest wearing heavier duty pants for sections like this in the future. I took a quick break at Spirit lake, feeling pretty accomplished and relieved that the crux of the route so far was behind me. It was midday by the time I reached fourth lake, so I didn’t spend much time there and quickly made my way up towards fifth lake and Isolation Peak Pass.
Looking down into East Inlet.
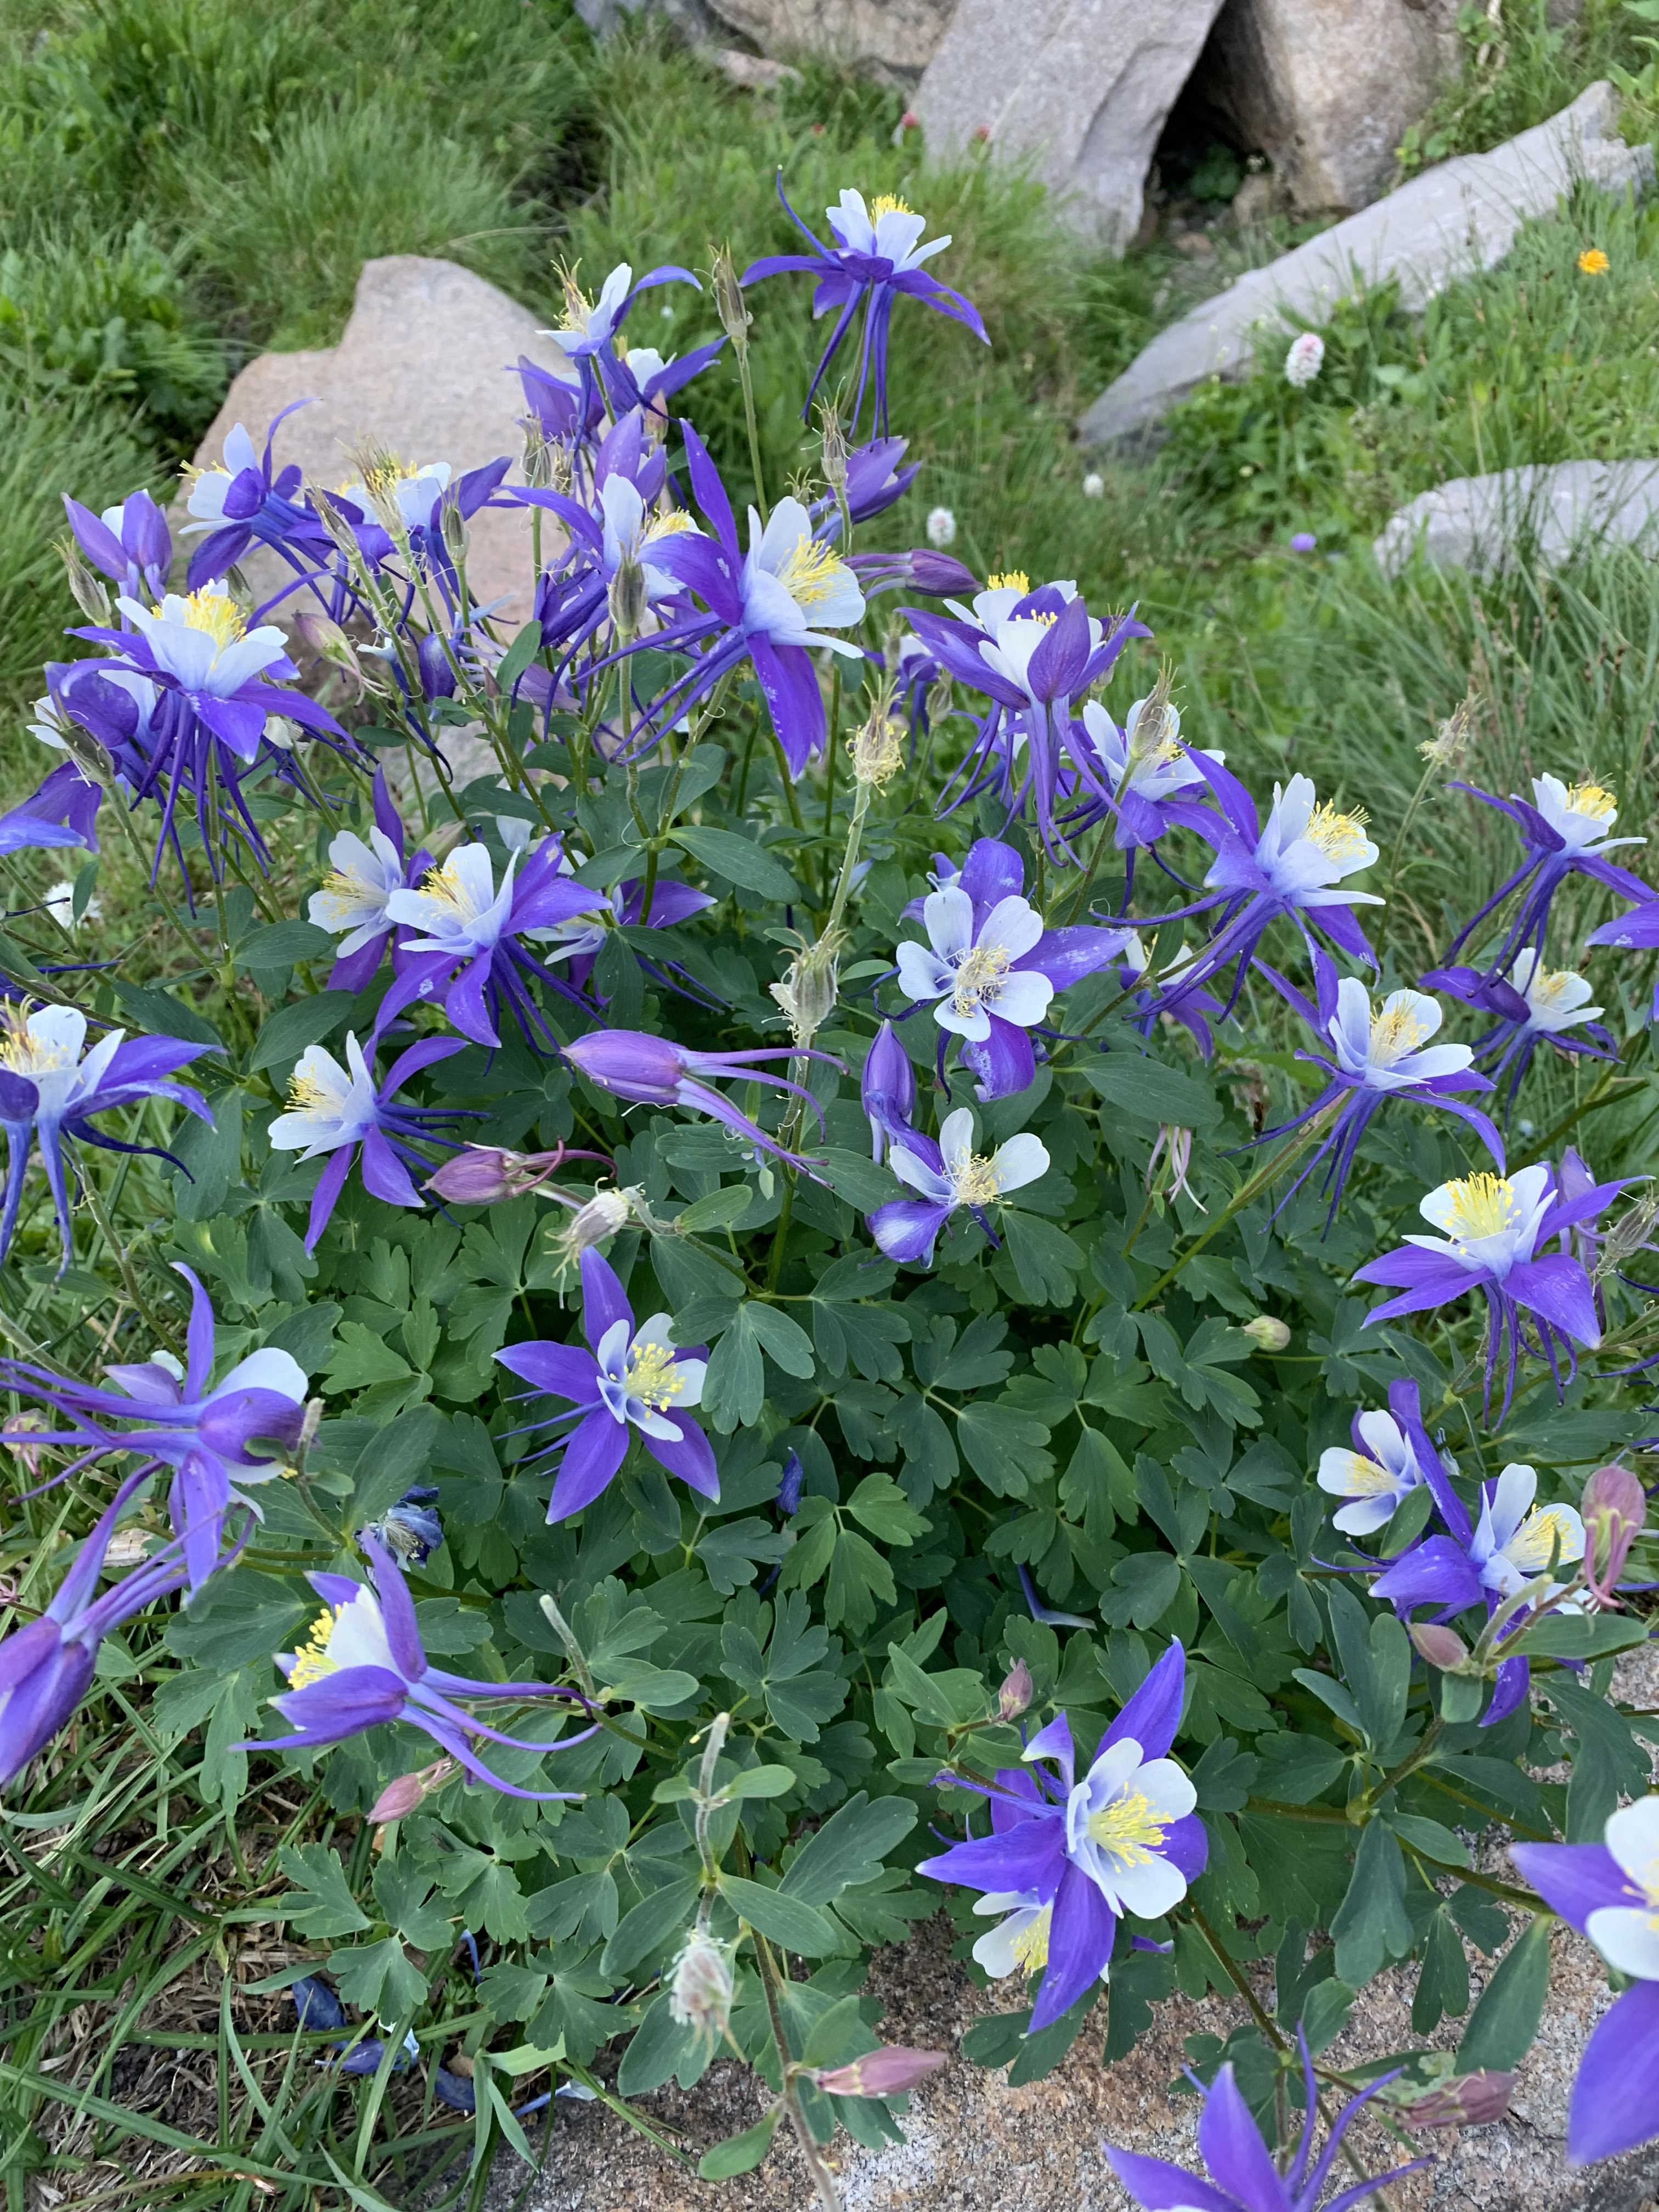
This section was probably the most navigationally complicated for me, and for no good reason. I lost the use trails numerous times, and felt like the ascent was a bit of a slog. Fortunately, abundant wildflowers made the ordeal more pleasant. I suggest staying on the left side of the creek, using it as a handrail the whole way, though I haven’t been back to fifth lake to confirm this route. I used both sides, and ended up in waist-high vegetation and had some precarious scrambling to get across the creek. Took some time to rest at the lake, with some of the most epic and inspiring scenery so far, before making the final push to Isolation Peak Pass. This last push was a grind: steep with some wet vegetation along the way. Gaining Isolation peak pass, my third pass of the day, felt like a big accomplishment.
Fifth Lake. Excellent spot for lunch.
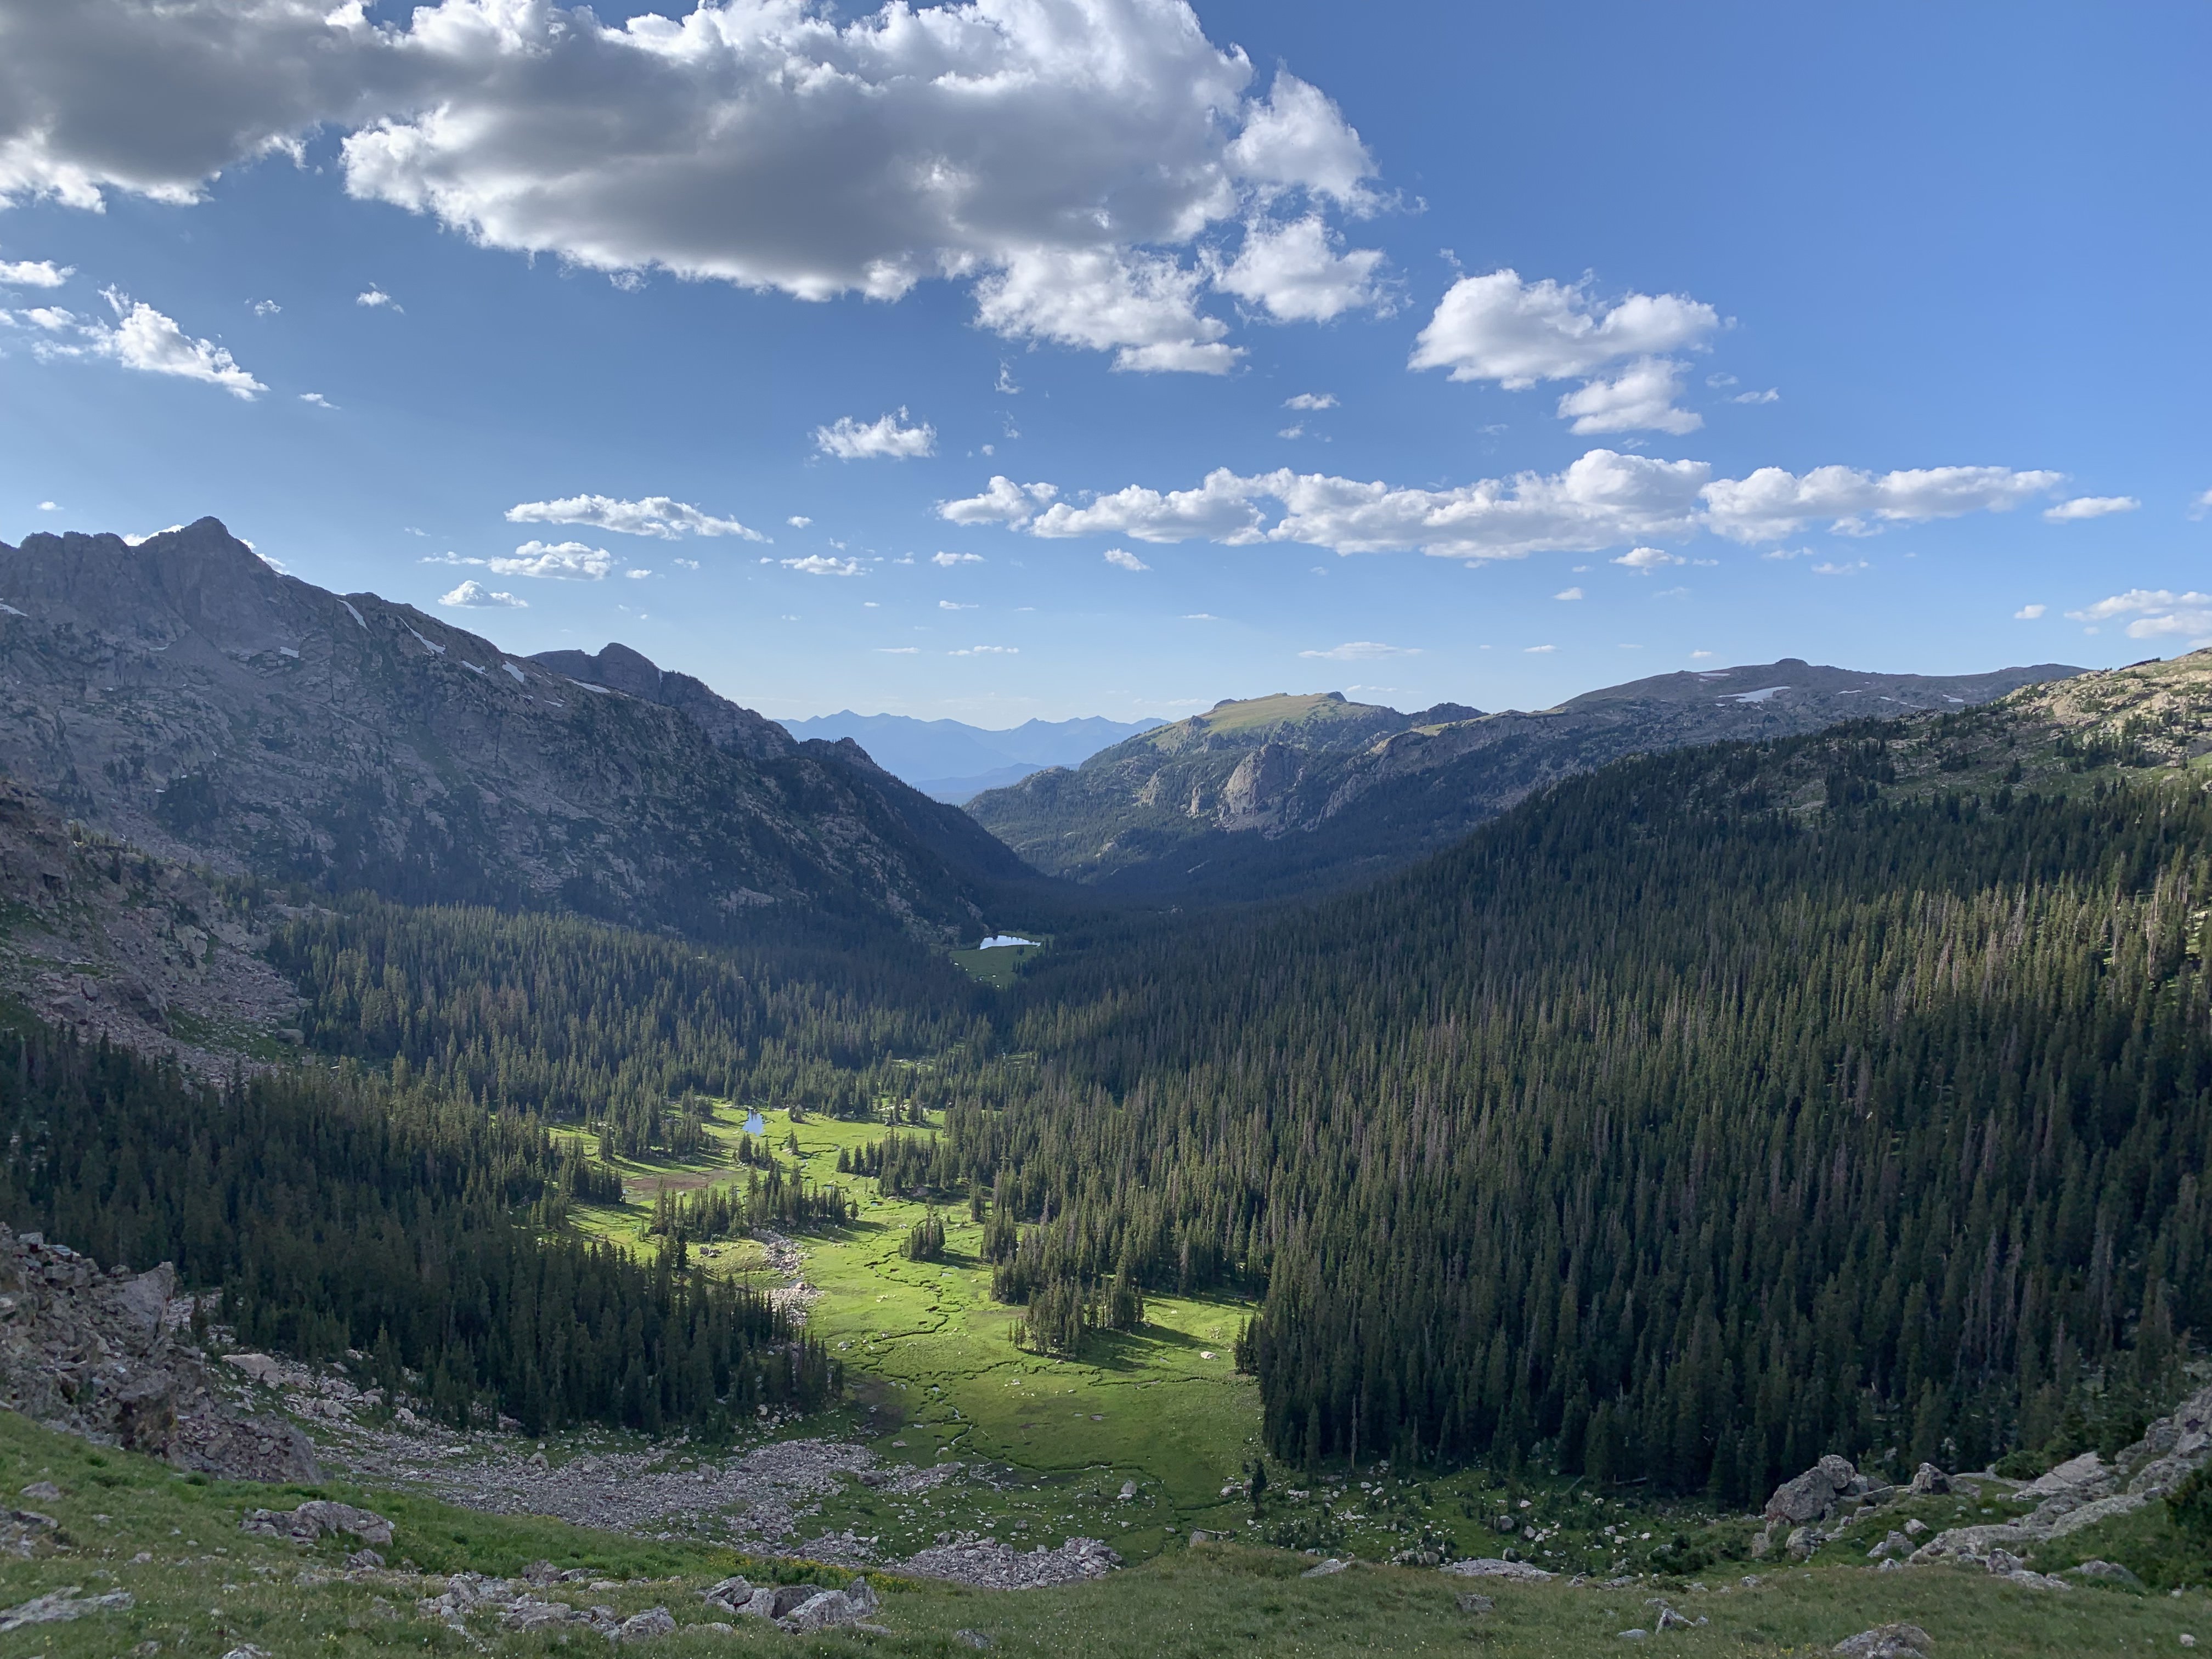
Paradise Park. Pretty sure more elk visit this location than humans.
Not gonna beat around the bush: everything Andrew says about Paradise park is true. It’s incredible, remote and was probably the top highlight of the route for me. I can’t wait to go back, and even though I'm sure the Ooh-la-la extra credit route is fun, I would urge all thru-hikers and section hikers alike to favor the route through Paradise park. Follow the guide closely here, the navigation isn’t a cake-walk as you enter the more forested section of the descent. After reaching the valley floor and observing Paradise pass, I quickly began hiking up parallel to the creek to get to the base. I really cannot overstate how awe-inspiring this location is. At the base of Paradise pass, it really does look steep. By this time, some clouds were rolling in, so I took an opportunity to rest and enjoy some dinner before gaining the pass. Fortunately, no rain and thunder today. Huge relief. Paradise pass was definitely the steepest climbing so far, and it was really a grind. My fourth pass of the day, reaching the saddle was relieving and inspiring. I looked back down towards Paradise Park, and over towards upper Hell Canyon and let out a big ‘Woohoo!’ After the troubles of day one, I had just completed the section of the route with the most off-trail travel and complex navigation, and I really felt like I got my mojo back. The PT guide proved invaluable on this day, but in retrospect I think that the route flow is so good that I could do it all over again mostly from memory. I do not recommend this on your first attempt.
Looking up Paradise Pass. If it looks heinously steep, it's because it is.
Paradise Meadow, from Paradise Pass.
I made camp at upper lake, eying Cooper Peak pass. I considered going for an evening ascent, but frankly I was pretty tired and questioned the sanity of going for a fifth pass in the day. It also looked impossibly steep. The camping options are excellent at upper lake, with very soft ground to sleep on and decent cover if you use a smaller shelter.
Upper Hell Canyon from Paradise Pass. The really steep ramp on the left is Cooper Peak Pass.
Mileage: 12-14 miles
Vertical Gain: 5,595 ft
Vertical Loss: 4,343 ft
Day 3 - Upper Lake to Caribou Lake
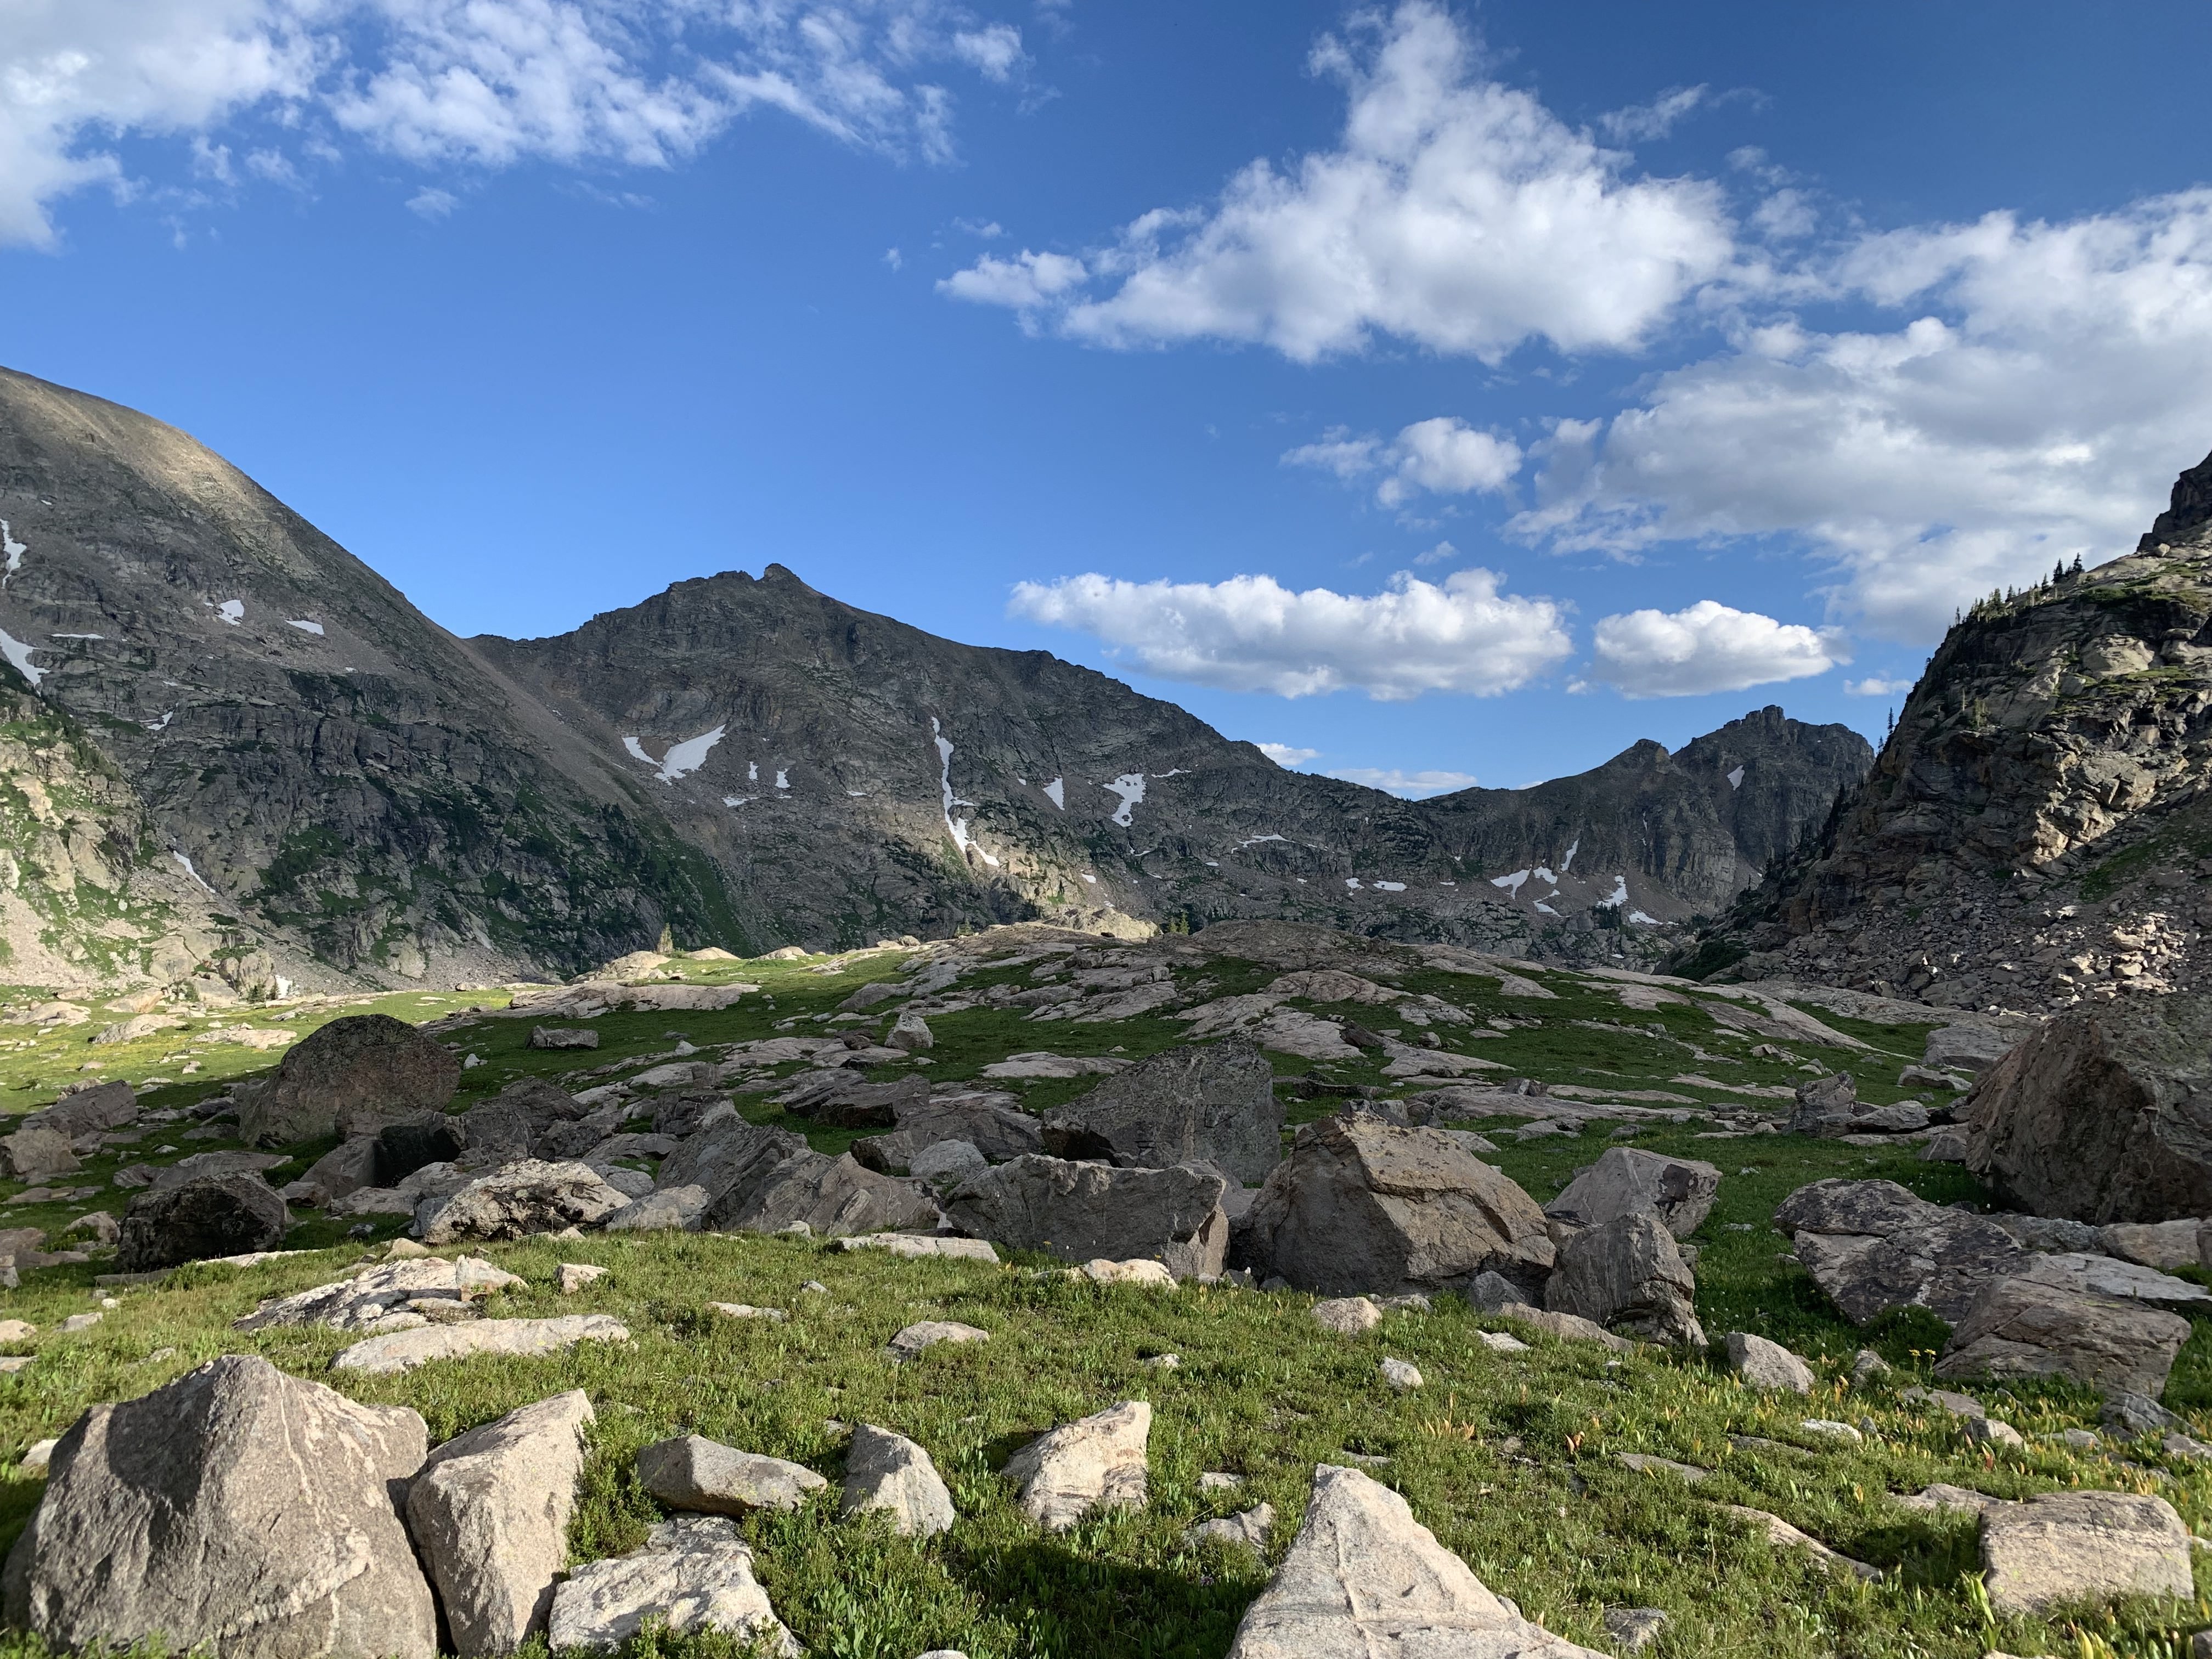
Upper Hell Canyon from the base of Cooper Peak Pass.
The next morning, I made quick work of getting to the base of Cooper Peak pass. It was super intimidating, and only became more intimidating as I ascended. It was really steep and very long, though I only once felt really freaked out when the terrain shifted towards looser scree. I elected to move to the right side of the pass towards large talus instead, which proved to be a little more up my alley than ascending the loose stuff. Fortunately in this section, you can choose the route that fits your style the best. Gaining the pass was another ‘Woohoo’ moment for me: it was probably the most physically challenging feature I had encountered yet.
Looking up Cooper Peak Pass. Looked impossible from the base.
Descending from Cooper Peak pass towards Island Lake, I felt so fortunate to be traveling in this area. Again, the scenery of the PT is so inspiring the whole way, almost bolstering the hiker and giving them confidence as they tackle new features. Perhaps I got a little too distracted by the glacier-carved basin, as I made a mistake here by dropping towards the lake too quickly. Can you blame me? Stay higher than you think you need to on the right side of the lake as you descend towards its outlet and on towards Gourd Lake. This is also a good opportunity to replenish water. The navigation is simple from here onward, following heavily used trails until Thunderbolt Meadow.
Island Lake
Panoramic View. I came too close to the shore, the better route is above the lake.
Gourd Lake
I had been battling injuries all summer and thusly did not have very much confidence in attempting Paiute Pass and the Northeast Gully. I opted to take the decidedly uninspiring and boring all trail bypass to Caribou lake. If I can offer one bit of advice to future PT thru-hikers it is this: do what you can to avoid using the all trail bypass. Train, and if you can, give Paiute Pass and the NE gully a shot before your hike. Build up the confidence and strength to attack these two challenging features. The all trail bypass was such a low point for me on my hike, and my biggest regret in my entire PT thru-hike is not putting in the time beforehand to feel confident in my skills. Ultimately, this was the right call for me: my knee injury had been re-aggrevated on my mad rush down to North Inlet on day one. I don’t have much else to say about this day other than that the scenery of the all-trail bypass was uninspiring. I will get back out there and complete Paiute pass and the Northeast gully some day soon.
Mood during the all trail bypass. It was quite boring compared to what could've been.
Camping at Caribou lake was really nice, though I wish I would’ve pushed it and made it to Columbine lake instead. Interestingly, I think an option for an epic high camp exists just above Arapaho pass given a calmer evening.
Mileage: 16-18 miles
Vertical Gain: 4,867 ft
Vertical Loss: 4,548 ft
Day 4 - Caribou Lake to Rollins Pass
An early start was rewarded with views of two moose grazing near Caribou lake. The views from Arapaho Pass are world class and provide a view of the PT up until this point. The trail to Caribou pass was actually quite nice as well, and made for an enjoyable walk along the divide. Dropping to Columbine lake was uneventful, the guide was also helpful for me here. The lake itself was gorgeous and made for an awesome breakfast stop and a chance to refill on water.
View from Arapaho Pass. You can see pretty much the entire PT that crosses through IPW from here.

Just over Arapaho Pass, an epic high camp could be made at this lake given a calm evening.
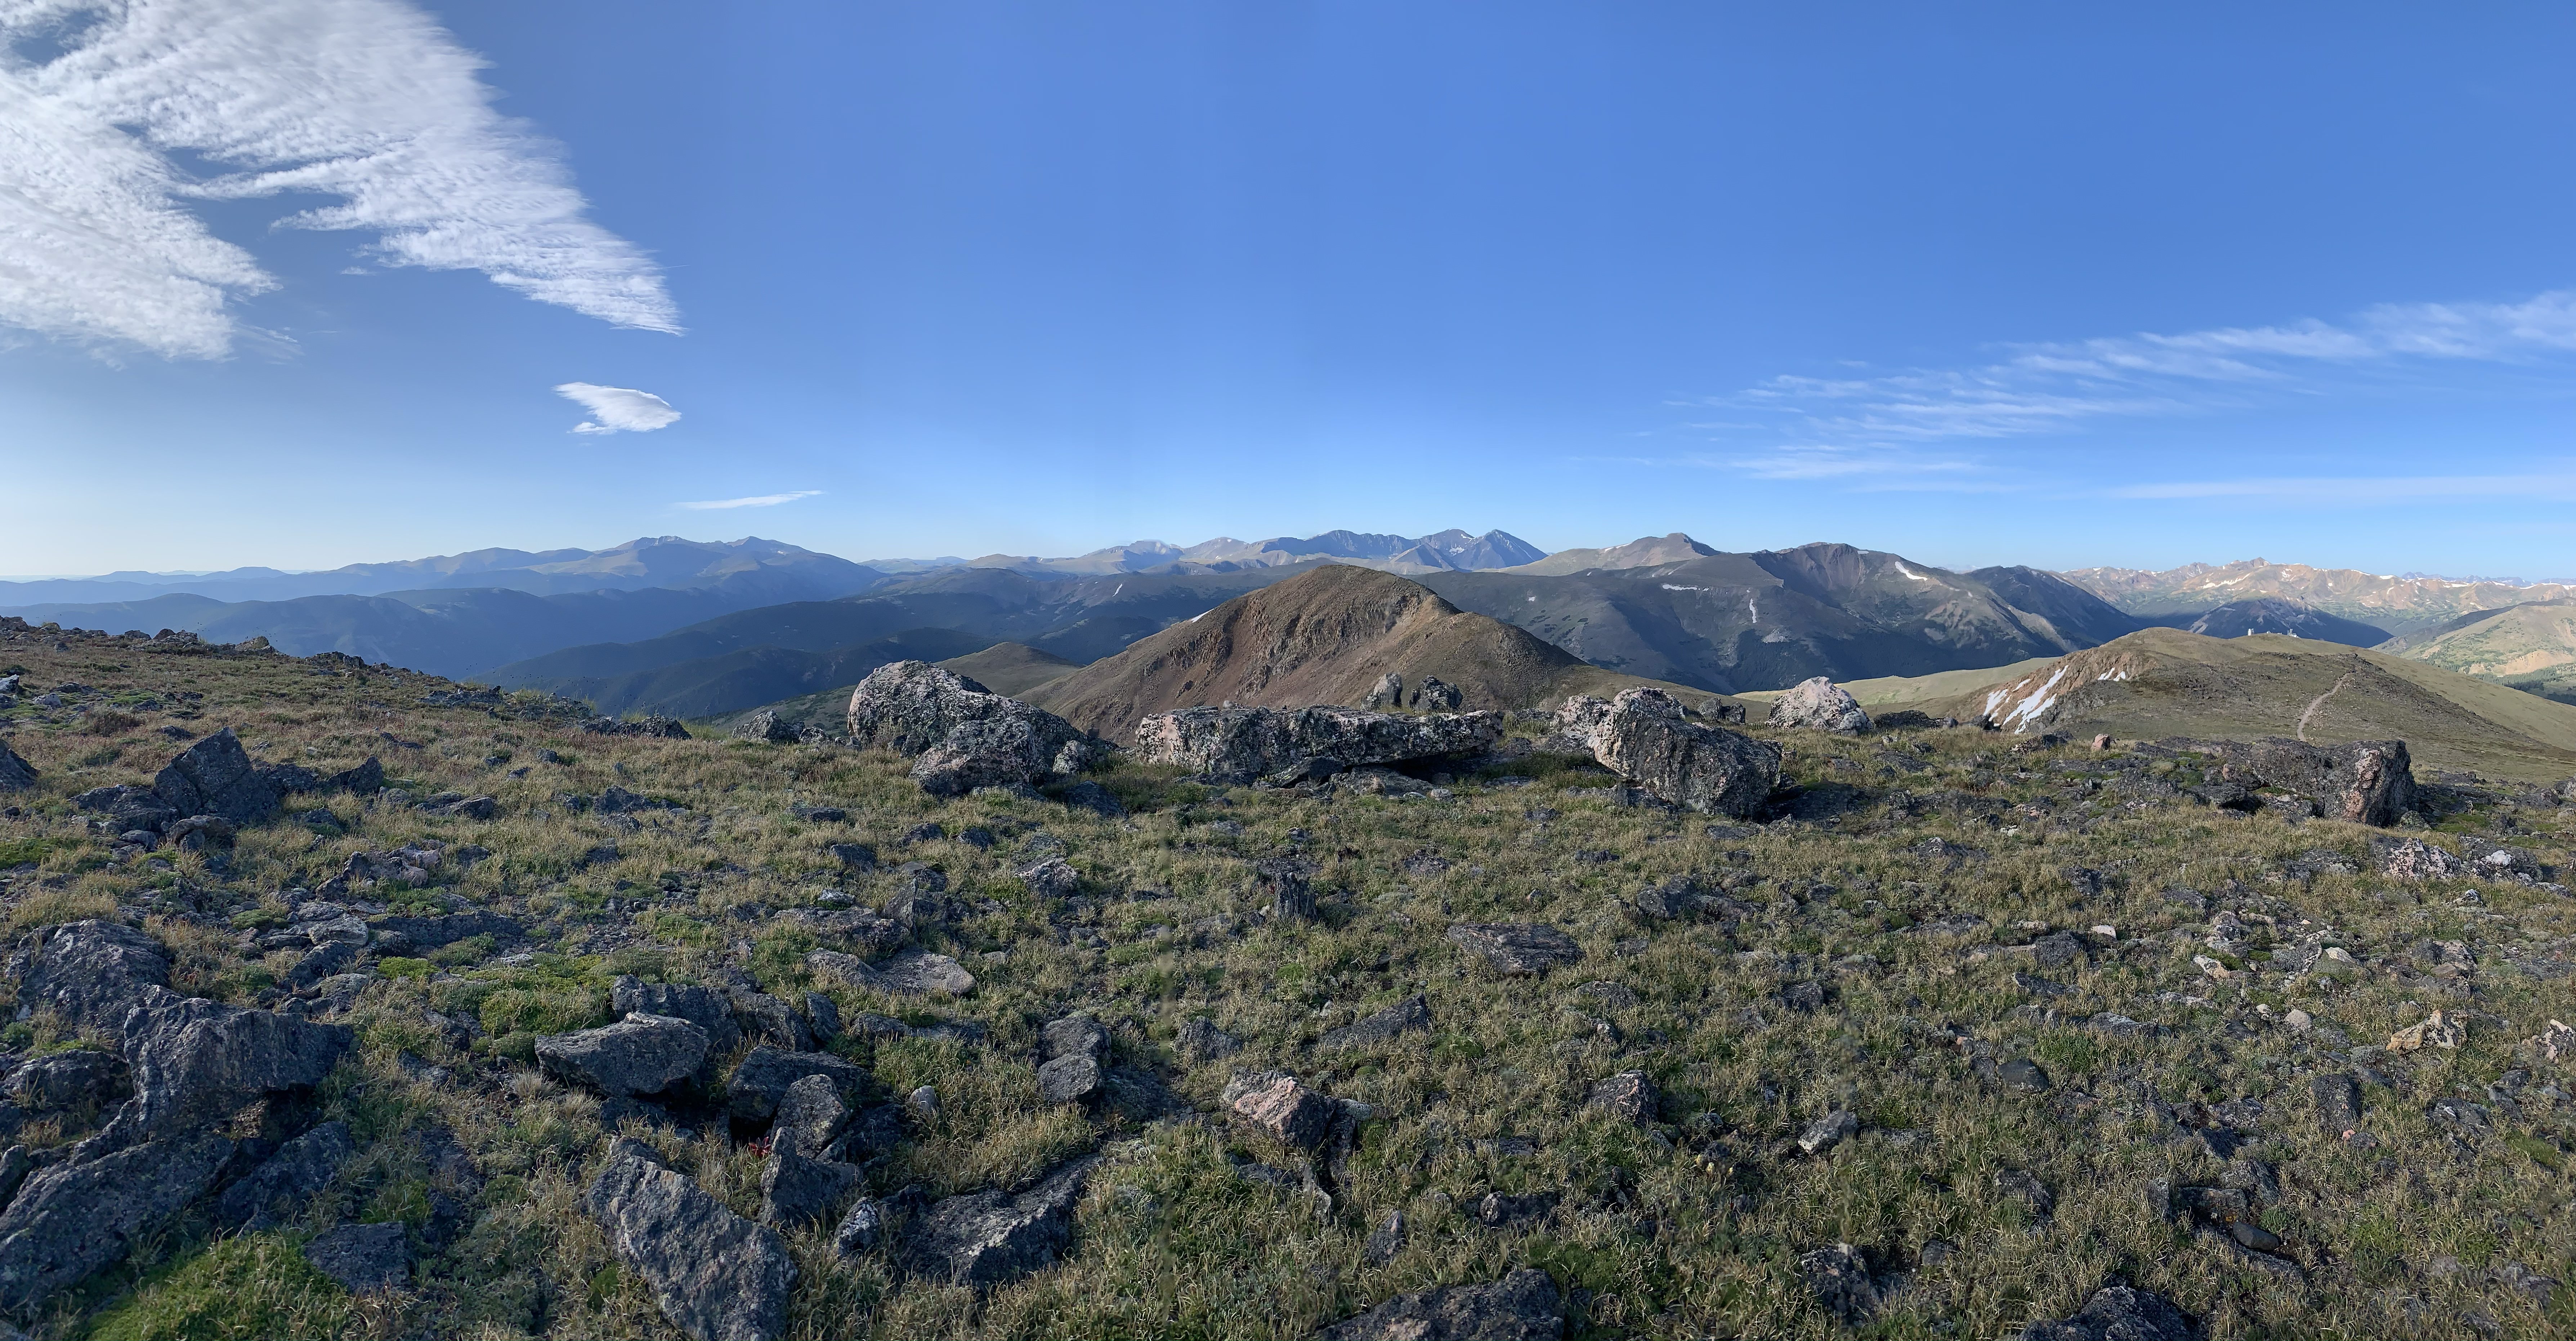
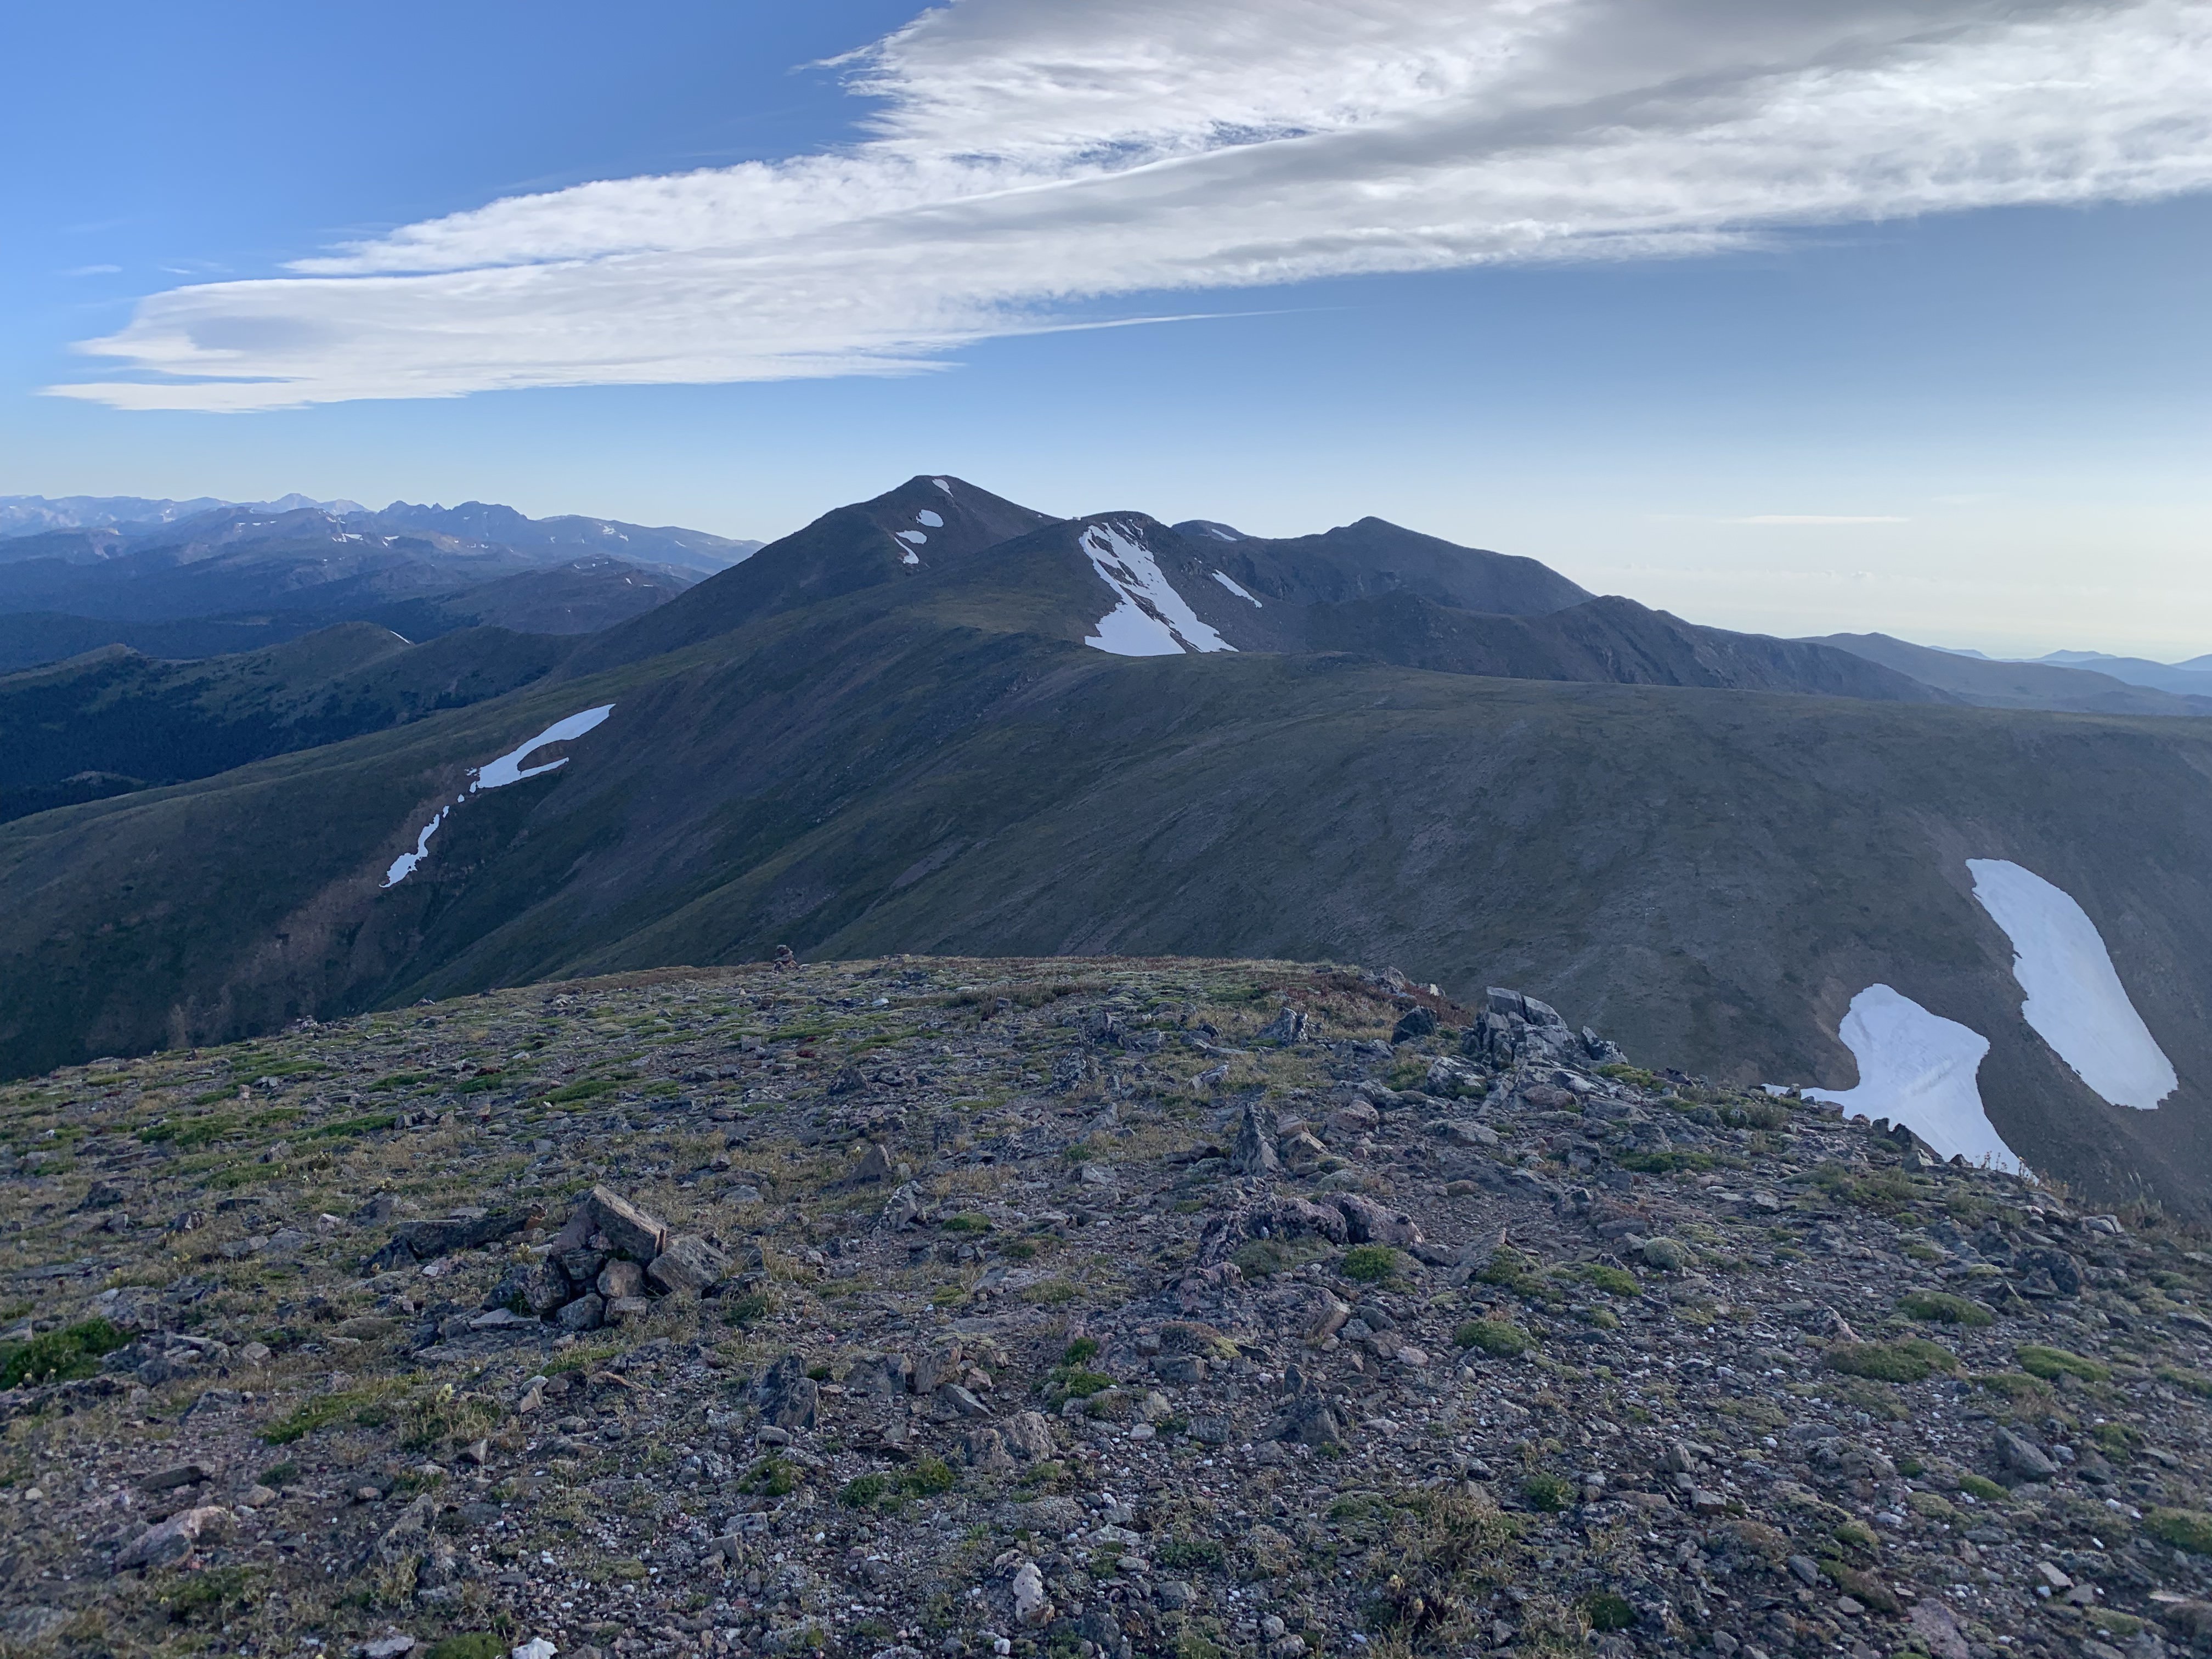
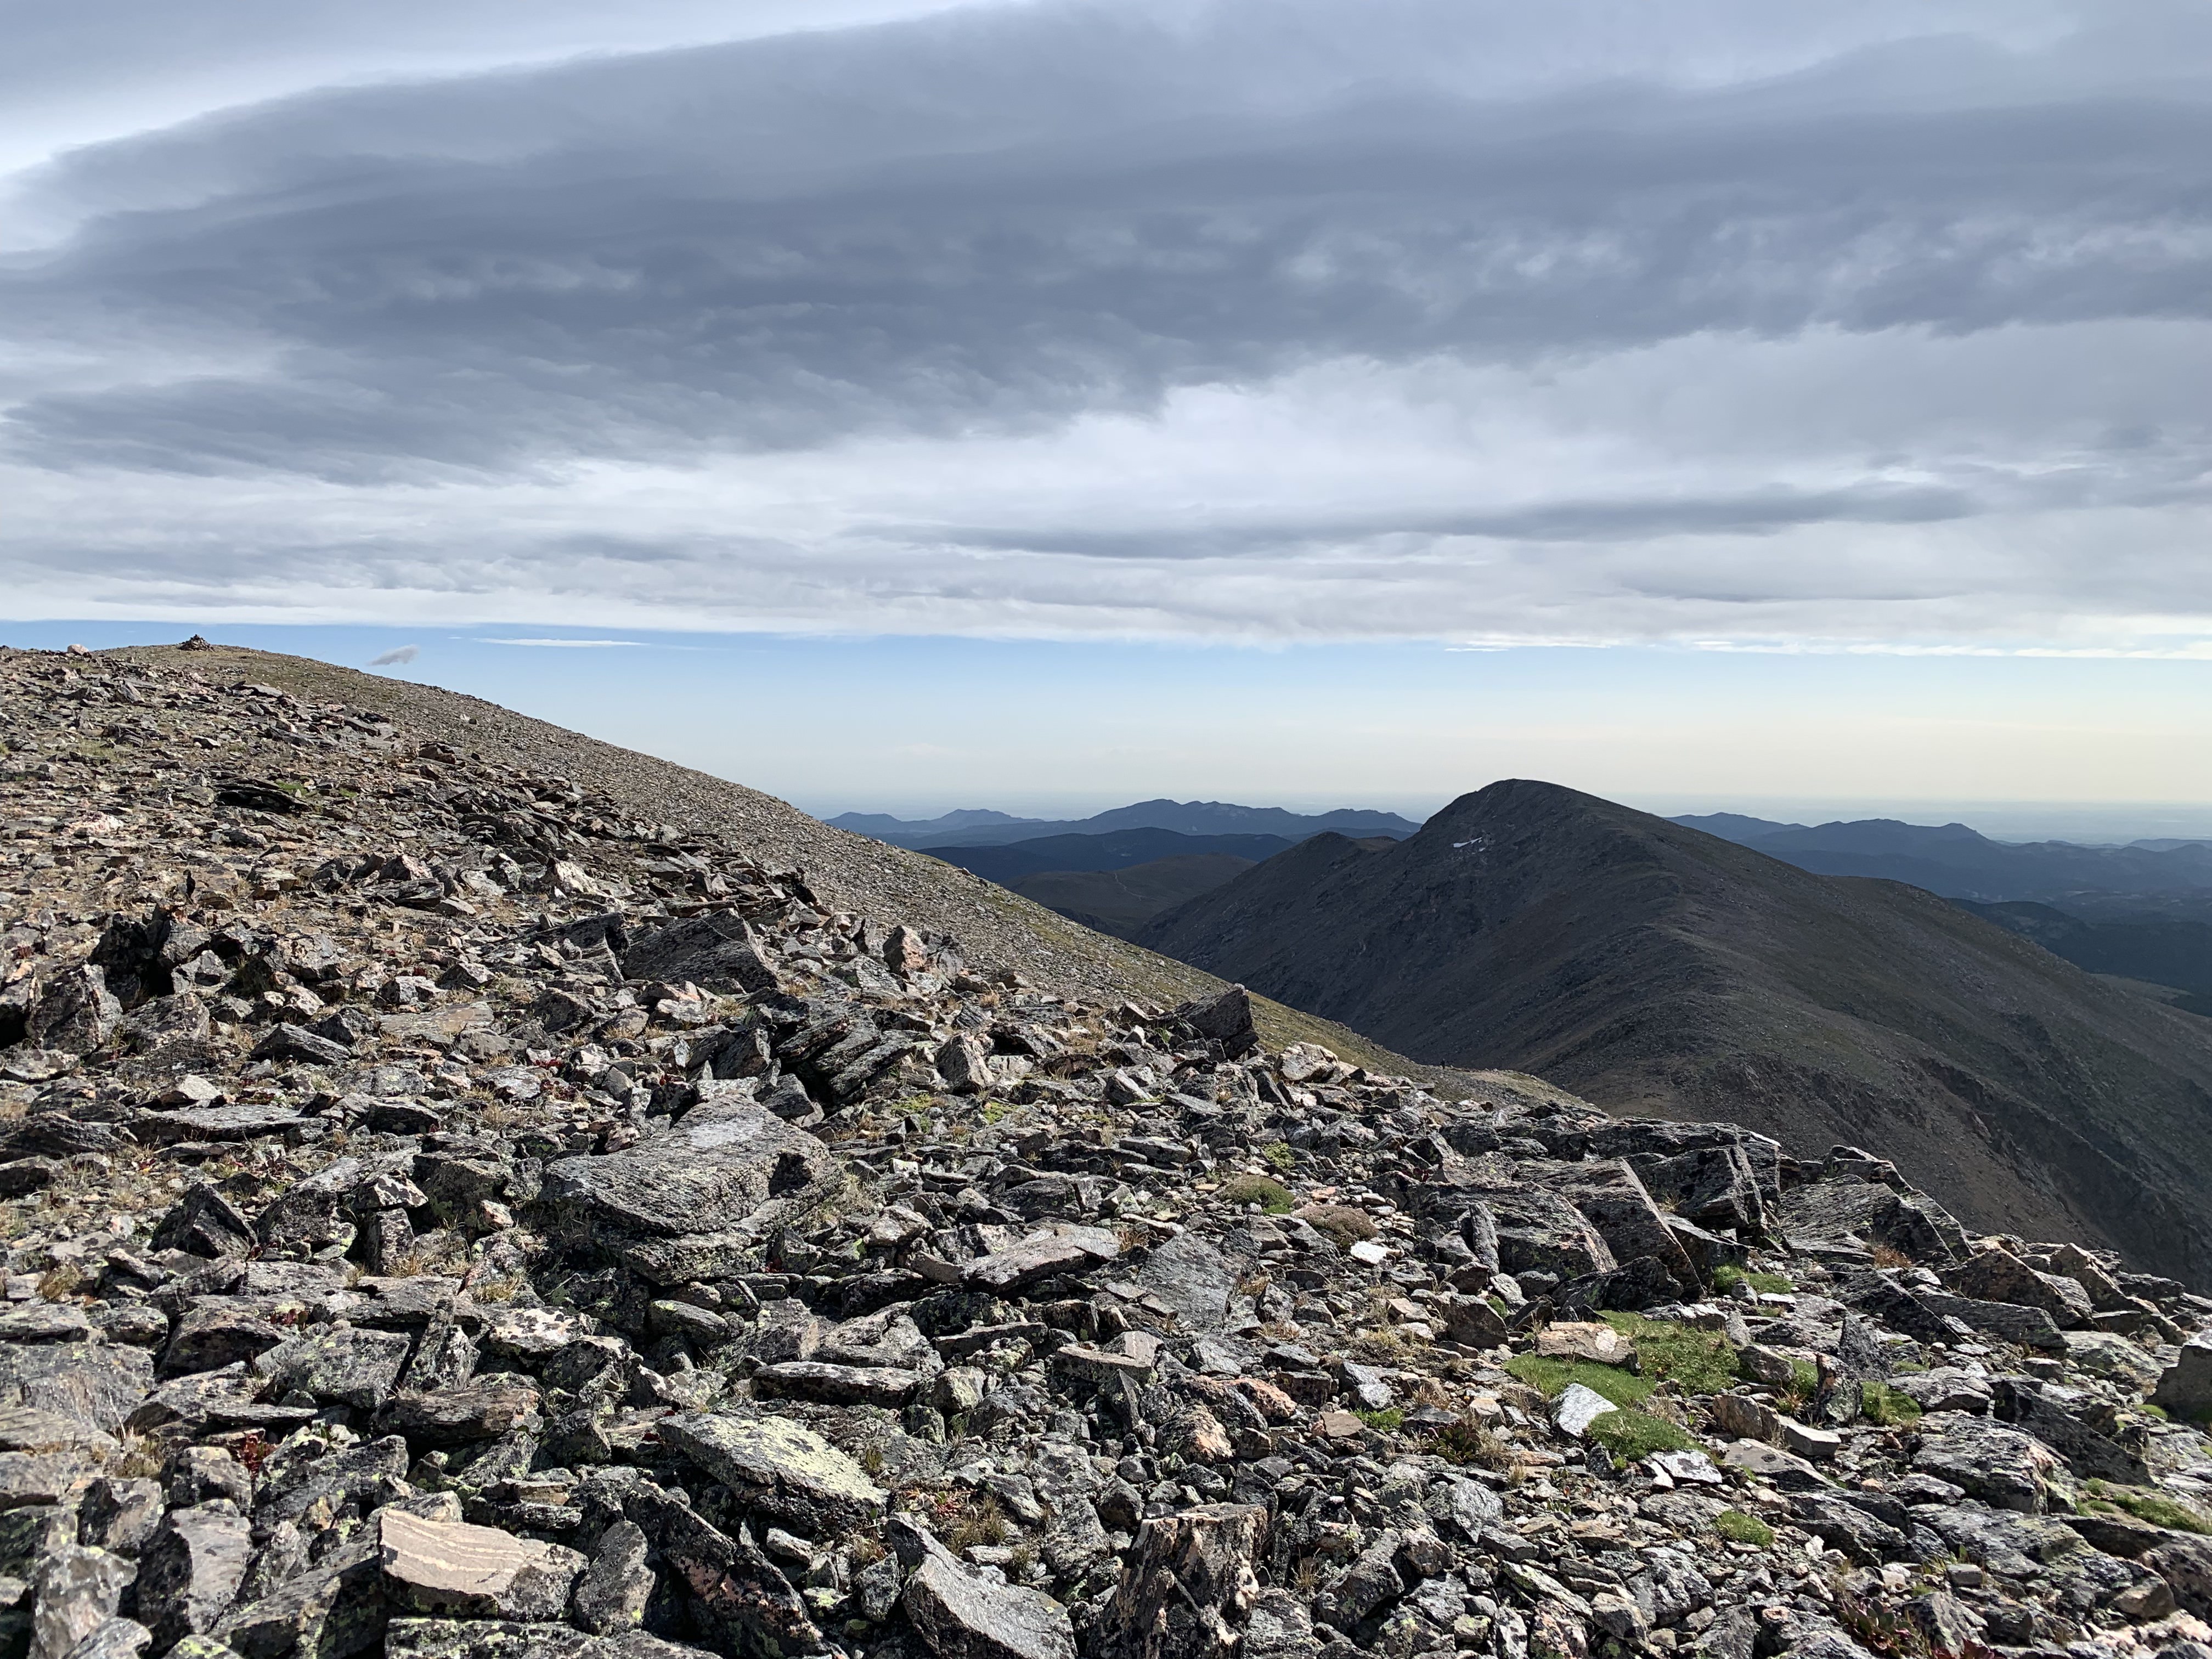
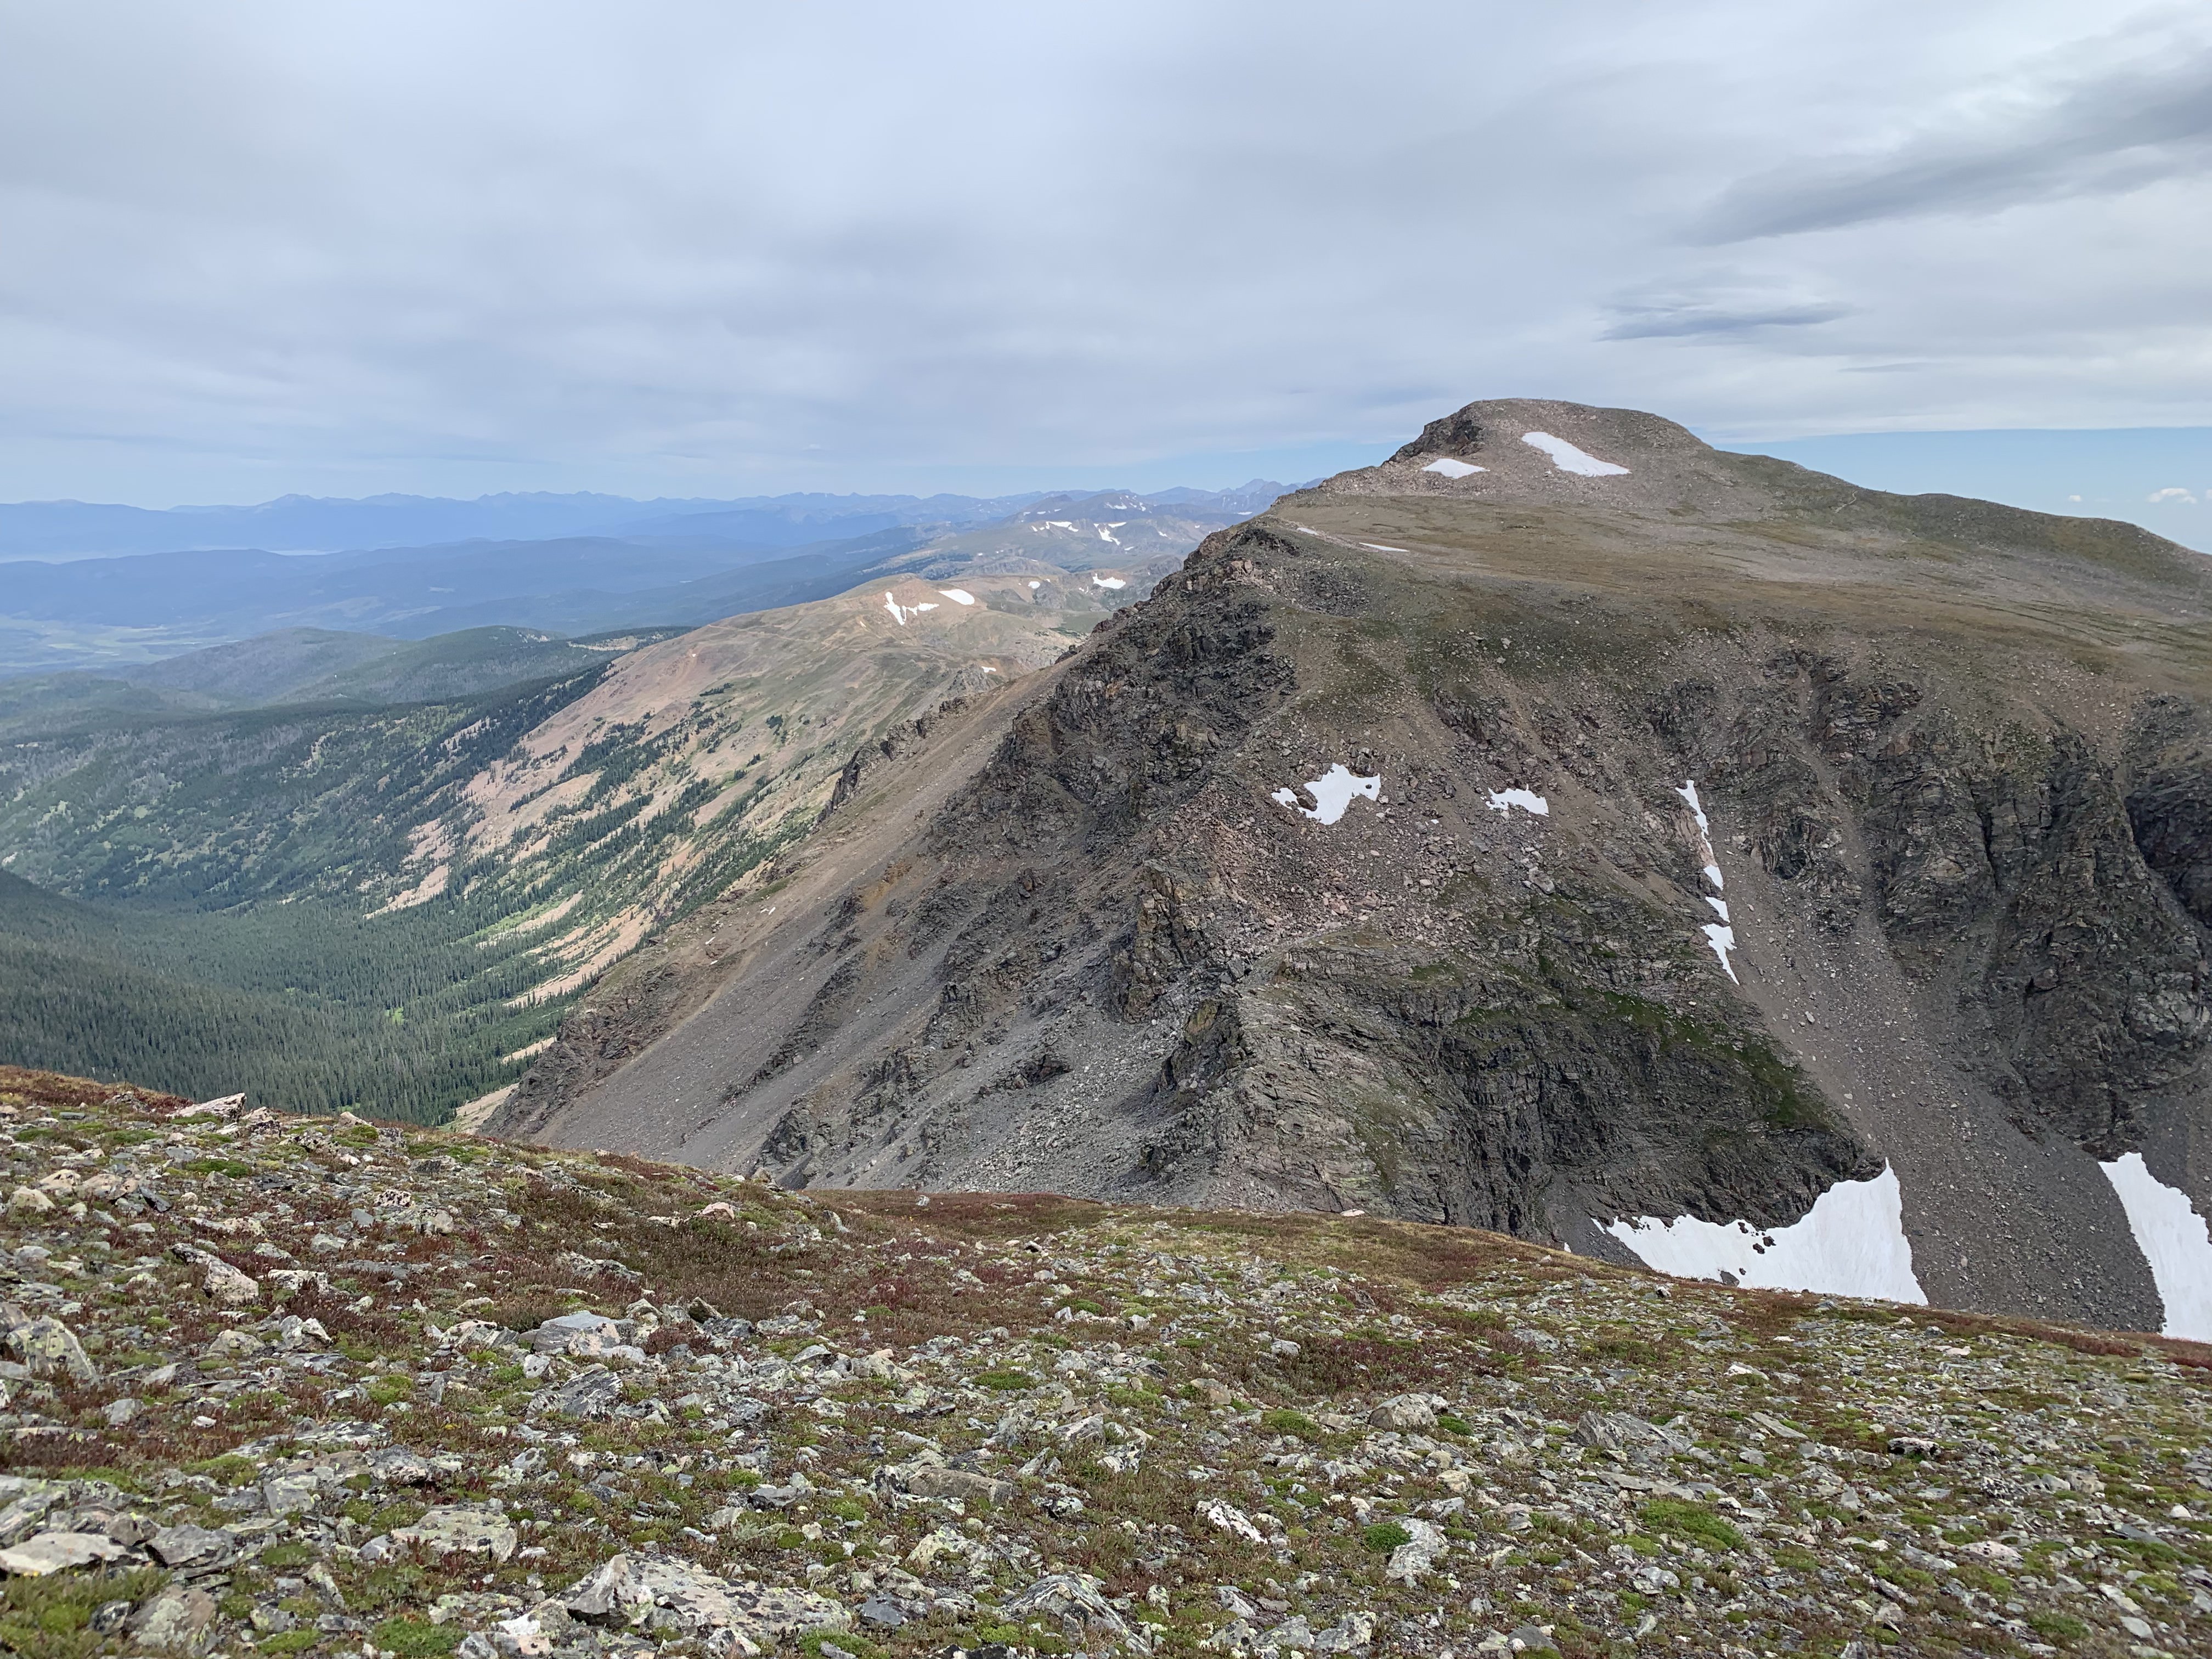
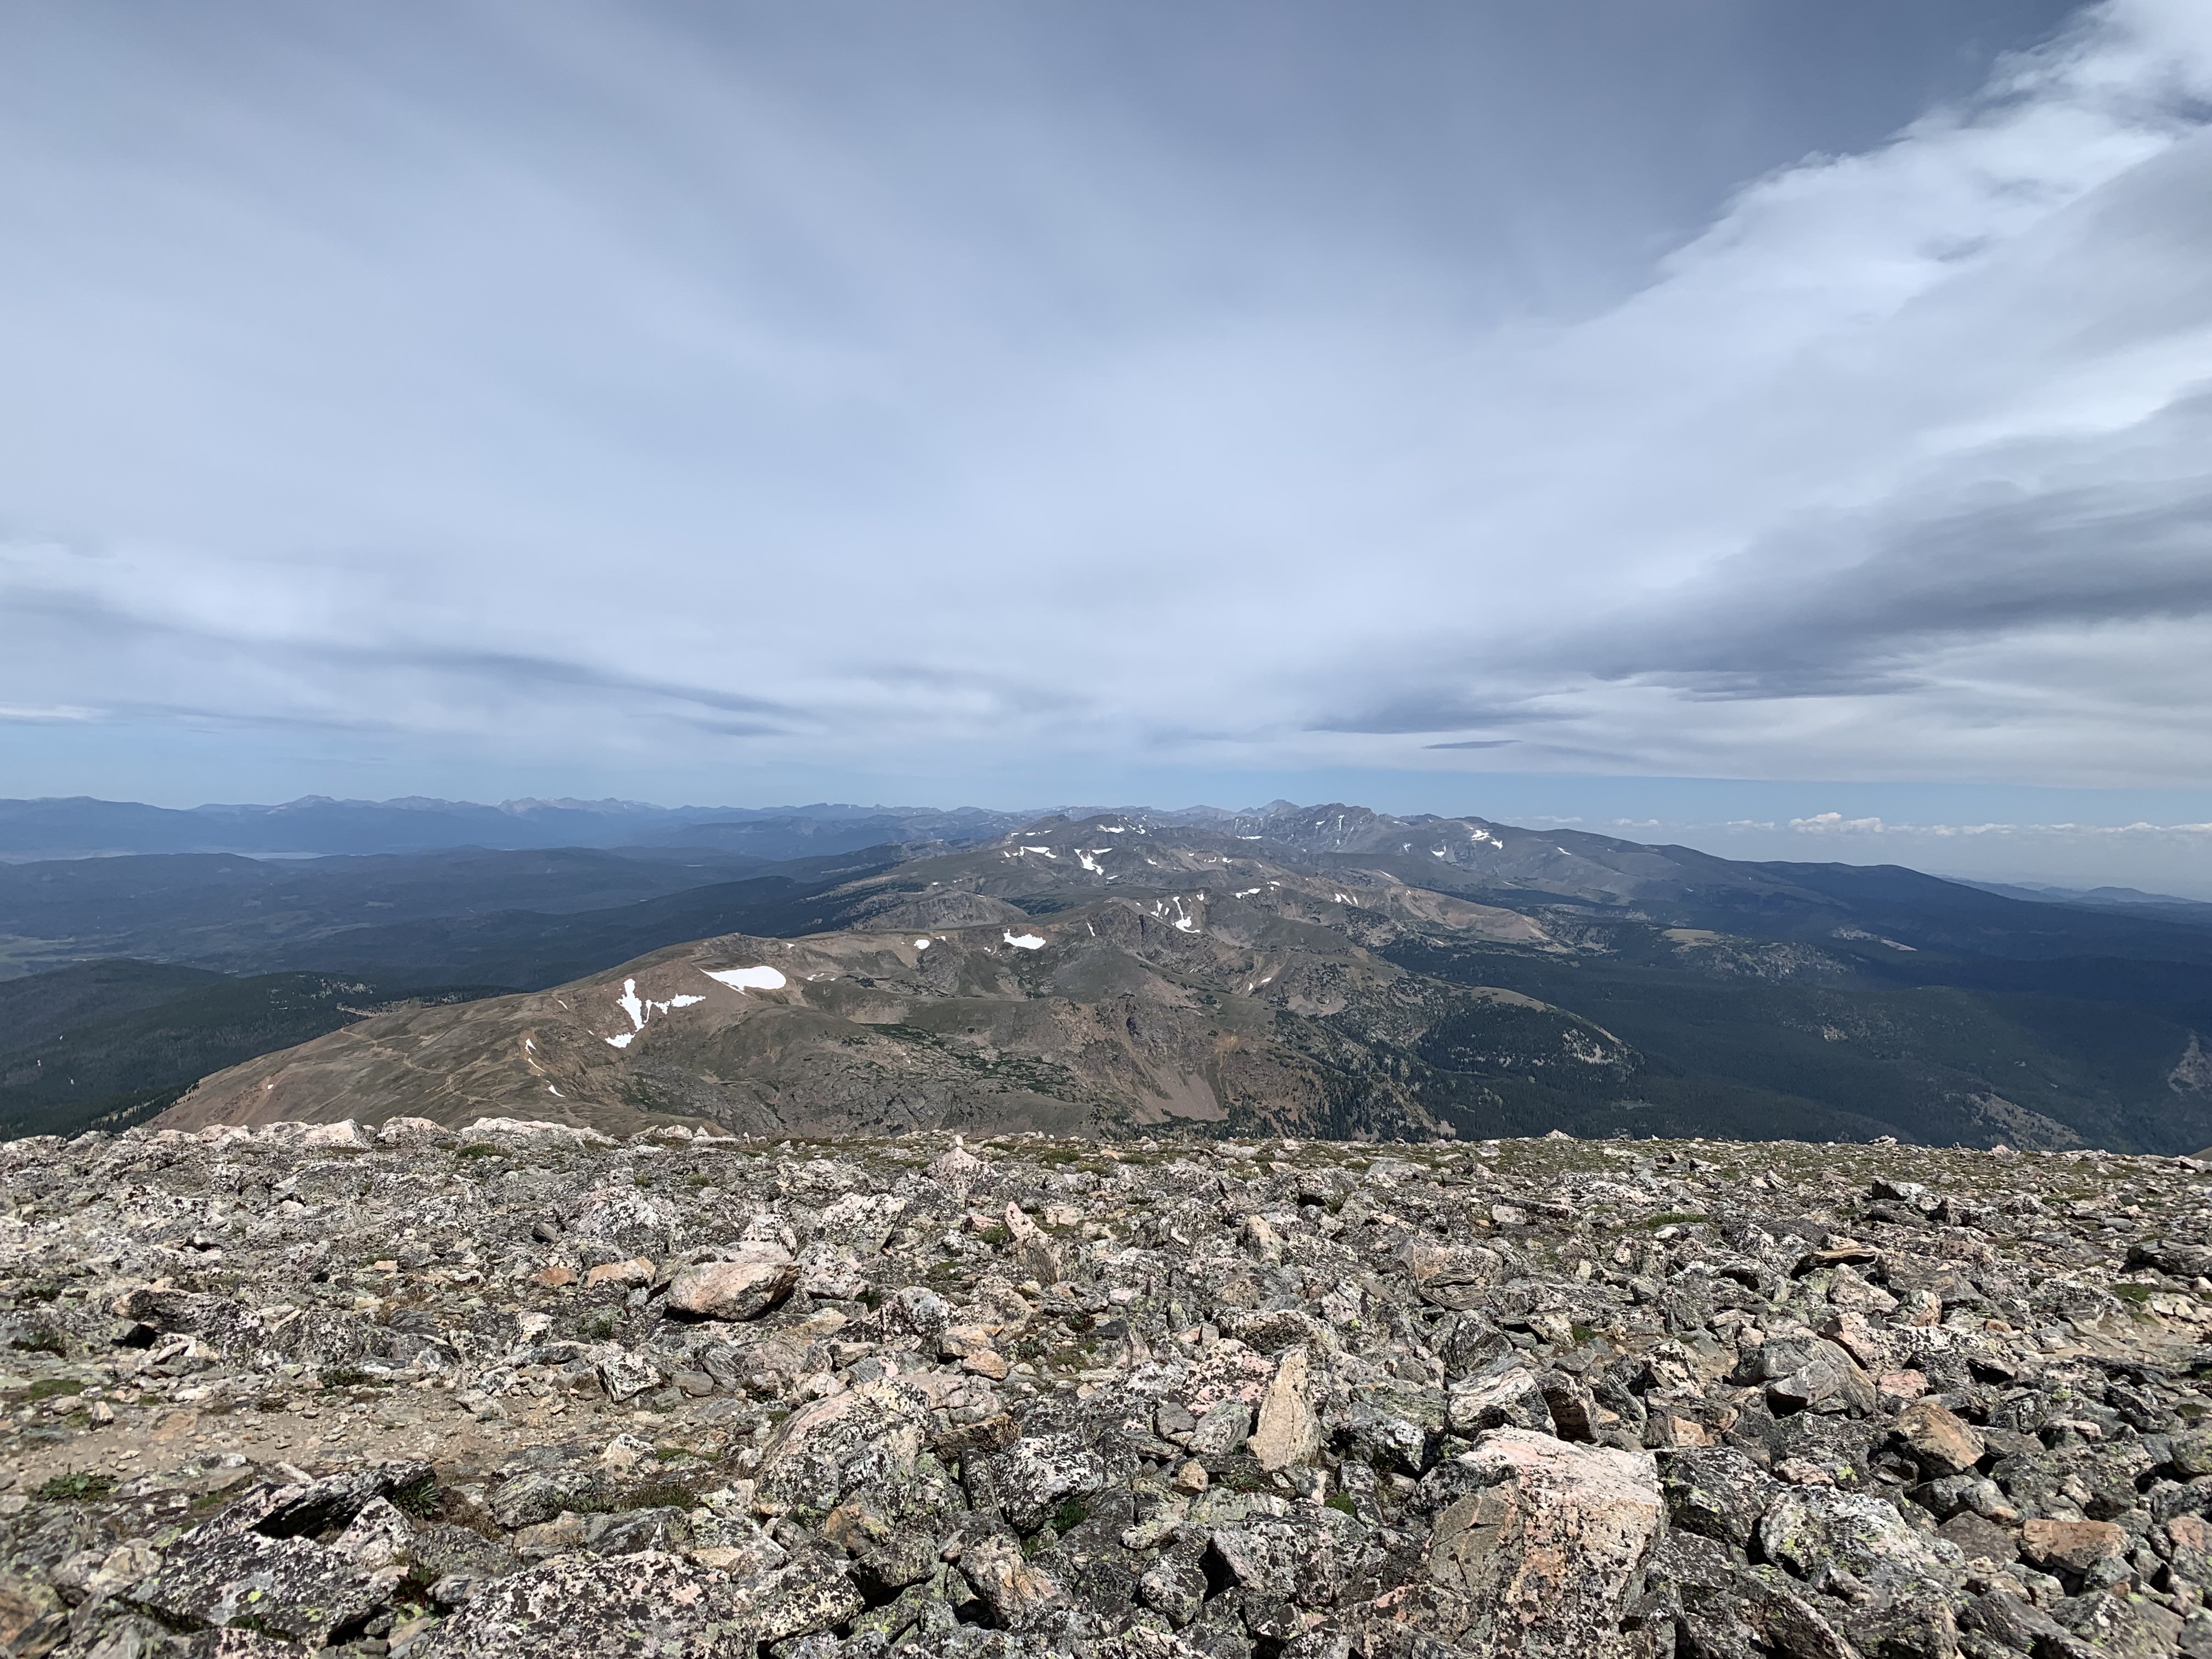
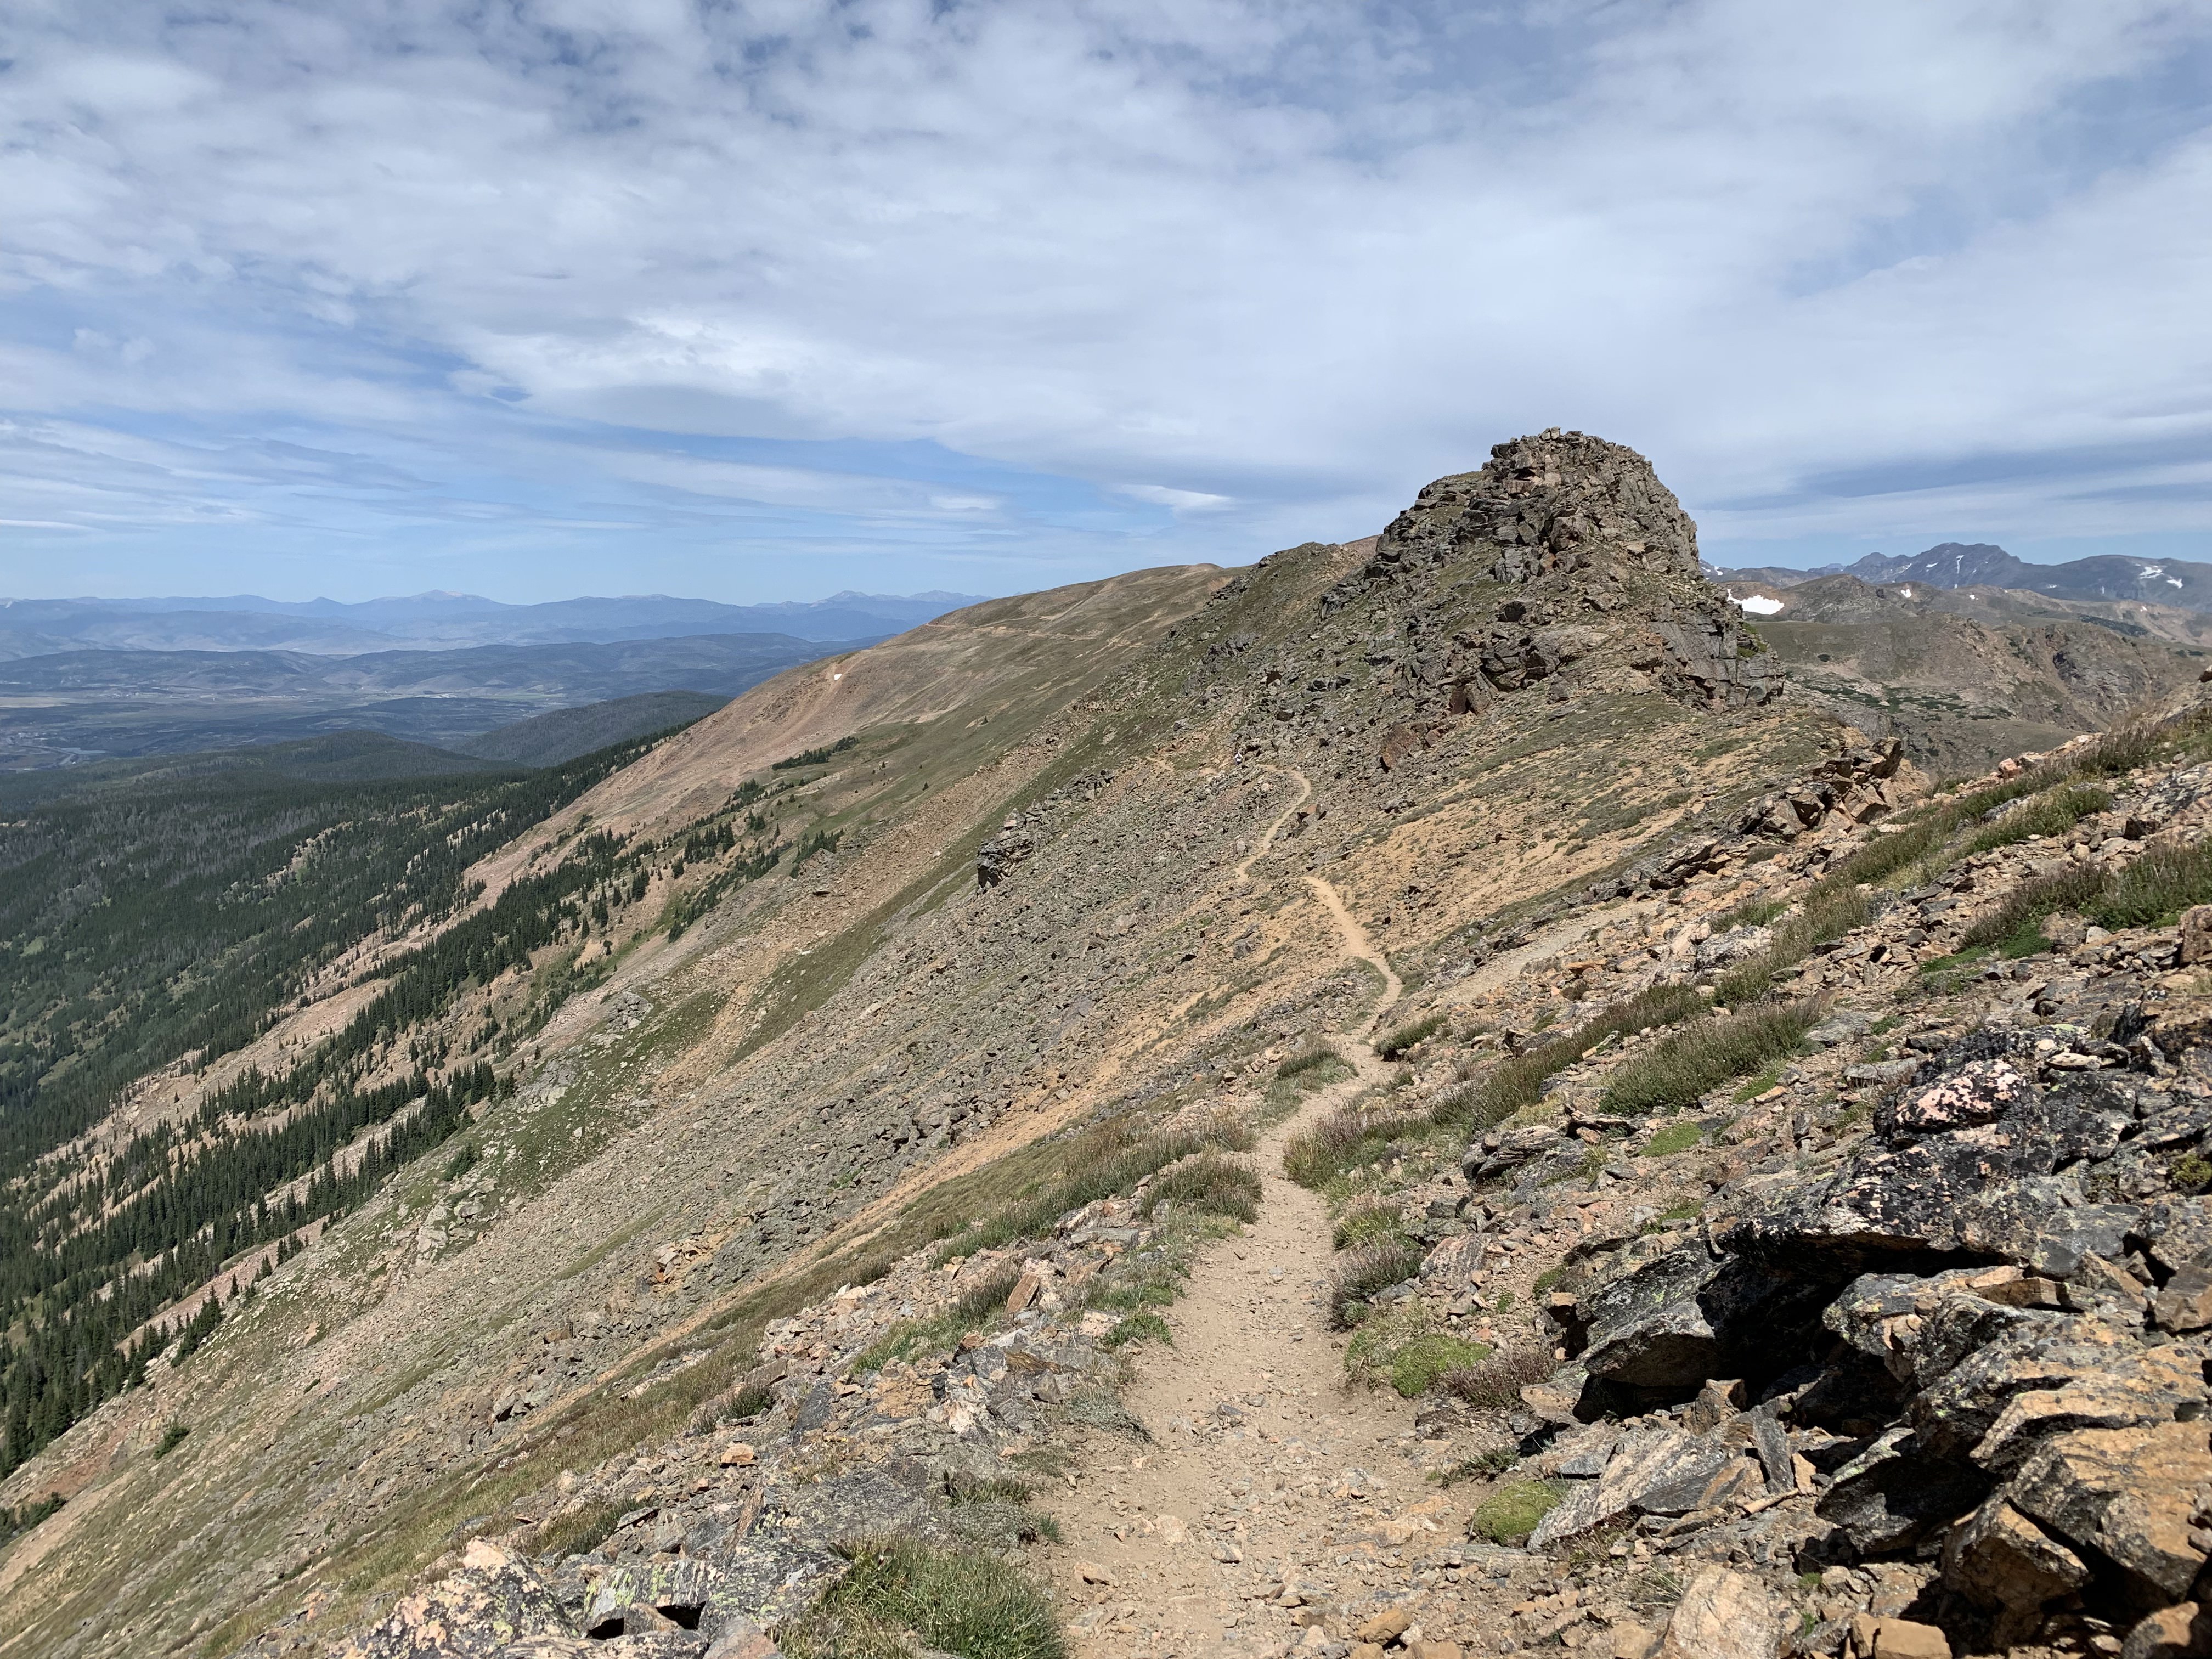
Now began what I was really looking forward to on the PT: a chance to travel directly on the divide for seemingly endless miles. This high section is rewarding and fun, with expansive views in every direction. This was certainly a rewarding way to finish up the trip in my mind, and proved to be another incredible section. It’s worth noting that you will be highly exposed with minimal bailout opportunities, so take the necessary precautions and make good decisions for yourself here. Fortunately, in general the travel is quick when you’re not rock-hopping on Mt. Neva’s south ridge. Take heed of the guide here and stay on the divide south of Mt. Neva, taking direct lines up any obstacles in your path. This would’ve been especially important to know at one particularly large rock outcropping. I spent what was probably 2 hours and certainly a waste of time trying to find a way around this obstacle, when the best and least dangerous route was directly over it’s solid rock face instead of the loose scree around its base. This particular feature really took it out of me, physically and mentally. It was one of the first times where I had found myself in a pickle on the route. My goal for the day was to make it to Heart Lake, but as afternoon storms started to loom overhead, I began to have second thoughts on my approach, and kicked myself for not taking the direct line.
Fittingly seen at Columbine Lake.
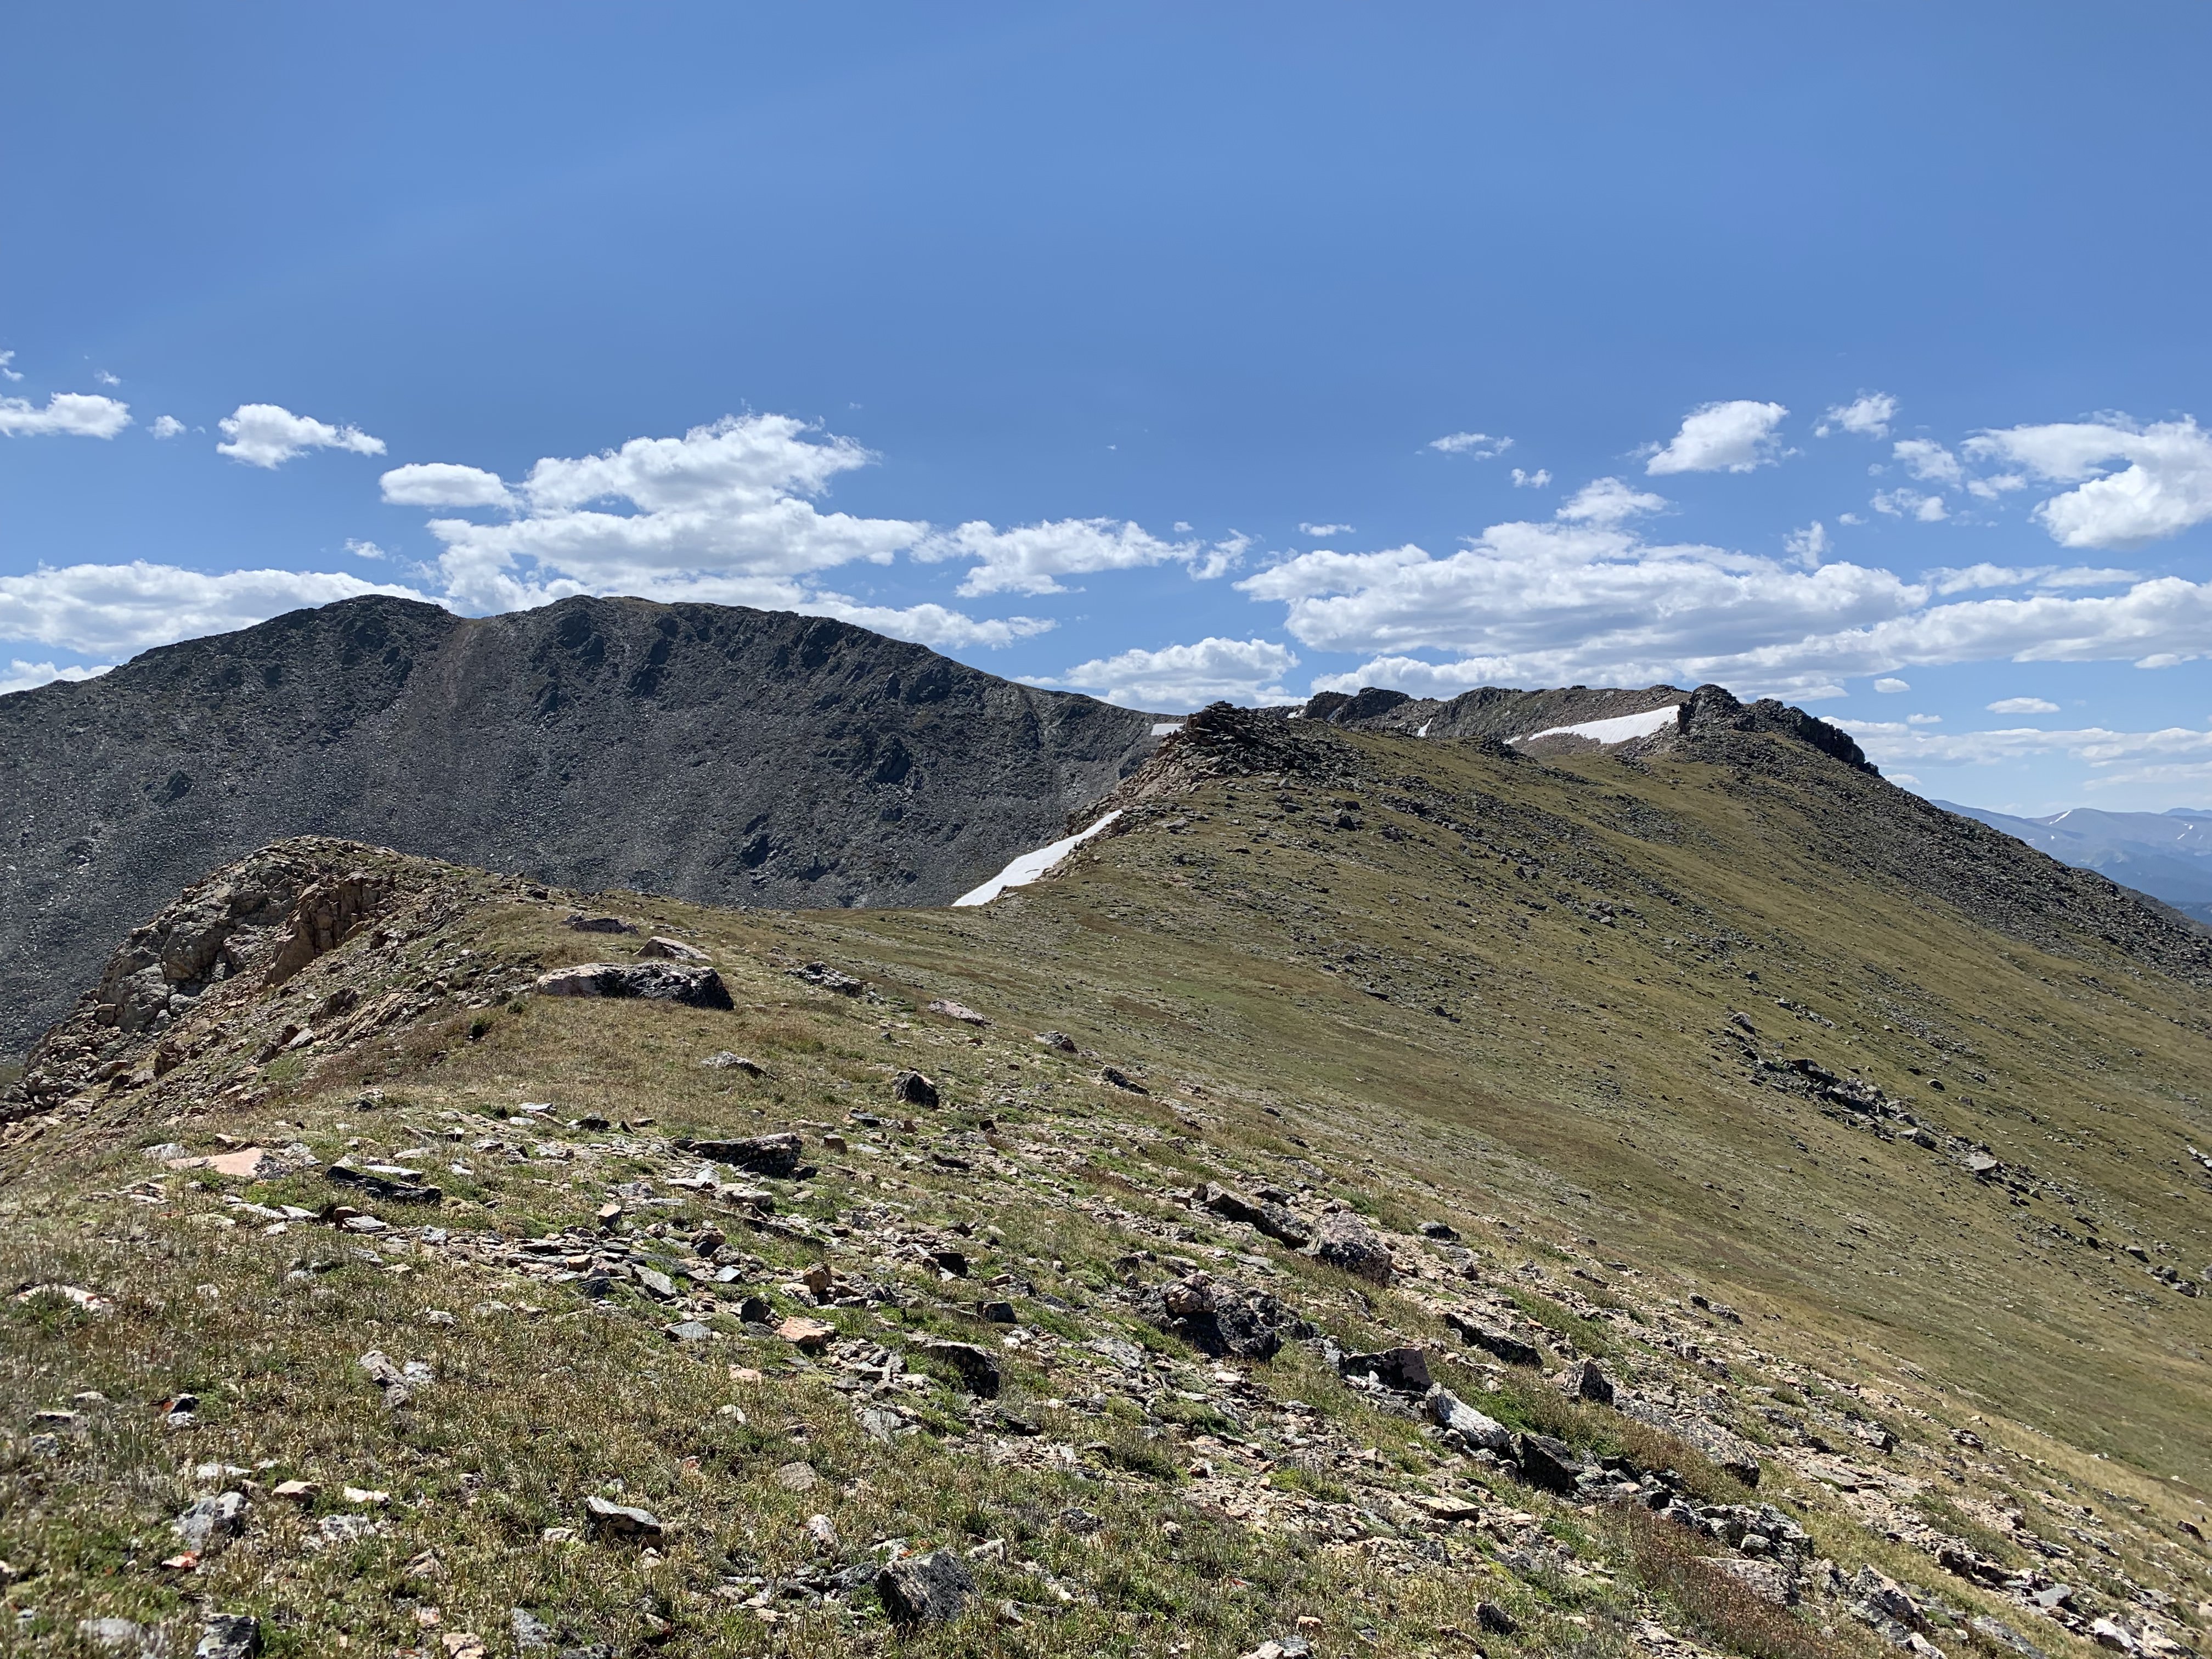
This is basically what you can expect from hiking on the Divide.
Traveling along the divide. James Peak can be seen on the left, the end is finally in sight.
It’s worth noting that at this point I had one day's worth of food left, and was staring to feel pretty exhausted. With the afternoon storms coming in providing flashbacks to day one, I made the decision to bail off the route at Rollins pass. Good service on the divide also provided insight into this decision: storms all day for the next two days in the James peak area. I gave my dad a call to get his opinion while waiting for the storm to pass at King Lake. I was frustrated by the prospect of getting off route at this point, but ultimately decided that it was a wise decision considering the forecast for the next two days and the increasingly high and exposed travel. I made my way down familiar trails to the Hessie trailhead, and planned to return to the route in the next few days.
Mileage: 16-18 miles
Vertical Gain: 4,401 ft
Vertical Loss: 6,568 ft
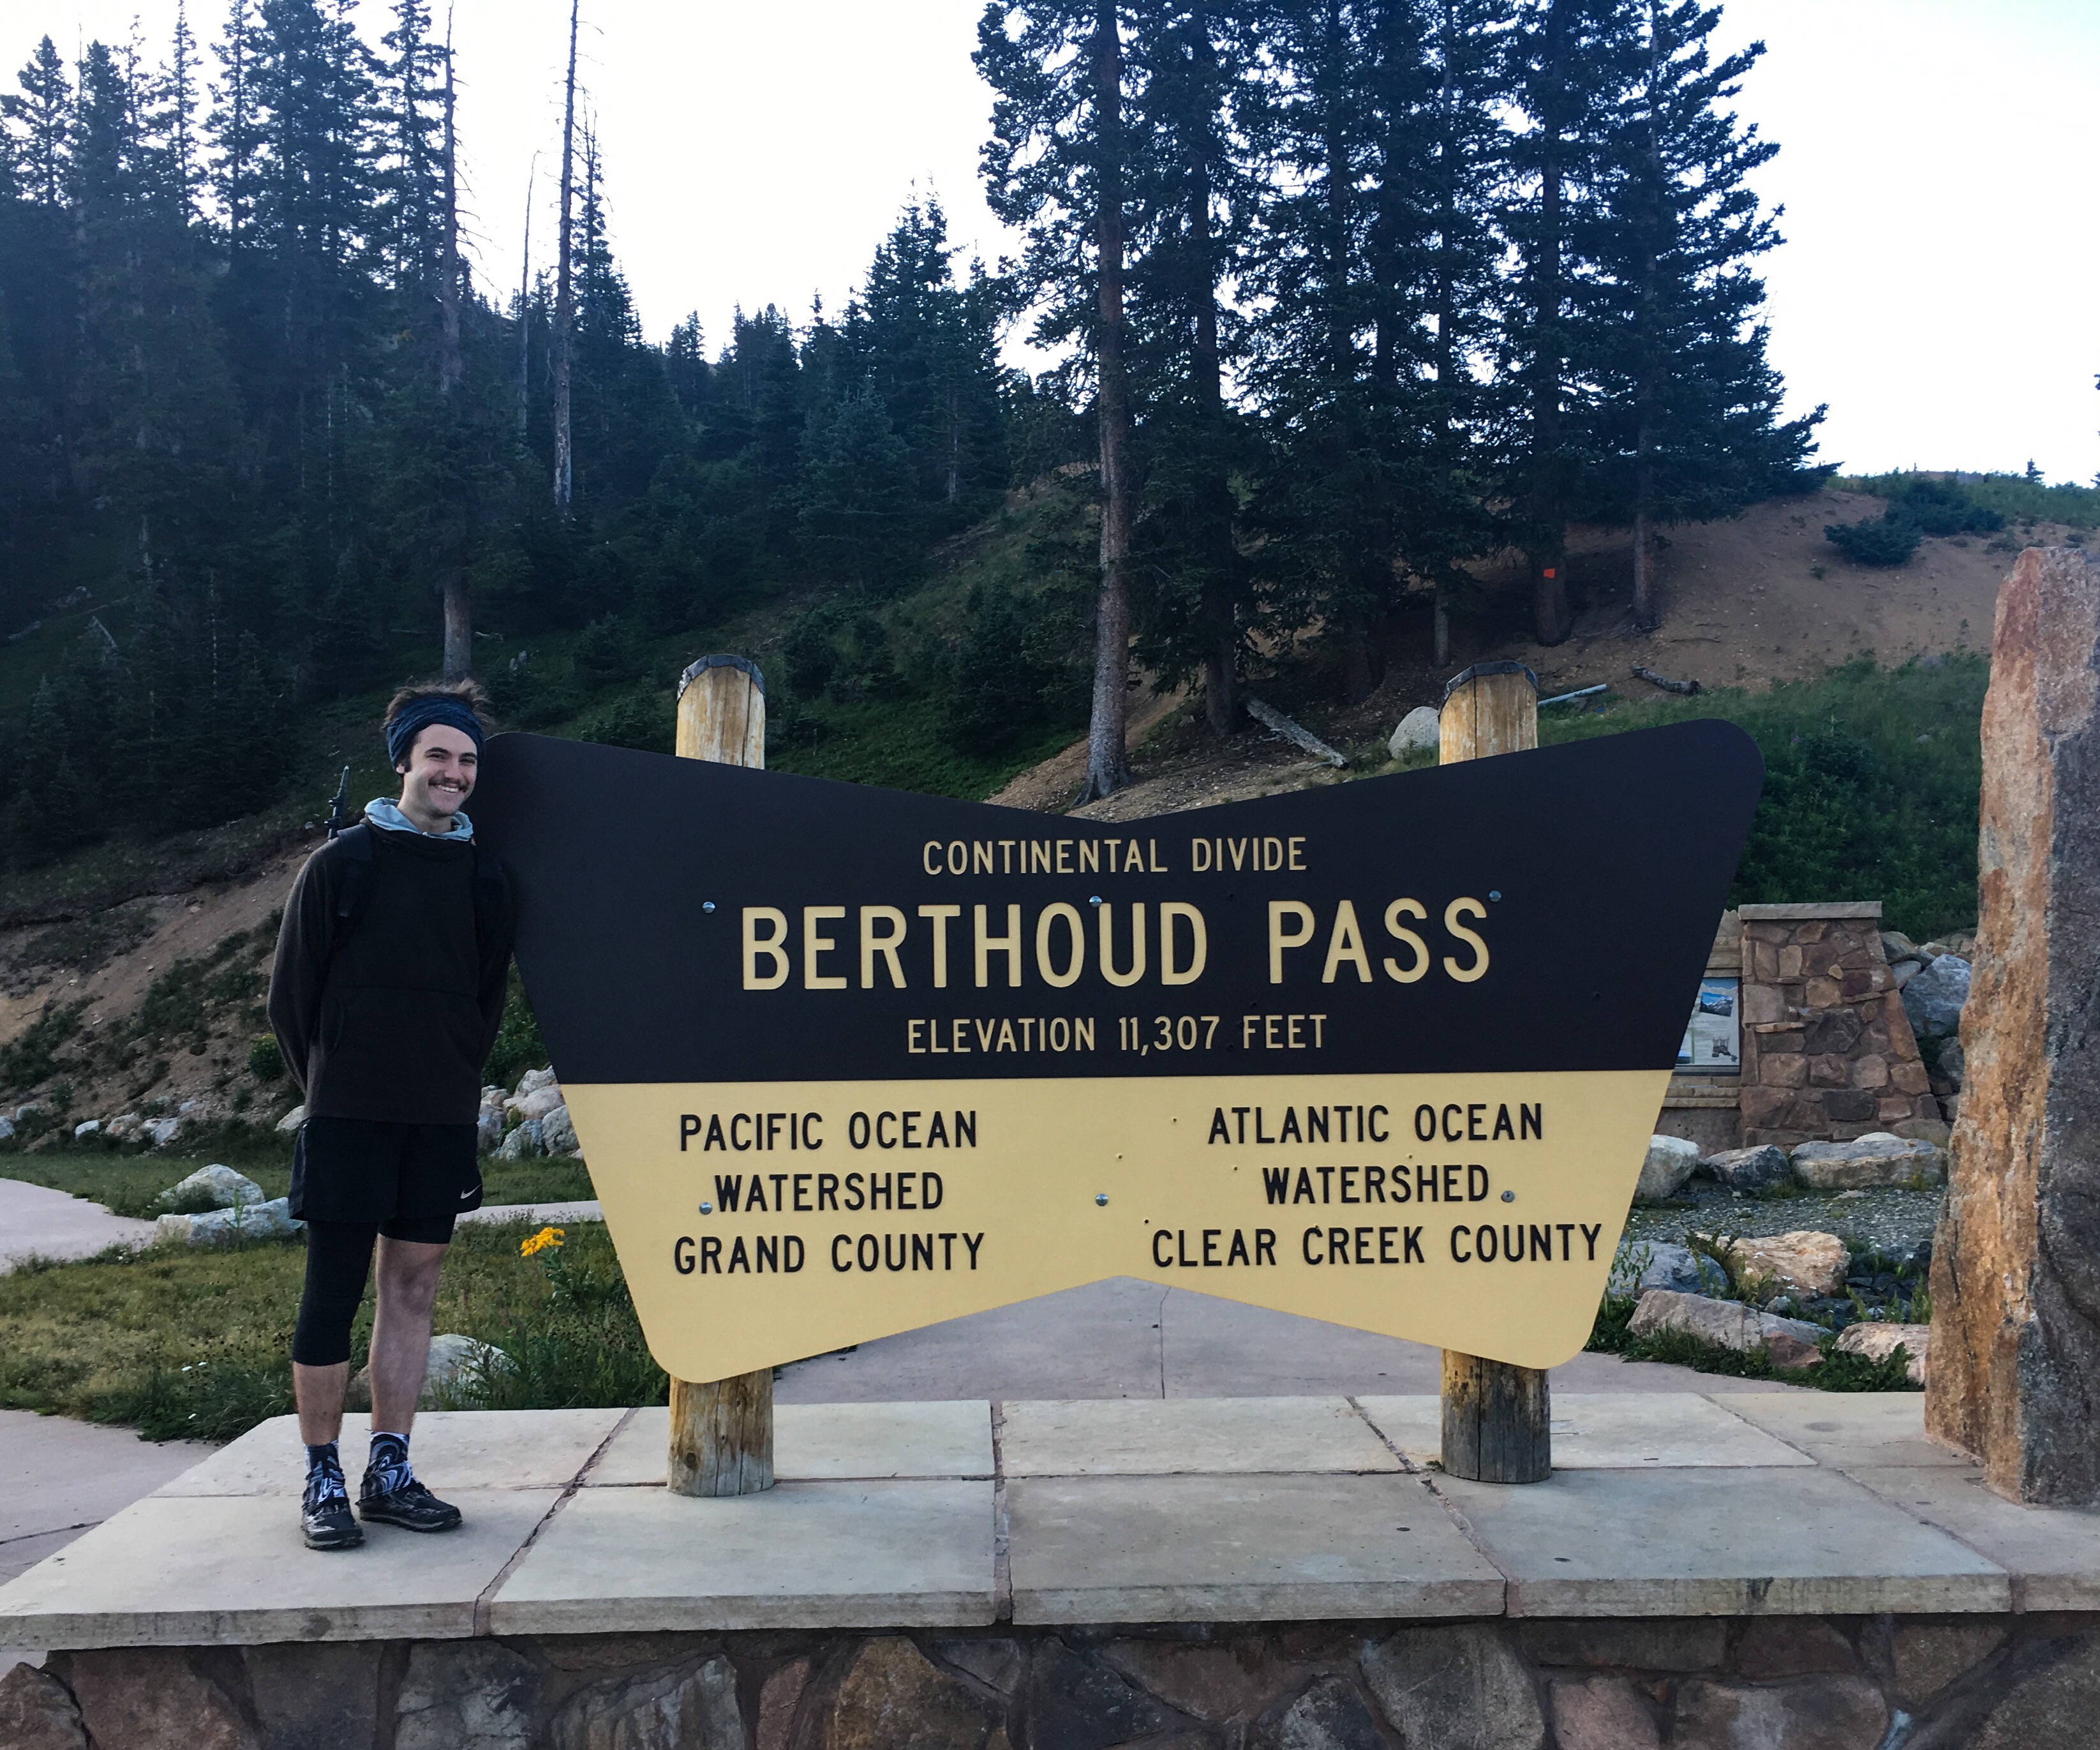
Day 5 - Berthoud Pass to Rollins Pass
Looking towards Gray's and Torrey's from the route to Flora
Back at it! I got up to Berthoud pass after two days off the route to finish things up. I was pumped and feeling great, excited about the remaining miles and interesting scrambling ahead. Inspired and eager to get after it, I quickly gained Mt. Flora on the CDT. It was a particularly windy day, with massive gusts pushing me around as I scrambled across the skyline. This was probably my second favorite section of the PT: the consistently high and challenging terrain made for interesting travel all the way to Rollins Pass. The wind made things a bit slower, with each summit serving as a welcome break (each summit had some rock cover from the wind). The most interesting part of the day was the scramble on the ridge between Mt. Bancroft and James peak. Crucial here was effective route-finding, again proving that solid rock is almost always a better option, even if it looks steeper and scarier than scree. Once on this section I found myself on a slippery slope of scree, and quickly made my way back up to a steeper ascent with more solid rock. In general, I would try to stay on the ridge proper next time, perhaps favoring the west side on my ascent to James peak. Notable is the possibility of more difficult scrambling in exchange for the better rock.

Mt. Flora Summit. Surprisingly busy.
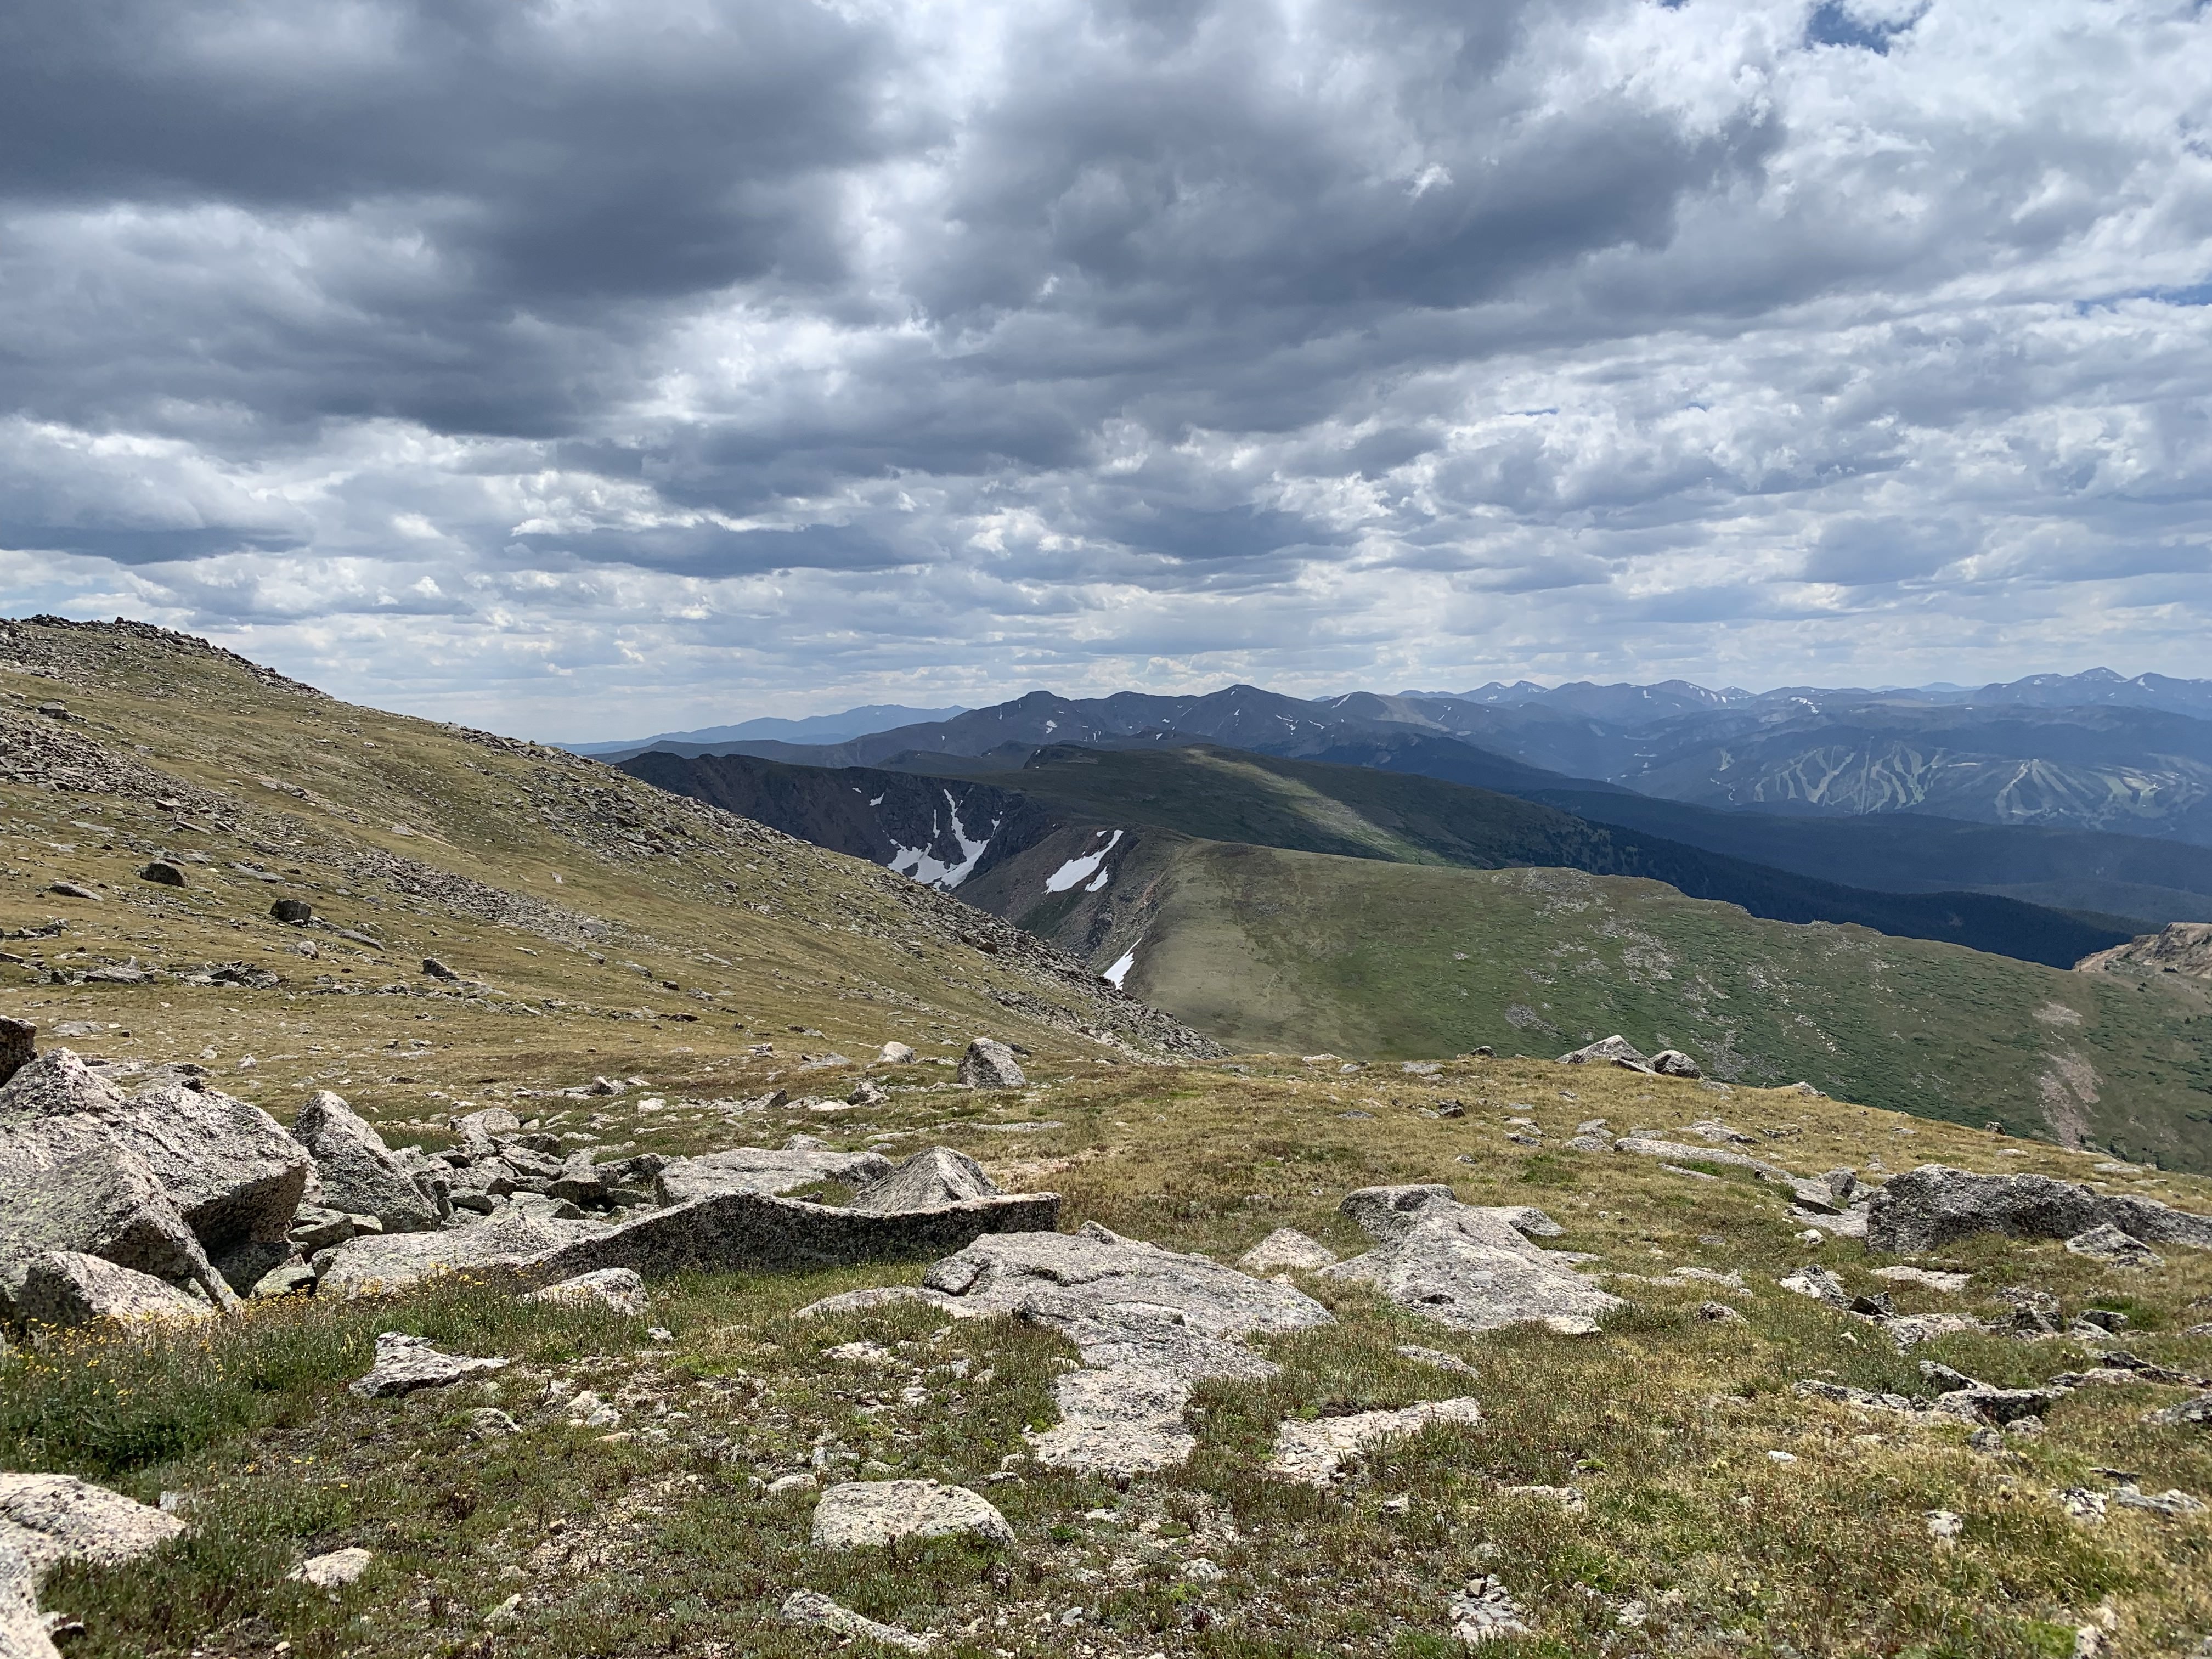
Observing the route from Flora to Eva. There is more gain/loss in the saddles than you might think.
Ridgeline on the way up to Parry, with Bancroft on the right.
There were tons of people on the summit of James peak that day, a stark contrast to the solitude I felt on the rest of the route. I quickly hopped off the peak as mean looking clouds started to roll towards the Skyline. The rest of the day provided fast and easy travel along a good trail on the divide, and gave me an opportunity to reflect on the trip as autopilot kicked in. I passed one or two CDT hikers on my way, and even ran into some backpackers who had asked me where I had come from. It was actually really reassuring to see other people out there, and it made me realize that the next time I do a trip like this I’m interested in doing it with a friend. The wind was really terrible all day, I felt quite cold for most of the journey. This is probably typical of this particular section, so take note.
Ridge over to James Peak. I took a line up the right side, I would probably recommend trying to stay on the ridge proper.
Looking at the divide from James Peak and feeling accomplished
Typical trail conditions on the CDT towards Rollins Pass
The rest of the day was really similar, but being able to see where I came from the whole way was very inspiring and humbling. I finally reached Rollins pass, completing my “Pflip-Pflop” thru-hike of the Pfiffner Traverse. It was an awe-inspiring trip, and one that I hope to repeat some time in the future (maybe northbound next time?). Growing up in the Front Range made this one really special to me, and was one of the reasons I decided to go for this particular route. After all, I think that this was absolutely the right decision. I had the opportunity to experience areas along the front range that I had never even heard of before this trip, and already can’t wait to go back and explore some more. I gained more respect for the land around me, and felt humbled by the challenging terrain and rewarded by the locations I visited. Overall, I think that Travis Briles made a statement in his PT trip report that pretty closely mirrors my feelings: “In some ways, this was the most glorified backyard camping trip imaginable”.
Mileage: 15-16miles
Vertical Gain: 5,197 ft
Vertical Loss: 4,820 ft
Next up? A few weeks later I improvised an off-trail route in Wild Basin and did the Pawnee-Buchanan loop with a friend a couple weeks after that (trip reports soon). In 2020, I'm planning a trip to the Winds, some packrafting and potentially a Colorado Trail thru-hike. I don't quite know how an all-trail route will compare to these highly engaging high-routes. Despite this, I am interested in proving myself at a long distance. I am also interested in getting down to the Grenadier range for a few days, and routing a traverse of the Sangre De Cristo range similar to Swami's.
Post-Hike Notes/Recommendations to Future Thru-Hikers
- Skurka’s guide proved to be a good investment. The level of detail at which he goes into navigation and trip planning is surely worth the cost of admission. If you’re very familiar with the Front Range, you could probably string together what the PT should look like at a high level on your own, but some of the micro-details in the guide proved to be difference makers for me. Specific examples include the descent towards Paradise Creek from Isolation Peak Pass, and the descent to Columbine lake.
- I would’ve spent an extra night in Rocky the next time. The Haynach Lakes basin would make for an epic campsite, especially at sundown. It would also provide an opportunity to tackle Bighorn flats in the morning when the chance of storms is lower, and also potentially break up a day with four consecutive off-trail passes into two days, which may be beneficial for some.
- Please avoid taking the all-trail bypass around Paiute Pass and the Northeast Gully if you can. It is worth putting in the time to learn the terrain to gain the confidence and skills required for these two features. The all-trail bypass is surely easier, but breaks the character of the route completely.
- On a route like this, vertical change is far more important on a day to day basis than mileage. I have no idea the number of miles that I hiked on each day, but I can tell you that I felt much more accomplished doing shorter days with more off-trail travel and vertical change than on the days where I was on-trail more of the time.
- Follow direct, solid lines when possible. Even though they may be more intimidating initially, they actually proved to be much safer and easier in my experience on this route.
- If you live in the Denver-metro area and have even a remote interest in high-routes: why have you not done this yet? It’s a classic: everything I could’ve hoped for out of an adventure in the Front Range. I encourage people to go for it, and to reach out if you have any questions or would like to discuss the route or hike a section together.
Gear that Worked Great on this Hike
- Katabatic Flex 30 - the best quilt ever. I prefer the flex style quilt because it gives you options on a warmer night, but can still keep you warm when temps drop. Cannot recommend this product any more to anyone.
- Patagonia Tropic Comfort 2 Sun Hoody - the sun hoody was new for me this trip, and I think it’s a keeper for routes like this. Sun protection was essential on this hike, and I never felt overheated in the tropic comfort 2.
- Melanzana Micro Grid Hoody - I went back and forth on taking a fleece without a hood and a fleece with a hood on this trip. At the end of the day, I’m happy to have taken the one with a hood. It was essential in keeping my ears warm while hiking and at night, even when I wore my Buff.
Gear that Didn’t Work on this Hike
- Altra King MT 1 - a very stiff, sticky shoe that provided a lot of confidence when scrambling, but ultimately fell short when it came to comfort. The soles of the shoes may just be too minimal to be used for longer daily miles on high routes. I had multiple blisters due to the poor fitting upper as well. I don’t recommend these as a good shoe for high routes if you plan on hiking 15 or more miles per day. I have recently transitioned to the Scarpa Spin Ultra, and have experienced better performance overall both on and off trail.
- Sawyer Micro Squeeze - I probably didn’t even need this, pristine water sources abound on the Pffifner Traverse. Regardless, it only really worked well on the first day before filtering much more slowly. Evidently, this is a known problem with the squeeze.
- Shorts/Tights setup - my tights ripped, and actually felt quite restrictive. However, I was happy to have them for both sun and vegetation protection. I think next time I would opt for a lightweight soft-shell hiking pant as opposed to shorts and tights.
- Frogg Toggs Rain Jacket - I think I just need a bigger size: the sleeves rolled up on me while I was wearing this jacket for wind protection on the divide, leaving my wrists and hands exposed and cold. I might also consider getting a wind shirt and using both that and the Frogg Toggs, because at the end of the day the jacket is actually quite effective in the rain. I would also bring gloves: perhaps sun gloves would be a good option on the PT.